
Introduction to Snowball Cake
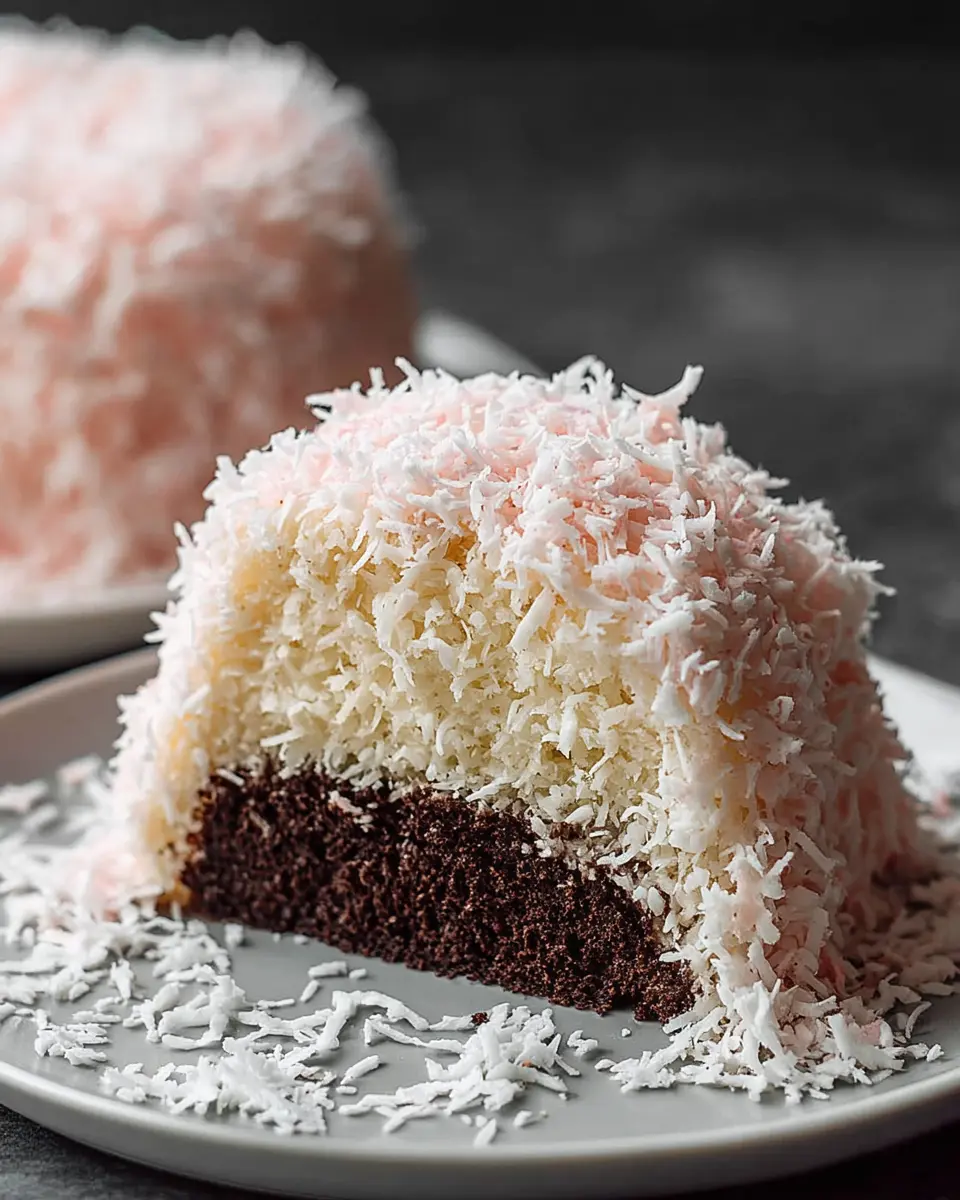
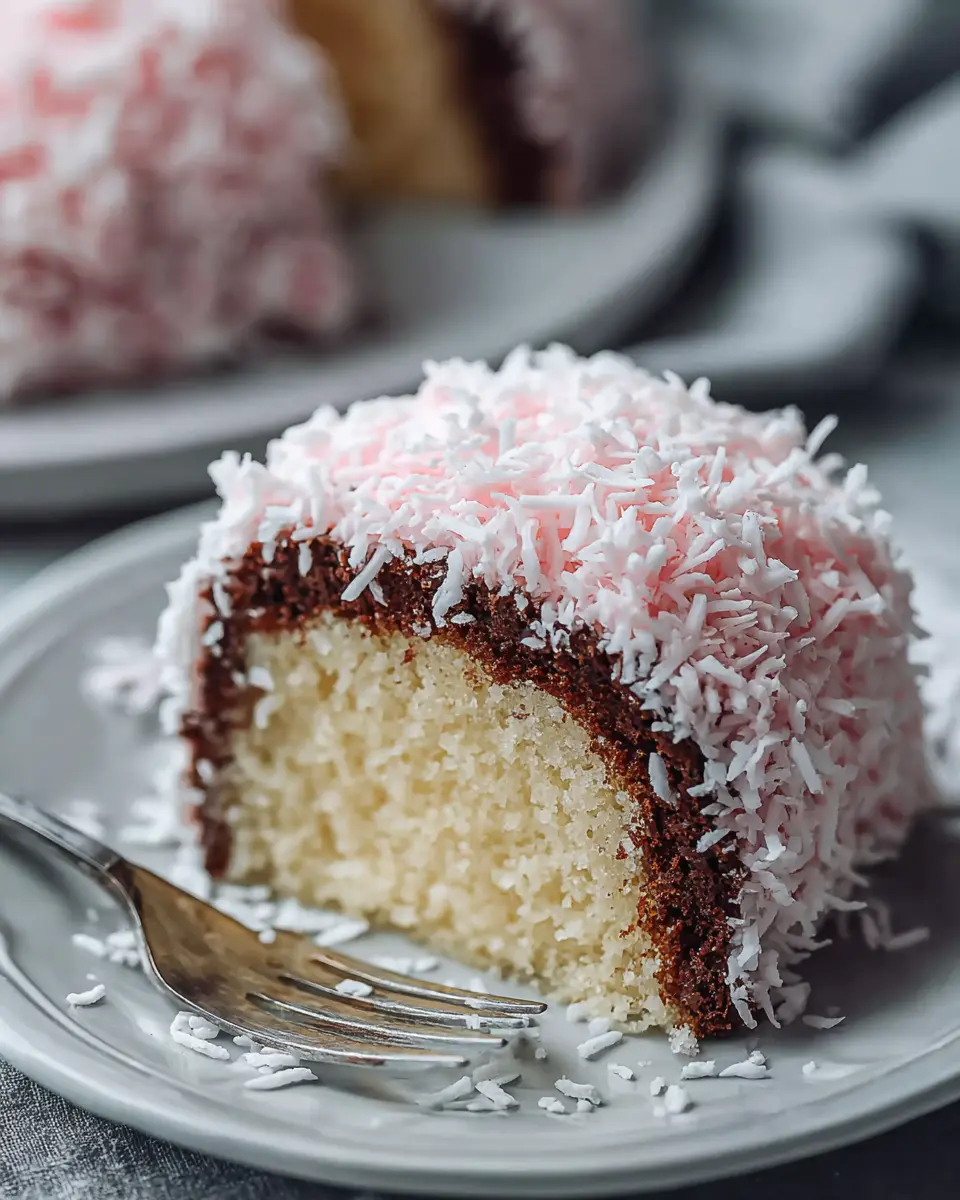
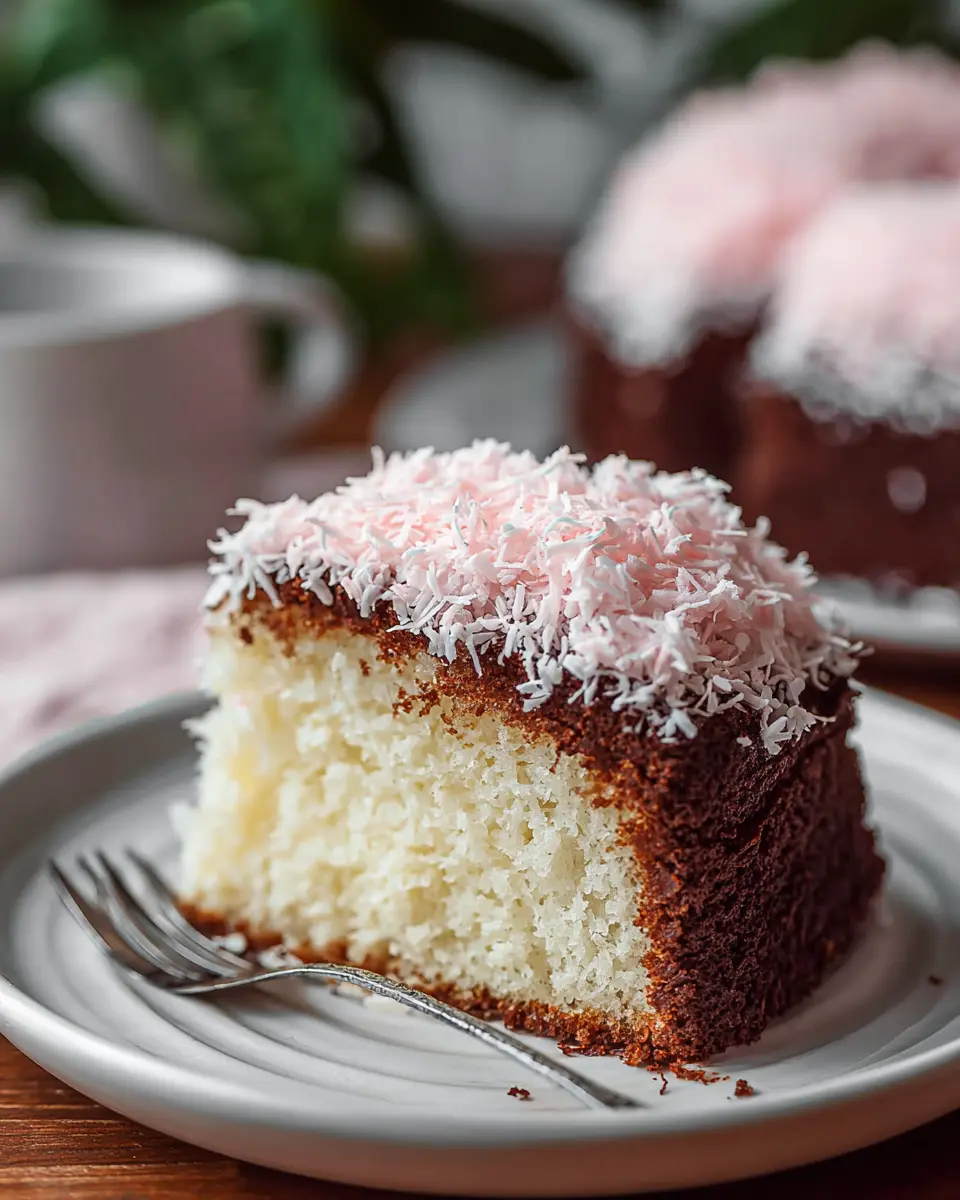
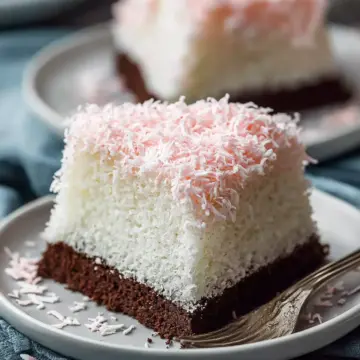
When you sink your fork into a slice of snowball cake, you're experiencing a delightful blend of flavors and textures that make this dessert a beloved classic. So, what exactly is a snowball cake? At its core, it's a luscious chocolate cake topped with a creamy frosting made from marshmallow fluff and covered in sweetened shredded coconut. This cake's aesthetic—often resembling a snow-covered mound—is just as appealing as its taste, making it a favorite centerpiece for celebrations.
Why do people love this cake so much? Well, the combination of rich chocolate and fluffy frosting creates a taste explosion that is hard to resist, while the coconut adds a fun, chewy texture that elevates every bite. Plus, it’s incredibly versatile. You can add food coloring to the coconut for a pop of color, making it perfect for birthdays, holidays, or any occasion that calls for a joyful treat.
Curious to make your own? Dive into our snowball cake recipe and discover the magic of creating this delightful dessert right at home. Whether you're hosting a gathering or just treating yourself, a snowball cake is sure to impress and satisfy. For more cake inspiration, check out this delightful baking guide.
Ingredients for Snowball Cake
When you're ready to bake this delightful Snowball Cake, having the right ingredients is essential to create that perfect texture and flavor. Here’s what you’ll need:
Essential ingredients for the cake
- 1 ½ cup all-purpose flour: The foundation that gives your cake structure and stability.
- ½ cup unsweetened cocoa powder: This not only adds richness but also that signature chocolate flavor.
- ½ teaspoon kosher salt: A little pinch enhances all the other flavors beautifully.
- 1 teaspoon baking soda & ½ teaspoon baking powder: These leavening agents help the cake rise to fluffy perfection.
- ½ cup brewed hot coffee: A secret weapon that elevates the chocolate taste!
- ½ cup whole milk: Ensures a moist texture throughout.
- ½ cup unsalted butter: Contributes to richness and adds a lovely buttery flavor.
- 1 ½ cups granulated sugar: Sweetens the cake while keeping it tender.
- 2 large eggs: These bring moisture and structure to your cake.
Topping ingredients for snowball effect
To achieve that iconic fluffy top, gather these goodies:
- 7-ounce jar Marshmallow Fluff: This creates the fluffy texture that makes the cake so special.
- ½ cup unsalted butter: A creamy base for your topping.
- 1 teaspoon pure vanilla extract: Adds a delightful aroma and taste.
- 2 cups powdered sugar: For that sweetness and a smooth consistency.
- 3 cups shredded sweetened coconut: The quintessential ingredient for that snowball look.
- 2–4 drops pink food coloring: A fun touch to give your cake a pop of color!
With these ingredients, you're just a few steps away from creating a snowy delight that will impress anyone who lays eyes on it! For more flavor inspiration, check out this coconut dessert or explore variations of the classic chocolate cake. Happy baking!
Step-by-Step Preparation of Snowball Cake
Baking a Snowball Cake is like a dance between flavors and textures, culminating in a treat that’s sure to impress. Let’s walk through this delicious journey, step by step.
Preheat the oven and prepare the pan
First things first, preheat your oven to 350°F (175°C). This ensures that your cake bakes evenly from the moment you put it in. While the oven heats up, grab a 13x9 inch baking dish. Spray it generously with non-stick baking spray, or consider a homemade cake release for easy removal later. Set this aside and get ready to mix some magic!
Combine and mix dry ingredients
In a large mixing bowl, combine 1 ½ cups of all-purpose flour, ½ cup of unsweetened cocoa powder, ½ teaspoon of kosher salt, 1 teaspoon of baking soda, and ½ teaspoon of baking powder. Whisk these together to make sure they are evenly distributed, ensuring a smooth batter. The key to a fluffy cake is a well-blended dry mix!
Prepare the coffee and milk mixture
Now, let's add some depth to our flavor. In a measuring cup, combine ½ cup of brewed hot coffee with ½ cup of whole milk. This mixture not only moistens the cake but also enhances the chocolate flavor beautifully. Set this aside and let it cool slightly.
Cream the butter and sugar
In the bowl of your electric mixer fitted with a whisk attachment, add ½ cup of softened unsalted butter and 1 ½ cups of granulated sugar. Beat this together on medium speed for 5 minutes. You'll want it to become light and fluffy, scraping down the bowl's sides to incorporate everything evenly.
Add eggs and alternate with dry ingredients
Next, add 2 large eggs one at a time, mixing well after each addition. Then, it's time to alternate adding the dry ingredients and the coffee mixture into the butter-sugar blend, starting and ending with the dry ingredients. Do this in three rounds—this technique keeps your batter airy.
Pour batter into the pan and bake
Once well-combined, pour your batter into the prepared pan, smoothing it out with a spatula. Pop it in the oven and bake for 33-38 minutes. Keep an eye on it—stick a toothpick in the center, and if it comes out clean, your cake is ready. Let it cool completely before frosting.
Prepare the frosting while the cake cools
While your cake cools, it's time for the frosting! Beat together 7 ounces of Marshmallow Fluff and ½ cup of softened butter for 3-4 minutes. Then mix in 1 teaspoon of pure vanilla extract and 2 cups of powdered sugar, beating until smooth and creamy.
Color and prepare coconut topping
To create that iconic snowball look, combine 3 cups of shredded sweetened coconut with 2-4 drops of pink food coloring in a bowl. Mix thoroughly until all the coconut is evenly colored. Adjust the color to your preference for that festive touch.
Frost the cake and add coconut
Spread a generous layer of your fluffy frosting over the cooled cake using an offset spatula. Immediately sprinkle your vibrant coconut on top for that delicious texture and breathtaking presentation. Slice and serve this beautiful creation!
Baking your own Snowball Cake is not just about following a recipe—it's about creating something special to share. Enjoy every bite and the lovely moments it brings to your table! For more delightful recipes, check out sources like Serious Eats or Bon Appétit for inspiration.
Variations on Snowball Cake
Chocolate Snowball Cake
If you’re a chocolate lover, this variation on the classic snowball cake recipe is a must-try! By simply adding unsweetened cocoa powder to the cake batter, this version delivers a rich, decadent flavor that pairs beautifully with the fluffy frosting. Drizzle with a chocolate glaze for an extra touch of indulgence!
Coconut-Lime Snowball Cake
For a refreshing twist, consider a coconut-lime snowball cake. To make this version, swap out some of the milk with coconut milk and add the zest of a lime to the frosting. This vibrant combination enhances the cake's tropical feel and will transport your taste buds straight to a beach paradise. Serve it chilled for a delightful treat on a warm day!
Discover more delicious twists and tips on how to personalize your snowball cake experience!
Baking Notes for Snowball Cake
Tips for Perfect Cake Texture
- Use Room Temperature Ingredients: Ensure your butter and eggs are at room temperature. This helps create a smooth batter and contributes to a tender cake.
- Don’t Overmix: Once you combine the wet and dry ingredients, mix until just combined. Overmixing can lead to a dense texture.
Common Mistakes to Avoid
- Skipping the Cooling Step: Make sure your cake is completely cool before frosting. This prevents the frosting from melting and losing its fluffy texture.
- Incorrect Oven Temperature: Always preheat your oven and check it with an oven thermometer. An incorrect temperature can affect baking time and texture.
For more cake tips, check out this article on perfecting your baking skills!
Serving Suggestions for Snowball Cake
Ideal Pairings with Beverages
Complement your snowball cake recipe with a delightful cup of coffee or a refreshing iced tea. The rich chocolate flavor pairs beautifully with coffee's warmth, while iced tea adds a crisp balance. For a festive twist, consider serving it with a homemade fruit punch or a fizzy lemonade to brighten up the sweetness.
Presentation Tips for Gatherings
Make your snowball cake a showstopper by presenting it on a decorative cake stand, dusted lightly with powdered sugar for a snowy effect. Scatter some fresh berries around the base for a pop of color. If you’re feeling creative, add a few edible flowers on top to impress your guests—not only do they look stunning, but they also elevate the flavor profile. For more inspiration on elegant dessert displays, check out this guide to cake presentation from Better Homes & Gardens.
Time Breakdown for Snowball Cake
Preparation Time
Start your sweet adventure with 20 minutes of prep. This includes gathering ingredients, measuring, and mixing your cake batter together. It's the perfect time to put on your favorite playlist and get excited about your delicious creation!
Baking Time
The actual baking? Just 33 to 38 minutes. While patience isn’t always easy, the aroma of the chocolate cake will remind you that it’s worth the wait.
Cooling and Decorating Time
Once out of the oven, allow the cake to cool completely, which takes about 1 hour. Then, whip up your fluffy frosting and decorate with coconut—this can take another 30 minutes. In total, set aside roughly 1.5 to 2 hours for cooling and decorating.
Enjoy this snowball cake recipe with friends or family; it's sure to be a crowd-pleaser! For more dessert inspirations, check out Baking the World or Sweet Treats for delightful ideas that make every occasion special.
Nutritional Facts for Snowball Cake
Calories per slice
Indulging in a slice of this delightful snowball cake will set you back about 350 calories. It’s a treat that perfectly balances indulgence with sweetness, making it an enjoyable dessert for any celebration.
Key nutritional components
Each slice is packed with:
- Sugar: 32g – Sweet and satisfying!
- Fat: 18g – Including 10g of saturated fat.
- Protein: 5g – Offering a bit of nourishment amidst the sweetness.
- Fiber: 2g – Helping you feel a tad satisfied.
While it's certainly a dessert, snowball cake brings a festive charm to your dessert table, making it a worthwhile indulgence. Enjoy in moderation! For more detailed insights, you might want to check out Healthy Dessert Choices and Understanding Calories.
FAQs about Snowball Cake
Can I make this cake ahead of time?
Absolutely! In fact, making your snowball cake recipe a day in advance can enhance its flavors. Simply bake the cake, let it cool completely, and then store it in the refrigerator. When you're ready to serve, frost it with the delicious marshmallow topping.
How do I store leftovers properly?
If you have some delightful leftovers, store them in an airtight container at room temperature for up to three days. For longer storage, consider refrigerating the cake, which may keep it fresh for an additional day or two. Just ensure each slice is well covered to maintain moisture and flavor.
Can this recipe be modified for dietary restrictions?
Absolutely! You can easily swap out ingredients to cater to various dietary needs. For example, use a gluten-free flour blend instead of all-purpose flour for a gluten-free version. You could also substitute dairy-free butter and milk to create a lactose-free dessert. Be creative, and enjoy the process of personalizing your snowball cake!
Conclusion on Snowball Cake
Making this delightful snowball cake recipe at home is an enjoyable adventure. With its rich chocolate flavor and fluffy coconut topping, it’s perfect for gatherings or a cozy night in. Plus, the smile on your friends' and family’s faces when they take a bite? Priceless! Give it a try!
Why You Should Try Making This Cake at Home
Creating a snowball cake from scratch comes with several rewarding benefits:
- Satisfaction: There’s immense joy in baking something delicious from scratch. You control the ingredients, ensuring quality and freshness.
- Customizable: Feel free to adjust the sweetness or add personal touches—like sprinkles or different food coloring shades.
- Social Activity: This is a great recipe to gather friends or family around the kitchen, making it a fun social event.
Think about the last time you shared a homemade treat—there’s something about it that brings people together. For more inspiration on desserts, check out Allrecipes or Food Network for additional ideas that’ll keep your baking game strong!
Snowball Cake Recipe
Equipment
- oven
- 13×9 baking dish
- mixing bowl
- Electric mixer
- Measuring Cup
- Offset spatula
Ingredients
Cake Ingredients
- 1.5 cups all-purpose flour
- 0.5 cups unsweetened cocoa powder
- 0.5 teaspoons kosher salt
- 1 teaspoon baking soda
- 0.5 teaspoons baking powder
- 0.5 cups brewed hot coffee
- 0.5 cups whole milk
- 0.5 cups unsalted butter, softened
- 1.5 cups granulated sugar
- 2 large eggs
Topping Ingredients
- 7 ounces Marshmallow Fluff
- 0.5 cups unsalted butter, softened
- 1 teaspoon pure vanilla extract
- 2 cups powdered sugar
- 3 cups shredded sweetened coconut
- 2-4 drops pink food coloring
Instructions
Baking Instructions
- Preheat the oven to 350 degrees F. Spray a 13×9 baking dish with baking spray or use homemade cake release. Set aside.
- In a bowl, combine flour, cocoa powder, salt, baking soda, and baking powder. Set aside.
- In a measuring cup, combine hot coffee with the milk. Set aside.
- In a mixing bowl of an electric mixer, fitted with a whisk attachment, add butter and sugar. Beat for 5 minutes.
- Add in eggs, one at a time. Slowly add the dry ingredients, alternating with the coffee mixture.
- Pour cake batter into the prepared pan. Bake for about 33-38 minutes. Cool completely before frosting.
- For the frosting, beat together the Marshmallow Fluff with softened butter for 3-4 minutes until combined.
- Add in vanilla extract and powdered sugar. Beat until smooth and creamy.
- In a bowl, combine coconut with pink food coloring, mixing until color saturates the coconut.
- Spread frosting over cooled cake and sprinkle with the colored coconut. Slice and serve.
Leave a Reply