
Introduction to Sugar Cookie Icing
Sugar cookie icing is a fabulous way to elevate your homemade cookies from good to extraordinary. Whether you’re baking for a holiday, a birthday, or simply to satisfy your sweet tooth, this simple icing can turn your creations into delightful works of art. The ability to customize colors and designs allows your creativity to shine, making every batch uniquely yours.
One of the biggest benefits of using sugar cookie icing is its versatility. With just a few pantry staples—powdered sugar, corn syrup, vanilla extract, and milk—you can whip up a smooth, glossy icing that hardens beautifully. Not to mention, the finished product not only looks amazing but also enhances the flavor of your cookies!
Imagine serving delicious cookies adorned with intricate designs that captivate your guests—it's sure to impress! Not to mention, the perfect sugar cookie icing can make the decorating process fun and relaxed, even if you’re a beginner. For tips and techniques on how to master those designs, check out resources like The Spruce Eats for additional guidance.
Ready to dive in? Let’s explore how sugar cookie icing can revolutionize your baking experience!
Ingredients for Sugar Cookie Icing
Creating the perfect sugar cookie icing is easier than you might think! With just four simple ingredients, you can whip up a delightful icing that adds the finishing touch to your cookies. Here’s what you’ll need:
- Powdered Sugar (3 cups/338 g): This is the star ingredient. It gives the icing its sweetness and smooth texture. Feel free to add more if you need to thicken it up!
- Corn Syrup (4 teaspoons/20 ml): This helps achieve that beautiful, glossy sheen and keeps the icing smooth and pliable.
- Vanilla Extract (1 teaspoon/5 ml): A splash of vanilla adds a lovely flavor that complements your cookies beautifully. You can even experiment with other extracts!
- Milk (¼ cup/60 ml, divided): Milk is key for adjusting consistency. Depending on the thickness you want, you can add more or less to create either border or flood icing.
These ingredients work together harmoniously to elevate your cookie-decorating game. Remember, the right consistency is crucial, so adjust your milk and powdered sugar as needed to achieve the perfect flow. Check out this article for more decorating tips!
Preparing Sugar Cookie Icing
Creating sugar cookie icing is an art that can elevate your cookies from tasty treats to edible masterpieces! This simple guide will walk you through every step, ensuring your cookies are beautifully decorated with that perfect sweet glaze.
Gather Your Ingredients
Before diving into the mixing, it's essential to have everything you need on hand. Here’s a quick list of the ingredients you'll require for a delightful icing:
- 3 cups (338 g) powdered sugar, plus more as needed
- 4 teaspoons (20 ml) corn syrup
- 1 teaspoon (5 ml) vanilla extract
- ¼ cup (60 ml) milk (divided, with extras for diluting)
Having these items ready will streamline the process, giving you time to focus on creativity and presentation. For a deeper dive into ingredients and icing types, check out this informative article on cookie decorating techniques.
Make the Border Icing
Start by sifting the powdered sugar into the bowl of a stand mixer. It’s important to eliminate lumps for that smooth surface we love. Next, add the corn syrup, vanilla extract, and 2 tablespoons of milk. Pulse your mixer on and off eight times, then mix on low for about 5 seconds. Scrape down the sides and continue mixing.
The ideal consistency here should be thick—think toothpaste-like. This thickness makes it great for piping borders that hold their shape! If you find it too thick, gradually add more milk; a little goes a long way!
Color Your Icing
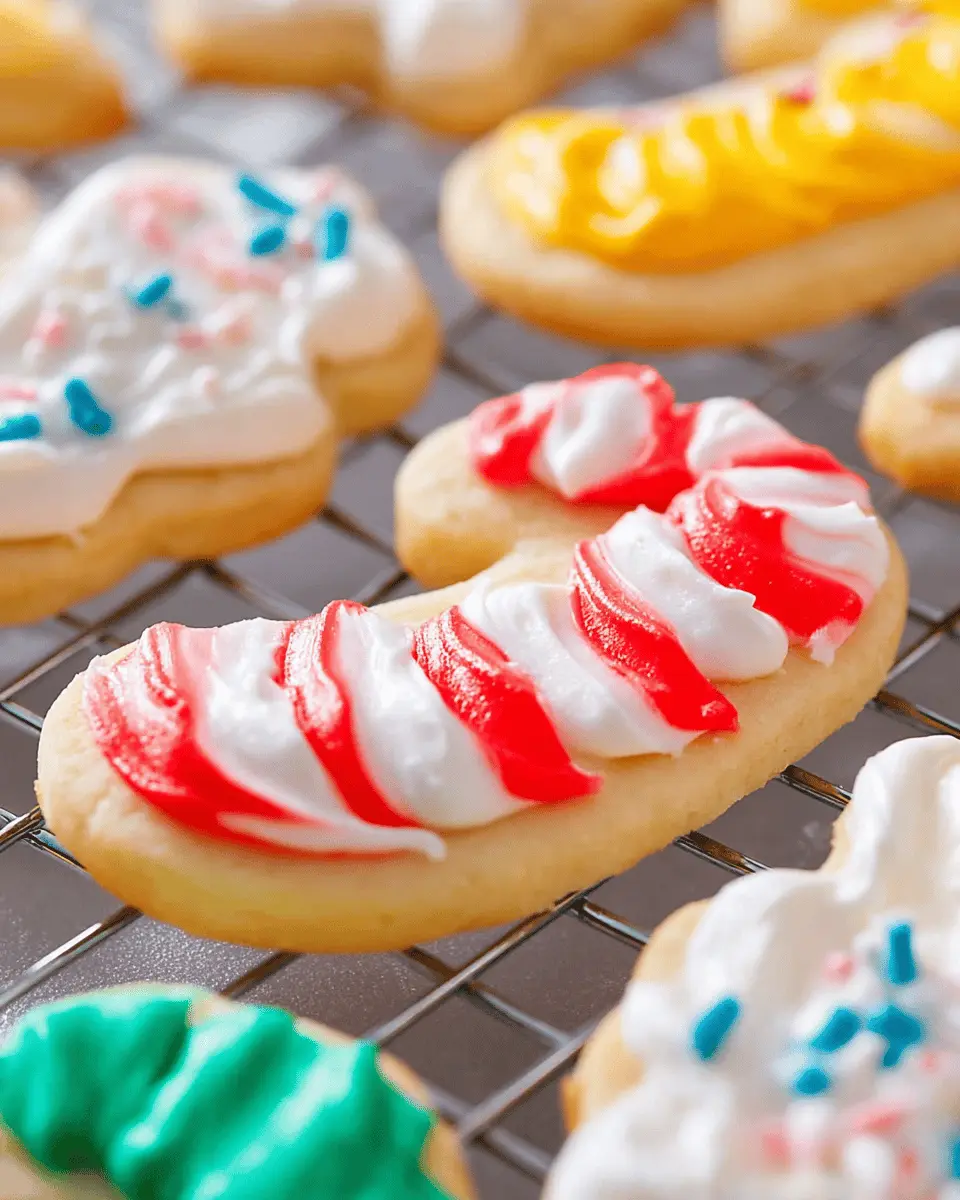
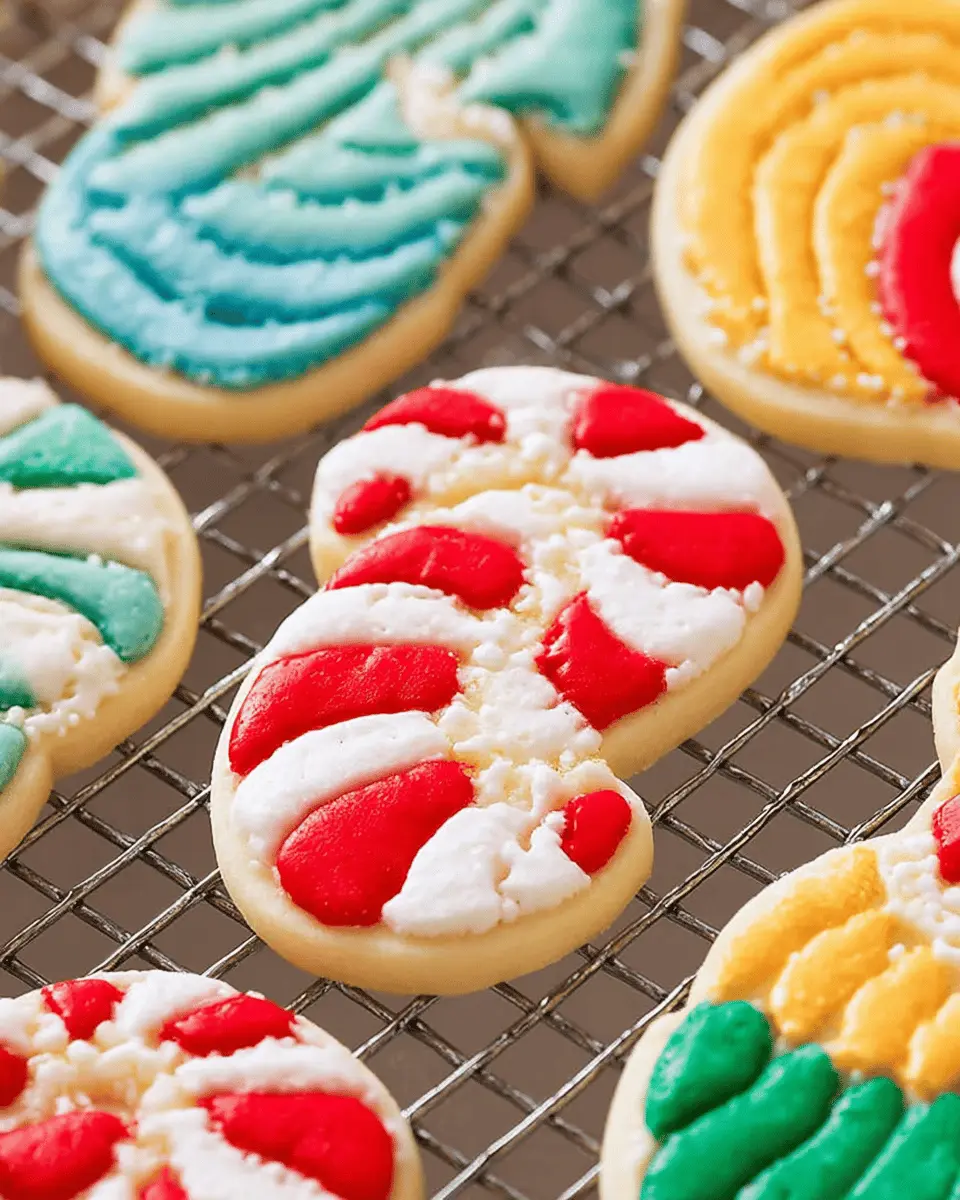
Want to add some vibrancy to your sugar cookie icing? Divide your icing into bowls based on how many colors you want. Add gel or food coloring, and mix until you reach your perfect hue. Remember, a little coloring can go a long way; so start small and adjust as needed.
Create the Flood Icing
This is where the magic happens! Take some of your border icing and transfer it to another bowl. To make the flood icing, start adding milk, half a teaspoon at a time, until you achieve a honey-like consistency. This icing should flow smoothly to fill spaces within the borders you’ve created.
Decorate Those Cookies!
Once your icing is ready, it’s showtime! If you're not using the icing right away, cover the bowls with plastic wrap to keep it moist. Now, you can pipe the border onto your cookies and let that set for a few minutes. After it’s slightly dried, fill in the borders with your flood icing. For added flair, consider sprinkling some nonpareils while the icing is still wet!
Lastly, let your decorated cookies dry on a baking sheet for about 1 to 2 hours. The waiting can be tough, but the result will be oh-so-worth-it! Store them in an airtight container once they’re perfectly set. Want tips on making super cute designs? Head over to this popular baking blog for inspiration.
And there you have it! Now you can master the art of sugar cookie icing and impress friends and family alike!
Variations on Sugar Cookie Icing
Bright and Colorful Icing for Festive Occasions
When it comes to decorating with sugar cookie icing, the sky's the limit! For a vibrant touch on your cookies, divide your icing into bowls and mix in gel food coloring. Aim for a rainbow palette to really get into the festive spirit. Whether you're celebrating birthdays, holidays, or seasonal events, colorful icing can truly elevate your sweet treats. Be sure to check out this helpful resource on coloring cookie icing for some pro tips!
Chocolate-Flavored Sugar Cookie Icing
If you adore chocolate like I do, why not take your sugar cookie icing up a notch with a rich chocolate flavor? Simply sift in cocoa powder as you mix the base icing ingredients. Start with 1-2 tablespoons of cocoa and adjust to taste. This chocolate variation pairs beautifully with both vanilla and chocolate cookies, making it an irresistible treat for any occasion. Plus, it adds a delightful twist that will impress your family and friends! For more flavor variations, explore this article on chocolate icing ideas.
Tips for Making Great Sugar Cookie Icing
When crafting the perfect sugar cookie icing, consistency is essential. Start with your border icing: it should be thick enough to hold its shape, similar to toothpaste. If you prefer a thinner flood icing, gradually add milk, stirring carefully to achieve a honey-like texture for even spreading.
Consider using gel food coloring instead of liquid—it produces vibrant colors without altering the icing's consistency. As you decorate, remember to apply your sprinkles while the icing is still wet for them to stick beautifully. Need more guidance? Check out this guide on cookie decorating for inspiration! Happy decorating!

Serving Suggestions for Sugar Cookie Icing
When it comes to sugar cookie icing, the possibilities are endless! Consider these fun serving ideas to elevate your cookie game:
-
Layered Designs: Use different colors of icing to create stunning layered effects. Start with a base color, let it set, and then pipe on another layer for a 3D effect.
-
Themed Decor: Match your icing colors and decorations to upcoming holidays or events. Think pastels for spring, bright colors for summer, or warm tones for fall.
-
Personal Touch: Write messages or initials with the icing for personalized cookies. This is perfect for birthdays, weddings, or special occasions.
For more creative inspiration, check out sites like Wilton or Food Network for additional decorating tips and tricks. Don’t forget to have fun with it and let your personality shine through your creations!
Time breakdown for Sugar Cookie Icing
Preparation time
Whipping up your sugar cookie icing is a breeze, taking only about 10 minutes to prepare. This quick icing is perfect for when you're in a pinch!
Total time
From start to finish, you're looking at just 10 minutes before your cookies are ready for decoration. It’s a simple and swift process that lets your creativity shine without taking too much time.
By the way, if you're curious about the science behind icing consistency or want tips on decorating, check out resources from The Kitchn or Serious Eats. Happy icing!
Nutritional Facts for Sugar Cookie Icing
Calories
When indulging in sugar cookie icing, you can expect to consume approximately 98 calories per tablespoon. This makes it a sweet yet manageable add-on for your favorite cookies!
Sugar Content
The icing packs a delightful sweetness, boasting about 24 grams of sugar per serving. While it enhances the flavor of your treats, keeping an eye on sugar intake can help maintain a balanced diet. For a healthier alternative, consider using less sugar or exploring natural sweeteners.
For more insights on sugar content in various toppings, check out sources like the American Heart Association.
Delve into how the ingredients in sugar cookie icing work together to create that perfect consistency and flavor, and remember: moderation is key when it comes to enjoying these sweet additions!
FAQs about Sugar Cookie Icing
How can I achieve the perfect icing consistency?
To nail that dreamy sugar cookie icing consistency, remember this: thick, yet spreadable. First, mix 3 cups of powdered sugar with corn syrup and milk until you reach a toothpaste-like texture for border icing. If you need a thinner flow for flooding, just add more milk gradually until it resembles honey. It’s always easier to thin out than to thicken up, so be patient!
Can I store leftover icing?
Absolutely! If you find yourself with leftover icing, store it in an airtight container in the fridge for up to 5 days. Just be sure to cover the surface with plastic wrap to prevent it from hardening. When you’re ready to use it again, give it a good stir, and if needed, adjust the consistency with a bit of milk.
What's the best way to color sugar cookie icing?
Coloring your sugar cookie icing can be a fun way to add personality to your cookies! Use gel food coloring for vibrant shades, as it won’t change the icing's consistency significantly. Just start with a tiny amount, mix it in, and adjust until you reach your desired color. Got different shades in mind? Divide your icing into separate bowls for easy mixing! For tips on coloring techniques, consider checking out resources like Wilton.
Conclusion on Sugar Cookie Icing
Sugar cookie icing is a delightful way to elevate your sweet creations. With just four simple ingredients, it offers an easy path to colorful, custom designs. Whether you’re decorating for holidays or special occasions, this icing will surely impress. Dive in and let your creativity shine!

Sugar Cookie Icing: The Best Homemade Recipe for Sweet Treats
Equipment
- Stand mixer
Ingredients
- 3 cups powdered sugar plus more as needed for thickening
- 4 teaspoons corn syrup
- 1 teaspoon vanilla extract
- ¼ cup milk divided, plus more as needed for diluting
Instructions
Instructions
- Make the Border Icing - Sift the powdered sugar into the bowl of a stand mixer. Using the whisk attachment, add corn syrup, vanilla extract, and 2 tablespoons of milk. Pulse on and off eight times. Mix on low speed (setting 2) for 5 seconds. Use a spatula to scrape down the sides of the bowl. Add 2 tablespoons of milk and mix on low speed (setting 2) for 10 seconds. Scrape down the sides of the bowl. Mix at medium-low speed until combined, about 15 to 20 seconds.
- Color the Icing (Optional) - Based on the number of colors, divide the icing into separate bowls. Mix with gel or food coloring until the desired hue is reached.
- Make the Flood Icing - Using the border icing as a base, portion a desired amount into a separate bowl. Gradually add more milk, ½ teaspoon at a time, until a thinner, honey-like consistency is reached.
- Decorate the Cookies - If not using the icing immediately, place a piece of plastic wrap directly on top of each bowl to prevent it from drying out. Transfer each icing to a piping bag or squeeze bottle to make designs. Pipe the border design first and let that set before adding the flood icing.
- Dry the Icing - Dry the decorated cookies on a baking sheet lined with parchment paper or on a wire rack. They will take about 1 to 2 hours to completely set and dry.


Leave a Reply