
Introduction to Snowball Cookies Recipe
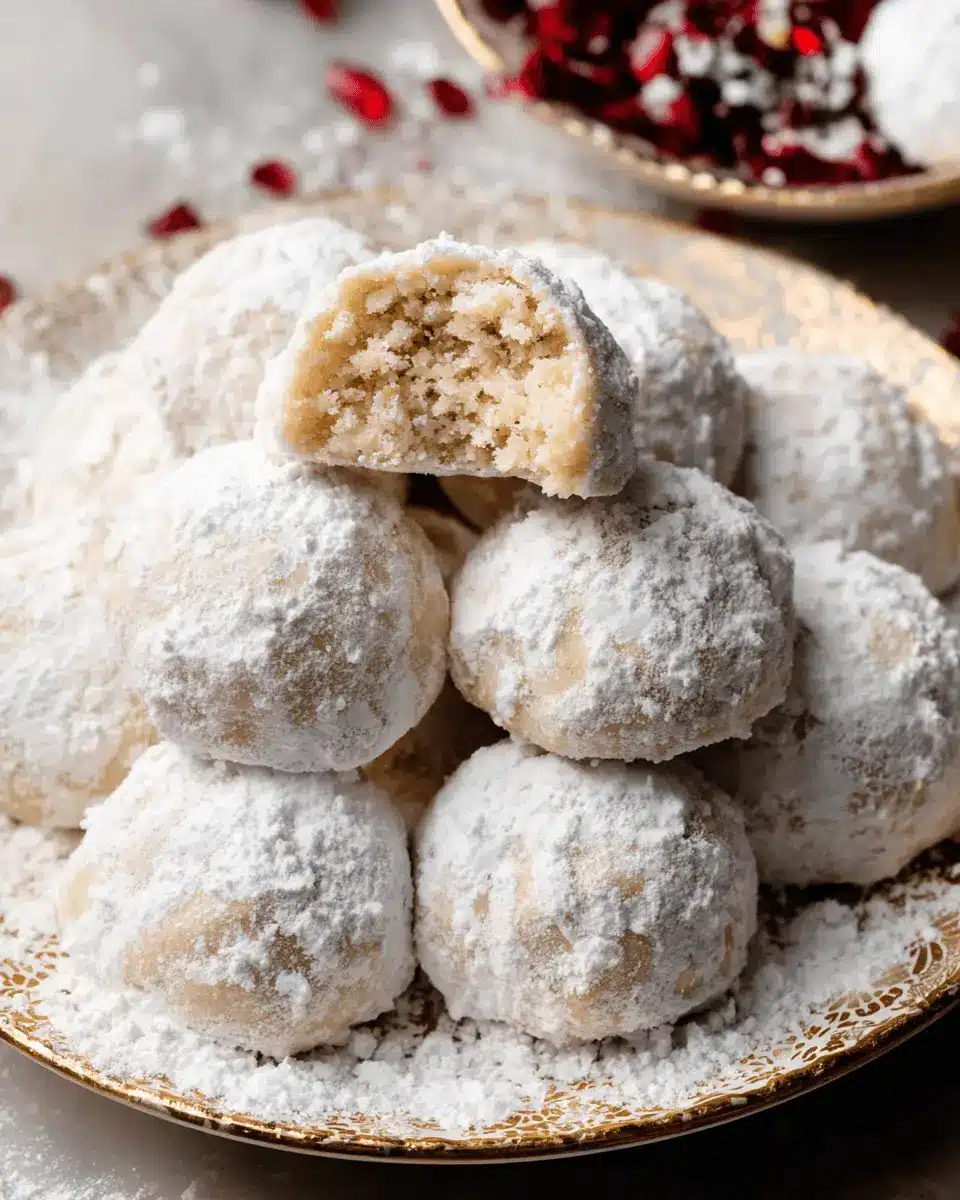
Snowball cookies are a holiday favorite for very good reason: their delightful melt-in-your-mouth texture and sweet, buttery flavor simply can’t be beaten. Also known as Russian Tea Cakes or Mexican Wedding Cookies, these little treats are dusted with confectioners' sugar, giving them their signature snow-like appearance. The name “snowball” perfectly encapsulates both their look and the joy they bring during the winter season.
What makes snowball cookies so beloved? Besides their charming name and appearance, they deliver a perfect balance of flavor and texture. The buttery cookie, often enhanced with finely chopped nuts like pecans or walnuts, crumbles softly when you take a bite. It’s a cookie that evokes nostalgia and warmth, making it a staple for gatherings and festivities. Whether you’re preparing for a holiday cookie swap or just a cozy baking day at home, this snowball cookies recipe is sure to impress friends and family alike.
Plus, their versatility allows you to customize the nuts or even swap them for sprinkles for a fun twist! If you’re ready to dive into a baking adventure, keep reading to create these scrumptious delights that will become a cherished tradition in your kitchen.
Ingredients for Snowball Cookies
Main ingredients for delicious snowball cookies
The foundation of your snowball cookies recipe is built on a handful of simple yet essential ingredients that create a buttery, melt-in-your-mouth treat. Here’s what you’ll need:
- Unsalted butter: 1 cup (softened to room temperature) provides richness.
- Confectioners’ sugar: ¾ cup gives that fluffy texture and sweet finish.
- Pure vanilla extract: 2 teaspoons for a warm, inviting flavor.
- All-purpose flour: 2 and ¼ cups, which gives structure to the cookies.
- Salt: Just a pinch (⅛ teaspoon) balances the sweetness.
- Optional: ¾ cup of finely chopped and toasted pecans for a delightful nutty crunch.
Optional ingredients for customization
While the classic version is simply delightful, you can personalize your snowball cookies recipe with a few optional ingredients:
- Nuts: Try substituting pecans with finely chopped walnuts or almonds.
- Sprinkles: For a festive touch, fold in ½ cup of colorful sprinkles.
- Flavorings: Consider adding citrus zest or almond extract for a unique twist.
Get creative! The beauty of these cookies is in their versatility. Feel free to experiment and make them your own!
Step-by-Step Preparation of Snowball Cookies
Making snowball cookies is a delightful experience that fills your kitchen with warmth and sweetness. Here’s a straightforward guide to help you prepare these delicious treats effortlessly.
Cream the Butter and Sugar
Start by gathering your ingredients and tools. In a large bowl, using either a handheld mixer or a stand mixer fitted with a paddle attachment, beat 1 cup of softened unsalted butter for approximately one minute at medium speed. You want it to be smooth and creamy—this is where the magic begins! Next, add ¾ cup of confectioners' sugar and continue beating on medium-high speed until the mixture is well combined. Don't forget to scrape down the sides of the bowl to ensure everything is mixed thoroughly. Finally, mix in 2 teaspoons of pure vanilla extract for that irresistible flavor!
Mix in the Vanilla and Dry Ingredients
Once you have a creamy base, it’s time to integrate the dry ingredients. Switch the mixer to low speed and gradually add 2 and ¼ cups of all-purpose flour, along with ⅛ teaspoon of salt. You might find the dough looks a bit crumbly at first, but don’t worry! Once all the flour is in, increase the mixer speed to high. Beat until the dough comes together. If you fancy a nutty twist, fold in ¾ cup of finely chopped toasted pecans at this stage, adding rich flavor and texture.
Chill the Cookie Dough
Now that your snowball cookie dough is ready, cover it tightly and chill it in the refrigerator for at least 30 minutes (up to 3 days if you need to plan ahead!). Chilling helps the dough firm up, making it easier to shape later. If it’s been chilling for over three hours, let it sit at room temperature for about 30 minutes before working with it, as it may become quite stiff.
Shape and Bake the Cookies
Preheat your oven to 350°F (177°C). While the oven heats, line two baking sheets with parchment paper or silicone baking mats for easy clean-up. Using a cookie scoop, measure out 1 tablespoon of dough for each cookie and form them into balls, placing them at least 2 inches apart on the prepared sheets. Bake for about 15 minutes, or until the edges are lightly golden. Keep an eye on them; you want them to be just barely browned on top!
Coat the Cookies in Confectioners’ Sugar
Once baked, allow the cookies to cool on the baking sheet for about 5 minutes. This is when the fun begins! Very gently roll each cookie in 1 and ¼ cups of confectioners’ sugar to coat them completely. Afterward, transfer them to a wire rack to cool fully. The sugar may melt slightly, which is normal. For that perfect snowball look, roll them in sugar again once cooled. This step ensures a beautiful, snowy finish that is delightful to the eye—and the taste buds!
Enjoy your homemade snowball cookies as a special treat or share them with friends and family!
Variations on Snowball Cookies
Chocolate Snowball Cookies
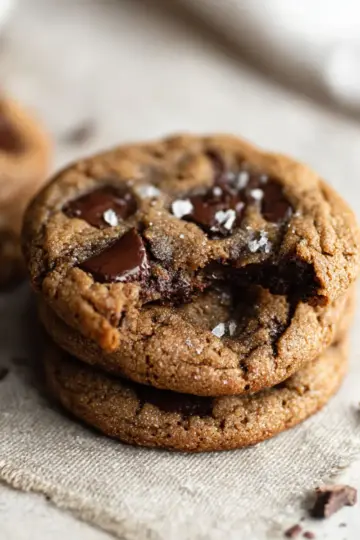
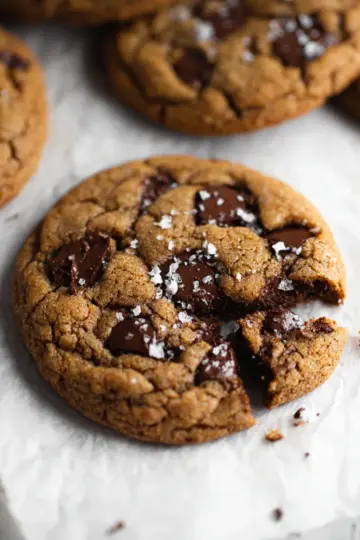
If you’re a chocolate lover, try adding unsweetened cocoa powder to your snowball cookies recipe. Simply substitute ¼ cup of flour with ¼ cup of cocoa powder, and you’ll be well on your way to creating delicious chocolate snowball treats! For an extra flavor boost, consider folding in mini chocolate chips or a sprinkle of sea salt to intensify that rich taste.
Nut-Free Snowball Cookies
Craving the melt-in-your-mouth experience without the nuts? No problem! You can easily create nut-free snowball cookies by simply omitting the pecans and perhaps swapping them for rolled oats for texture. Not only does this keep the cookies allergy-friendly, but it also adds a delightful chewiness. Explore alternatives like dried fruits or seeds for a unique twist.
With these variations, your snowball cookies can fit any taste or dietary preference. Enjoy the process and happy baking!
Cooking Tips and Notes for Snowball Cookies
Tips for Perfect Texture
To achieve those melt-in-your-mouth snowball cookies, make sure your butter is fully softened. This helps create a creamy dough that binds perfectly. Chilling the dough for at least 30 minutes not only firm up the mixture but also develops a richer flavor. If you opt to freeze your cookie dough, you can bake directly from the freezer, just adding a minute or so to the baking time for that deliciously soft texture.
Storage Tips for Longevity
For optimal freshness, store your snowball cookies in an airtight container at room temperature. They can last up to a week, but they're so tasty, they might not last that long! If you have leftovers (or want to make them ahead), simply freeze them in a sealed bag for up to three months. Thaw them at room temperature and enjoy — they’ll taste freshly baked! For more storage tips, you might find this guide on baking storage methods helpful.
Serving Suggestions for Snowball Cookies
Great Pairings for Snowball Cookies
If you're wondering what to enjoy with your homemade snowball cookies, consider pairing them with:
- Hot cocoa or coffee: The rich flavors complement the sweetness perfectly.
- Fresh fruit: Berries or sliced oranges can bring a refreshing balance to the cookies’ richness.
- Cheese platter: Soft cheeses like Brie enhance the cookie's buttery goodness.
These options create a delightful treat that’s perfect for gatherings or cozy nights in.
How to Present Them Nicely
Presentation can elevate your snowball cookies recipe to a whole new level! Try:
- Using a decorative plate: A colorful or festive plate can showcase your cookies beautifully.
- Dusting with extra confectioners’ sugar: This adds to the visual appeal and reinforces that sweet flavor.
- Arranging with fresh mint or edible flowers: These add a pop of color and elegance, making them perfect for special occasions.
These simple touches not only enhance the experience but also make for stunning posts on social media. Remember, a well-presented cookie invites everyone to indulge!
For more ideas, check out The Kitchn's guide on cookie presentation that sparks creativity.
Time Breakdown for Snowball Cookies
When you're ready to whip up these delightful snowball cookies, here's how your time will be divided:
Preparation Time
Getting started is easy! Set aside about 15-20 minutes for measuring, mixing, and chilling the dough before baking.
Baking Time
The cookies bake quickly, taking roughly 15 minutes until they’re golden brown on the edges.
Cooling Time
Allow about 5 minutes on the baking sheet before rolling them in confectioners' sugar and transferring them to a wire rack to cool completely.
With this timeline, you’ll be enjoying your snowball cookies recipe in just about an hour! Perfect for when you need a sweet treat in a pinch.
Nutritional Facts for Snowball Cookies
Here’s a quick rundown of the nutritional content for our delightful snowball cookies recipe. Each cookie delivers approximately:
- Calories: Around 120 calories per cookie, perfect for a sweet treat without overindulging.
- Sugars: Each cookie contains about 4 grams of sugar, providing just enough sweetness to satisfy your cravings.
- Fats: With approximately 8 grams of fat, these cookies strike a nice balance between indulgence and moderation.
For all nutritional information, please remember to account for any additions like pecans or extra sugar you might use. For more detailed dietary insights, check out resources like the USDA Nutrient Database. Enjoy baking!
FAQs about Snowball Cookies
Can I use margarine instead of butter?
While you can substitute margarine for butter in this snowball cookies recipe, the texture and flavor may vary. Butter provides a rich taste and creates a creamy consistency that is hard to replicate with margarine. If you do opt for margarine, look for a high-fat variety to ensure a better result.
How should I store leftover cookies?
To keep your delightful snowball cookies fresh, store them in an airtight container at room temperature. They’ll stay delicious for up to a week. If you want to maintain their signature powdery finish, avoid stacking them directly on top of each other.
What’s the best way to freeze snowball cookies?
Freezing is a fantastic way to preserve your snowball cookies! Place the cooled cookies in a single layer on a baking sheet to freeze for about an hour. Once frozen, transfer them to an airtight container, separating layers with parchment paper, and store for up to three months. Thaw in the refrigerator when you're ready to enjoy! For more tips on freezing cookies, check out this guide on how to freeze cookie dough.
Conclusion on Snowball Cookies
Making snowball cookies today is more than just baking—it's about creating cherished memories and sharing delicious treats with loved ones. With their simple ingredients and delightful flavors, this snowball cookies recipe is perfect for both novice and experienced bakers alike. Try them and enjoy a taste of nostalgia!
Why You Should Try Making Snowball Cookies Today!
- Quick and Easy: These cookies come together in no time, making them perfect for busy weeknights or unexpected guests.
- Customizable: Whether you stick to traditional pecans or experiment with different nuts and add-ins, you can make these cookies your own.
- Impressive Looks: The snowy coating of confectioners' sugar makes each cookie look elegant—ideal for gifting or holiday celebrations.
- Shelf Life: Store them easily, as they stay fresh for up to a week. Or, freeze extras for later enjoyment!
Baking snowball cookies is not just about satisfying a sweet tooth; it's about gathering around the oven, creating delicious memories, and sharing the joy that only homemade treats can bring. So, what are you waiting for? Dive into your kitchen and start baking!
Snowball Cookies Recipe
Equipment
- handheld or stand mixer
- baking sheets
- Parchment Paper or Silicone Baking Mats
- Wire Racks
Ingredients
- 1 cup unsalted butter softened to room temperature
- ¾ cup confectioners’ sugar
- 2 teaspoons pure vanilla extract
- 2 ¼ cups all-purpose flour spooned & leveled
- ⅛ teaspoon salt see note
- ¾ cup finely chopped and toasted pecans optional
Coating
- 1 ¼ cups confectioners’ sugar
Instructions
- In a large bowl using a handheld mixer or stand mixer fitted with a paddle attachment, beat the butter for 1 minute on medium speed until completely smooth and creamy. Add ¾ cup confectioners’ sugar and beat on medium high speed until combined and creamy. Scrape down the sides and bottom of the bowl as needed. Next, beat in the vanilla extract on medium-high speed until combined. Switch to low speed and slowly add the flour and salt. The dough will look dry and you may not think the flour will fully combine. Once all of the flour is added, turn the mixer up to high speed. The dough will come together. Finally, beat in the chopped pecans, if using.
- Cover the cookie dough tightly and chill in the refrigerator for at least 30 minutes and up to 3 days. If chilling for 3+ hours, make sure you let the cookie dough sit at room temperature for at least 30 minutes before rolling into balls.
- Preheat oven to 350°F (177°C). Line 2 large baking sheets with parchment paper or silicone baking mats. Set aside. Pour the confectioners’ sugar needed for the coating into a shallow bowl.
- Scoop or roll 1 Tablespoon (20g) of cookie dough per cookie. Roll into a ball and place on the baking sheets, at least 2 inches apart. Bake the cookies until golden brown on the bottom edges and just barely browned on top, about 15 minutes.
- Allow the cookies to cool for 5 minutes on the baking sheet, then very gently roll them in the confectioners’ sugar to coat completely. Place the cookies on wire racks to cool completely. The confectioners’ sugar will melt a bit and get sticky; that's ok. Once the cookies have completely cooled, roll in confectioners’ sugar again.
- Cookies stay fresh covered at room temperature for up to 1 week.

Leave a Reply