
Introduction to Red Velvet Cake with Cream Cheese Frosting
Why Red Velvet Cake is the Ultimate Homemade Dessert
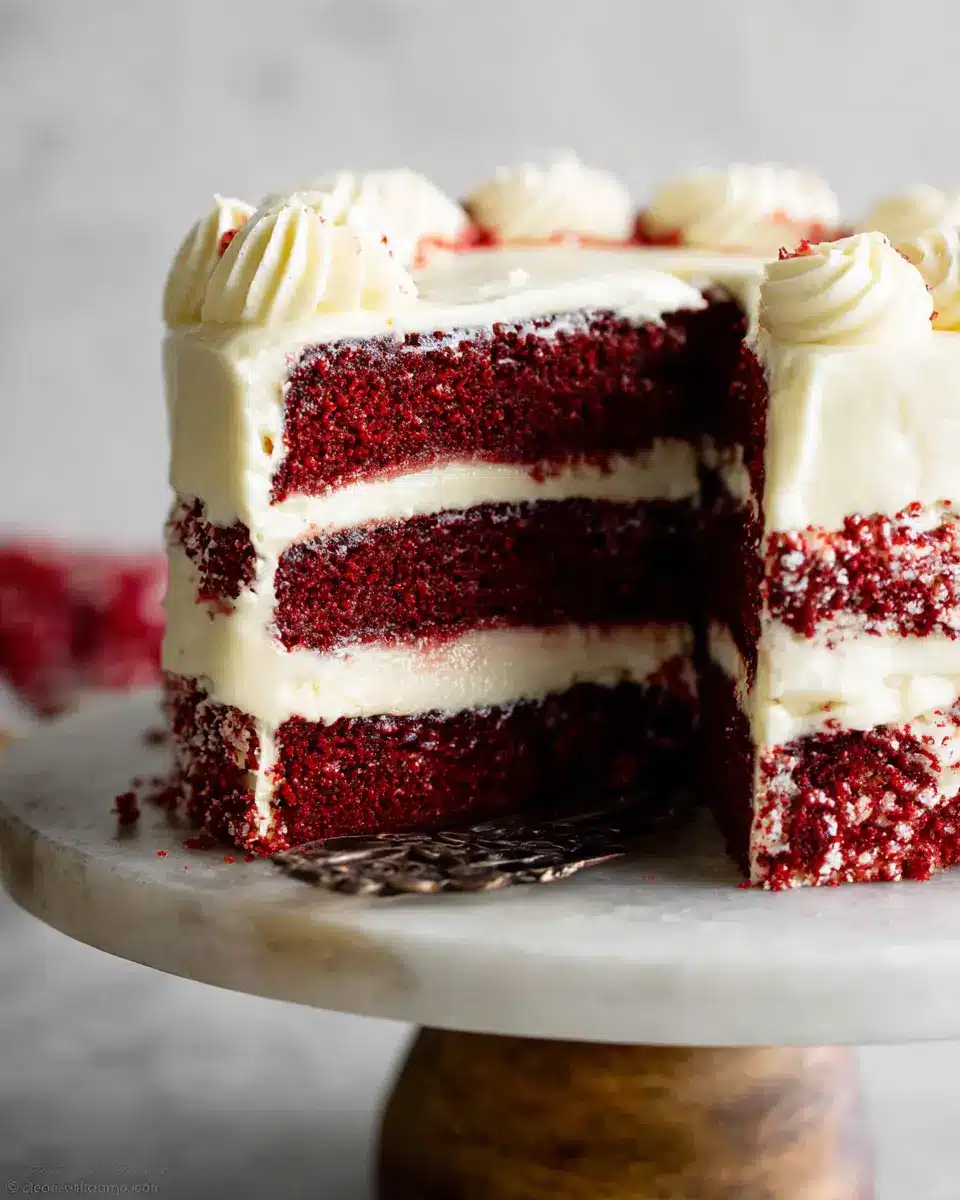
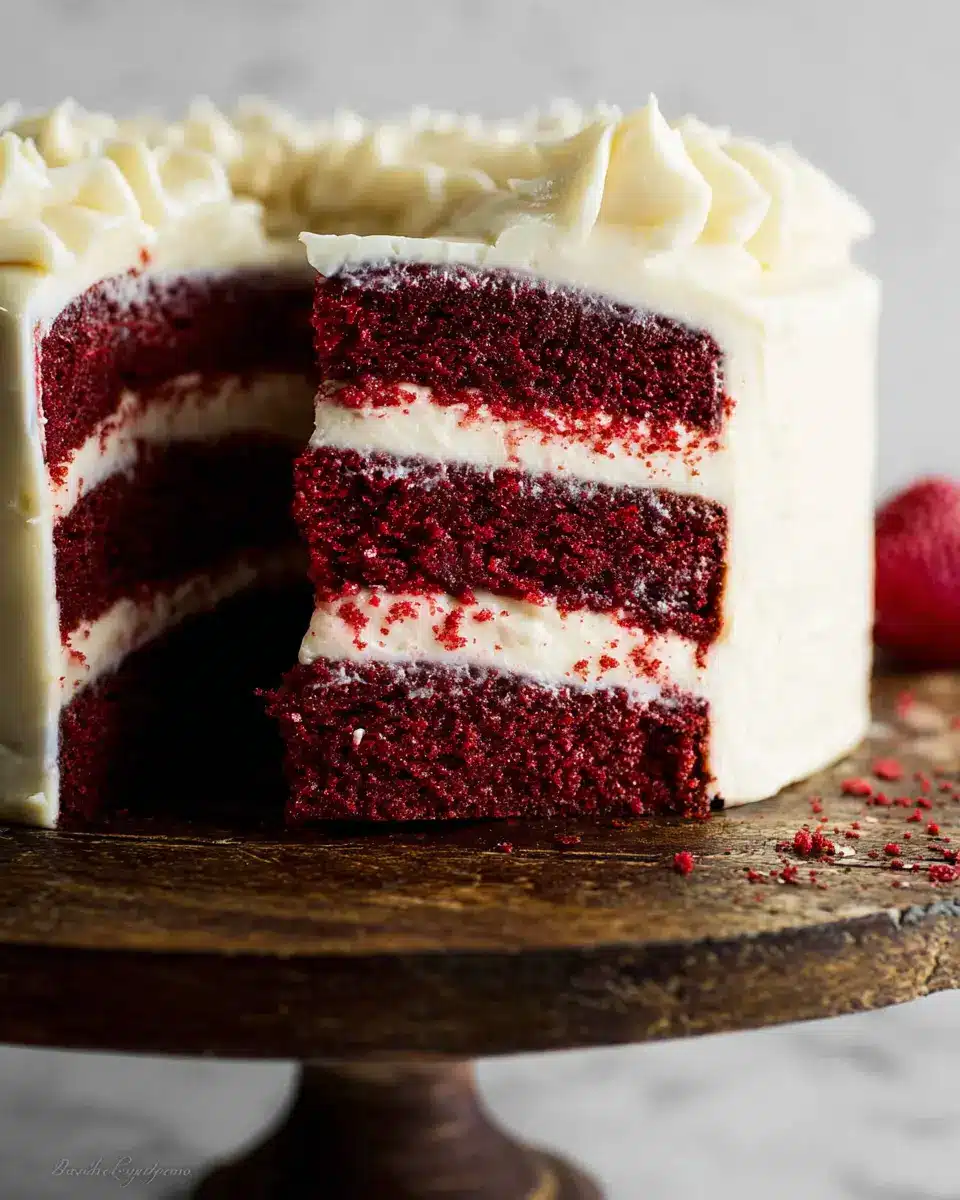
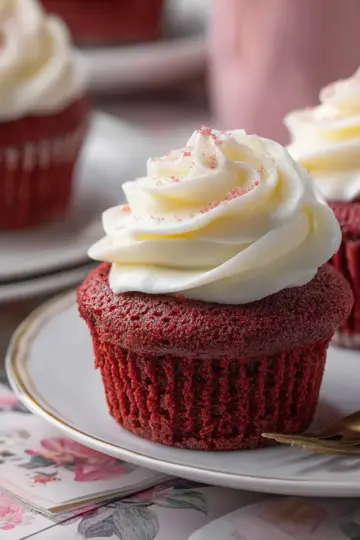
When it comes to homemade desserts, few can rival the allure of red velvet cake. This strikingly beautiful cake, with its vibrant crimson hue, is not just a treat for the eyes—it’s also a delight for the taste buds! The subtle chocolate flavor combined with its moist texture creates a uniquely satisfying experience. Perfect for celebrations or just because you deserve it, red velvet cake brings a sense of joy to any occasion.
Plus, baking this cake allows for endless customization—add sprinkles for a birthday or keep it classic for a sophisticated gathering!
The Appeal of Cream Cheese Frosting
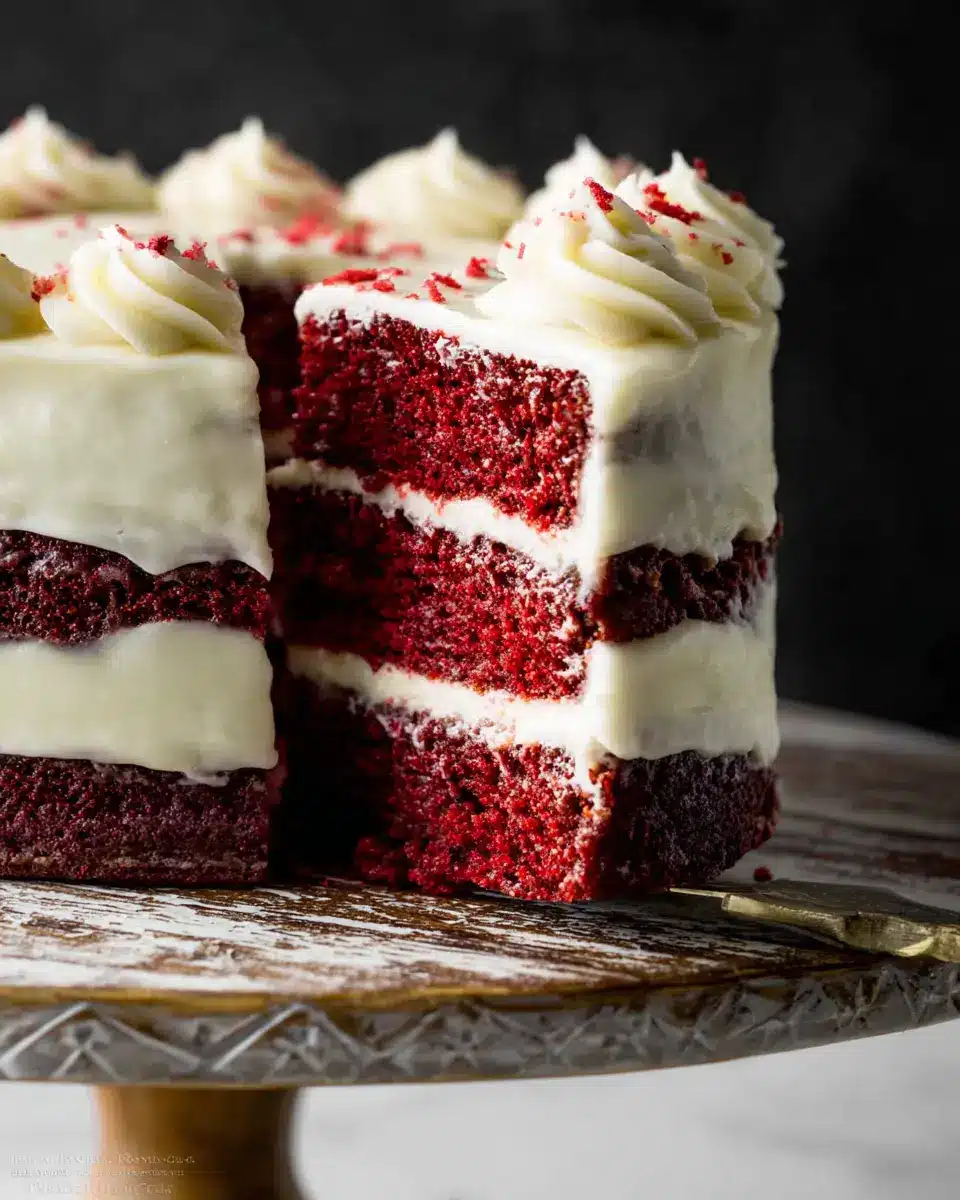
What makes red velvet cake truly decadent is the rich cream cheese frosting that typically accompanies it. The tangy sweetness of the cream cheese complements the cake's flavors perfectly, ensuring a balanced bite every time. Whether you're piping intricate designs or slathering it on generously, this frosting is the cherry on top of your delightful dessert.
Many bakers swear by this combination, often citing that the cream cheese frosting elevates the overall flavor profile. If you’re unsure, think about the cakes you admire most—chances are, it’s those with frosting that strikes the perfect balance. Ready to dive into making your own delicious red velvet cake with cream cheese frosting? Let’s get started!
Ingredients for Red Velvet Cake with Cream Cheese Frosting
Creating a stunning red velvet cake with cream cheese frosting is all about using the right ingredients. Here’s what you’ll need!
List of ingredients for the cake
- 3 cups (360g) cake flour (spooned & leveled)
- 1 teaspoon baking soda
- 2 Tablespoons (10g) unsweetened natural cocoa powder
- ½ teaspoon salt
- ½ cup (113g) unsalted butter, softened to room temperature (check how here)
- 2 cups (400g) granulated sugar
- 1 cup (240ml) canola or vegetable oil
- 4 large eggs, room temperature and separated
- 1 Tablespoon pure vanilla extract
- 1 teaspoon distilled white vinegar
- Liquid or gel red food coloring
- 1 cup (240ml) buttermilk, at room temperature
List of ingredients for the frosting
- 16 ounces (452g) full-fat brick cream cheese, softened to room temperature
- ¾ cup (170g) unsalted butter, softened to room temperature (details here)
- 5 cups (600g) confectioners’ sugar
- 1 and ½ teaspoons pure vanilla extract
- A pinch of salt, to taste
Gathering these fresh ingredients will ensure your red velvet cake turns out moist, flavorful, and beautifully topped with rich, creamy frosting. Ready to bake? Let’s get started!
Step-by-Step Preparation of Red Velvet Cake
Baking a red velvet cake with cream cheese frosting is a delightful process that fills your kitchen with sweet aromas and joy. Follow these steps to ensure you create a stunning and delicious cake that’s sure to impress at any gathering.
Prepping Your Kitchen and Cake Pans
Before diving into the baking process, it’s essential to prepare your kitchen. Start by preheating your oven to 350°F (177°C). Grease two 9-inch cake pans, then line them with parchment paper and grease the parchment as well. This method ensures the cakes come out smoothly! If you’re unsure about using parchment paper, check out this helpful guide on how to use it effectively.
Mixing Dry Ingredients for the Cake
In a large bowl, whisk together your dry ingredients:
- 3 cups of cake flour
- 1 teaspoon of baking soda
- 2 tablespoons of unsweetened cocoa powder
- ½ teaspoon of salt
Mixing these ingredients well is key for uniform and fluffy results.
Creating the Wet Mixture
Next, grab your mixer! In another bowl, beat together:
- ½ cup of softened butter
- 2 cups of granulated sugar
Blend these on medium-high speed until combined, about one minute. Now add 1 cup of canola or vegetable oil, 4 large egg yolks, 1 tablespoon of vanilla extract, and 1 teaspoon of distilled white vinegar. Beat this mixture on high for two minutes until it's creamy and fluffy. Don't forget to set your egg whites aside for later!
Combining Dry and Wet Ingredients
It’s time to mix the dry and wet ingredients! With your mixer on low, alternate adding the dry ingredient mixture and 1 cup of room temperature buttermilk, mixing until just combined. At this stage, gently fold in the beaten egg whites for added fluff—your cake batter will now have a shiny, thick consistency.
Baking the Cakes
Now, divide the batter evenly between the two prepared pans. Pop them in the oven and bake for 30-32 minutes. You’ll know they’re done when the tops spring back to the touch and a toothpick inserted in the center comes out clean. Allow the cakes to cool in the pans on a wire rack completely.
Making the Cream Cheese Frosting
While the cakes are cooling, let’s whip up the cream cheese frosting! In a large mixing bowl, beat together:
- 16 ounces of softened cream cheese
- ¾ cup of softened butter
Mix until smooth, about two minutes. Gradually add in 5 cups of confectioners’ sugar and 1 and ½ teaspoons of vanilla extract, plus a pinch of salt to taste. This frosting should be creamy and spreadable!
Assembling and Frosting the Cake
Finally, once the cake layers are cool, slice the tops off to create flat surfaces. Place one layer on your cake stand and spread frosting evenly on top, then add the second layer. Cover the entire cake with the remaining frosting, making it beautiful and delectable. Using an icing spatula and a bench scraper can help achieve that professional look!
Refrigerate your cake for 30-60 minutes before serving. This resting time is essential for the cake to hold its shape when slicing.
Baking a red velvet cake with cream cheese frosting is not just about the final product; it's about enjoying the process and perhaps sharing a slice with someone special. Happy baking!
Variations on Red Velvet Cake
Gluten-free Red Velvet Cake
For those needing a gluten-free option, substituting cake flour with a high-quality gluten-free flour blend works wonders! You can also try adding a little xanthan gum to the mix for better texture. Just ensure you use a gluten-free buttermilk substitute (like almond milk with vinegar) to maintain that classic red velvet taste.
Dairy-free Frosting Options
Craving that rich cream cheese frosting but avoiding dairy? Opt for vegan cream cheese combined with coconut or nut-based butters for a delicious twist! Coconut cream also makes for a luscious alternative. It provides a creamy texture while allowing the delightful vanilla flavor to shine through. Need tips for whipping up dairy-free delights? Check out resources from Minimalist Baker.
Embrace these variations to satisfy all your gathering's dietary needs while enjoying a scrumptious slice of red velvet cake with cream cheese frosting!
Cooking Tips and Notes for Red Velvet Cake
Importance of Room Temperature Ingredients
Using room temperature ingredients is essential for a delightful red velvet cake with cream cheese frosting. Cold butter or eggs can cause the batter to curdle, affecting texture and flavor. To bring your ingredients to room temperature quickly, let them sit out for about 30 minutes. Alternatively, you can set eggs in warm water for 10-15 minutes or microwave butter in short bursts, keeping an eye on it to avoid melting.
Tips for Achieving the Perfect Frosting Consistency
The key to scrumptious frosting lies in its consistency. A perfect cream cheese frosting should be smooth and spreadable. Start by mixing your cream cheese and butter until they're silky. Gradually add the confectioners' sugar, beating on low to avoid a sugary cloud. If your frosting feels too thin, add more sugar. For sweetness balance, a pinch of salt helps elevate flavor without being noticeable. Always taste as you go!
For more tips on achieving perfect frosting, check out this guide on frosting techniques.
Serving Suggestions for Red Velvet Cake
Best Pairings with Drinks and Sides
When enjoying your red velvet cake with cream cheese frosting, consider pairing it with a warm cup of coffee or a refreshing glass of iced tea. The rich flavors complement each other beautifully, creating a delightful afternoon treat. If you're looking for sides, serve it alongside a creamy scoop of vanilla ice cream or a light fruit salad for a refreshing contrast.
Creative Ways to Serve Slices
Transform your cake presentation by serving slices on elegant dessert plates and garnishing them with a drizzle of chocolate or raspberry sauce. You can also add a dollop of whipped cream and a sprinkle of crushed nuts for added texture. For a fun twist, consider layering cake slices in jars with frosting, creating a tasty dessert parfait that's perfect for picnics or potlucks!
Remember, the beauty of red velvet cake is in its versatility; feel free to get creative and make it your own!
Time Breakdown for Red Velvet Cake
Preparation time
Get ready to bake! The preparation time for this delightful red velvet cake with cream cheese frosting is approximately 30 minutes. During this time, you'll gather your ingredients and mix the cake batter, ensuring everything is just right.
Baking time
Once prepped, pop those cake pans into the oven for about 30 to 32 minutes. It's the time when your kitchen will be filled with that irresistible aroma of baking cake!
Total time
In total, expect to invest around 1 hour in creating this masterpiece. This includes prep and baking time, not to mention the delightful chill before you dig in. Allowing it to set will make each slice a moment to savor!
Looking for more baking tips? Check out this guide on how to make a perfectly moist cake to elevate your baking skills.
Nutritional Facts for Red Velvet Cake
Calories per slice
A decadent slice of red velvet cake with cream cheese frosting typically contains around 300-400 calories. This delightful treat can be a perfect way to celebrate special occasions without feeling overly guilty!
Sugar content
With approximately 35-45 grams of sugar per slice, this cake brings a sweet, tasty experience. Moderation is key, so enjoy every bite mindfully!
Estimated servings
This recipe yields about 10-12 servings, making it an ideal choice for gatherings. Whether it’s a birthday party or a cozy family dinner, red velvet cake with cream cheese frosting is sure to impress your guests!
For more insights on healthy dessert options, you might find this nutritional guide helpful.
FAQs about Red Velvet Cake with Cream Cheese Frosting
What makes red velvet cake different from chocolate cake?
While both red velvet cake and chocolate cake can boast rich flavors, the differences lie mainly in their ingredients and textures. Red velvet cake combines cocoa powder (in smaller amounts) with a distinctive tang from buttermilk and vinegar, which contributes to its unique flavor profile. It’s often described as being lighter and more velvety in texture than traditional chocolate cake. Additionally, the signature red hue often comes from food coloring, enhancing its visual appeal.
Can I make this cake ahead of time?
Absolutely! This red velvet cake with cream cheese frosting can be baked in advance. Just cool the cake layers completely, wrap them tightly in plastic wrap, and store them in the refrigerator for up to 3 days or freeze them for up to 2-3 months. Thaw overnight in the refrigerator before frosting.
How do I store leftover red velvet cake?
To keep your delicious red velvet cake fresh, simply cover it tightly and store it in the refrigerator for up to 5 days. For longer storage, you can freeze slices or whole layers, ensuring they are wrapped well to prevent freezer burn. When you’re ready to enjoy, let them thaw in the fridge overnight for the best texture!
Conclusion on Red Velvet Cake with Cream Cheese Frosting
Indulging in a slice of red velvet cake with cream cheese frosting is truly a delight! The rich flavors and creamy texture create an unforgettable experience for any occasion. Remember to store any leftovers properly, allowing you to savor this heavenly treat for days to come. Enjoy baking!
Red Velvet Cake with Cream Cheese Frosting
Equipment
- hand mixer
- Paddle Attachment
- 9 inch Cake Pans
- Parchment paper
- Wire rack
Ingredients
Cake
- 3 cups cake flour spooned & leveled
- 1 teaspoon baking soda
- 2 Tablespoons unsweetened natural cocoa powder
- ½ teaspoon salt
- ½ cup unsalted butter softened to room temperature
- 2 cups granulated sugar
- 1 cup canola or vegetable oil
- 4 large eggs room temperature and separated
- 1 Tablespoon pure vanilla extract
- 1 teaspoon distilled white vinegar
- liquid or gel red food coloring
- 1 cup buttermilk at room temperature
Cream Cheese Frosting
- 16 ounces full-fat brick cream cheese softened to room temperature
- ¾ cup unsalted butter softened to room temperature
- 5 cups confectioners’ sugar
- 1.5 teaspoons pure vanilla extract
- pinch of salt to taste
Instructions
Preparation
- Preheat oven to 350°F (177°C). Grease two 9-inch cake pans, line with parchment paper rounds, then grease the parchment paper.
- Whisk the flour, baking soda, cocoa powder, and salt together in a large bowl. Set aside.
- Using a handheld or stand mixer, beat the butter and sugar together on medium-high speed until combined. Add the oil, egg yolks, vanilla extract, and vinegar and beat on high for 2 minutes.
- With the mixer on low speed, add the dry ingredients in 2-3 additions alternating with the buttermilk. Add food coloring just until combined. Whisk or beat the egg whites on high speed until fluffy peaks form. Gently fold into cake batter.
- Divide batter between cake pans. Bake for 30-32 minutes or until a toothpick inserted in the center comes out clean. Cool completely in the pans on a wire rack.
Frosting and Assembly
- In a large bowl, beat the cream cheese and butter together until smooth. Add confectioners’ sugar, vanilla extract, and a pinch of salt. Beat until creamy.
- Slice a thin layer off the tops of the cakes to create a flat surface. Place 1 cake layer on your cake stand, cover the top with frosting, add the 2nd layer, and spread remaining frosting on top and sides.
- Refrigerate cake for at least 30-60 minutes before slicing to help it hold shape.
- Cover leftover cake tightly and store in the refrigerator for 5 days. Frosted or unfrosted cake layers can be frozen for 2-3 months.
Leave a Reply