
Introduction to No-Churn Oreo Ice-Cream Sandwiches
If you've ever found yourself craving a decadent dessert but felt daunted by the idea of using an ice cream maker, no-churn recipes are here to save the day! One standout option is our no-churn Oreo ice-cream sandwiches, which elevate the classic cookie and cream combo into a delightful, soft treat that anyone can whip up at home. No fancy gadgets or complex techniques required!
Why are no-churn recipes such a game-changer for homemade desserts? Well, for starters, they simplify the process. You can indulge your sweet tooth without the need for special kitchen equipment or hours of preparation. Plus, no-churn desserts often use easy-to-find ingredients, making them accessible to everyone—even if you're short on time or culinary experience. With just a handful of pantry staples, you can create icy goodness that rivals store-bought varieties.
These no-churn Oreo ice-cream sandwiches not only cater to dairy-free diets, but they also eliminate the hassle of churning ice cream. Whether you're hosting a summer gathering or just want to treat yourself after a long day, this recipe promises satisfaction without the fuss. So, grab your ingredients and get ready for a sweet adventure!
Ingredients for No-Churn Oreo Ice-Cream Sandwiches
Creating delicious no-churn Oreo ice-cream sandwiches at home is super simple when you have the right ingredients. Let’s break it down into two main components: the cookie base and the cream filling.
Essential Ingredients for the Cookie Base
- 600 g Classic Oreo Cookies: These provide that beloved chocolatey crunch. If you prefer a gluten-free option, feel free to swap them with gluten-free cookies.
- 180 g Dairy-Free Butter: This is key for binding your cookie base together. If you don’t have dairy-free butter on hand, you can use melted coconut oil as a great substitute.
Key Ingredients for the Cream Filling
- 400 ml Dairy-Free Whipping Cream: Make sure it’s chilled for optimal whipping; this is what gives your ice cream its light and fluffy texture.
- 300 g Vegan Condensed Milk: You can use store-bought or opt for a homemade version if you’re feeling adventurous. This will sweeten and enrich the cream filling beautifully.
With these essential ingredients in hand, you’re well on your way to crafting mouthwatering no-churn Oreo ice-cream sandwiches that will impress your friends and family! Don't forget to check out some tips for making the best whipped cream on Serious Eats.
Step-by-Step Preparation of No-Churn Oreo Ice-Cream Sandwiches
If you’re looking to impress friends or simply indulge in a sweet treat, no-churn Oreo ice-cream sandwiches are the answer! They are quick to prepare and don’t require an ice-cream maker. Let’s dive into the steps for preparing these delicious sandwiches.
Gather Your Equipment
Before you begin whipping up your no-churn Oreo ice-cream sandwiches, get your kitchen ready. You’ll need:
- An 8x8 inch baking tin – this is perfect for molding your ice-cream sandwiches.
- A food processor – essential for creating those fine Oreo crumbs.
- A mixing bowl – for combining your filling ingredients.
Having everything set up ahead of time will streamline the process and make for a fun baking experience!
Prepare the Cookie Base
Now, let's tackle that delectable cookie base.
- Line your 8x8 inch baking tin with greaseproof or parchment paper. This ensures easy removal later.
- In your food processor, blend 500g of Classic Oreo cookies until they become fine crumbs. If you prefer a gluten-free version, feel free to substitute them with gluten-free cookies.
- Melt 180g of dairy-free butter and combine this with the crumbled Oreos until the mixture is sticky enough to hold together. This will form the delicious bottom layer of your sandwiches.
After these steps, you should have a thick, crumbly mixture!
Make the Cream Filling
Next up is the creamy, dreamy filling that makes these sandwiches irresistible.
- In a mixing bowl, whip together 400ml of dairy-free whipping cream and 300g of vegan condensed milk. Whip until the mixture thickens and forms peaks, giving you that rich, creamy texture.
- Fold in the remaining 100g of crumbled Oreos into the whipped cream. This adds delightful chunks of Oreo to your filling, making it even more delicious.
Assemble the Ice-Cream Sandwiches
With your cookie base and cream filling ready, it's assembly time!
- Spread the cream filling evenly over the prepared Oreo base in your baking tin.
- For that extra crispy layer, sprinkle the remaining Oreo crumble on top and gently press it down to adhere.
This layering is essential for achieving that classic ice-cream sandwich vibe!
Freezing and Setting
Finally, it's time to let your creation set.
- Cover the tin tightly with cling film and freeze it for at least 6 hours or let it sit overnight for the best results.
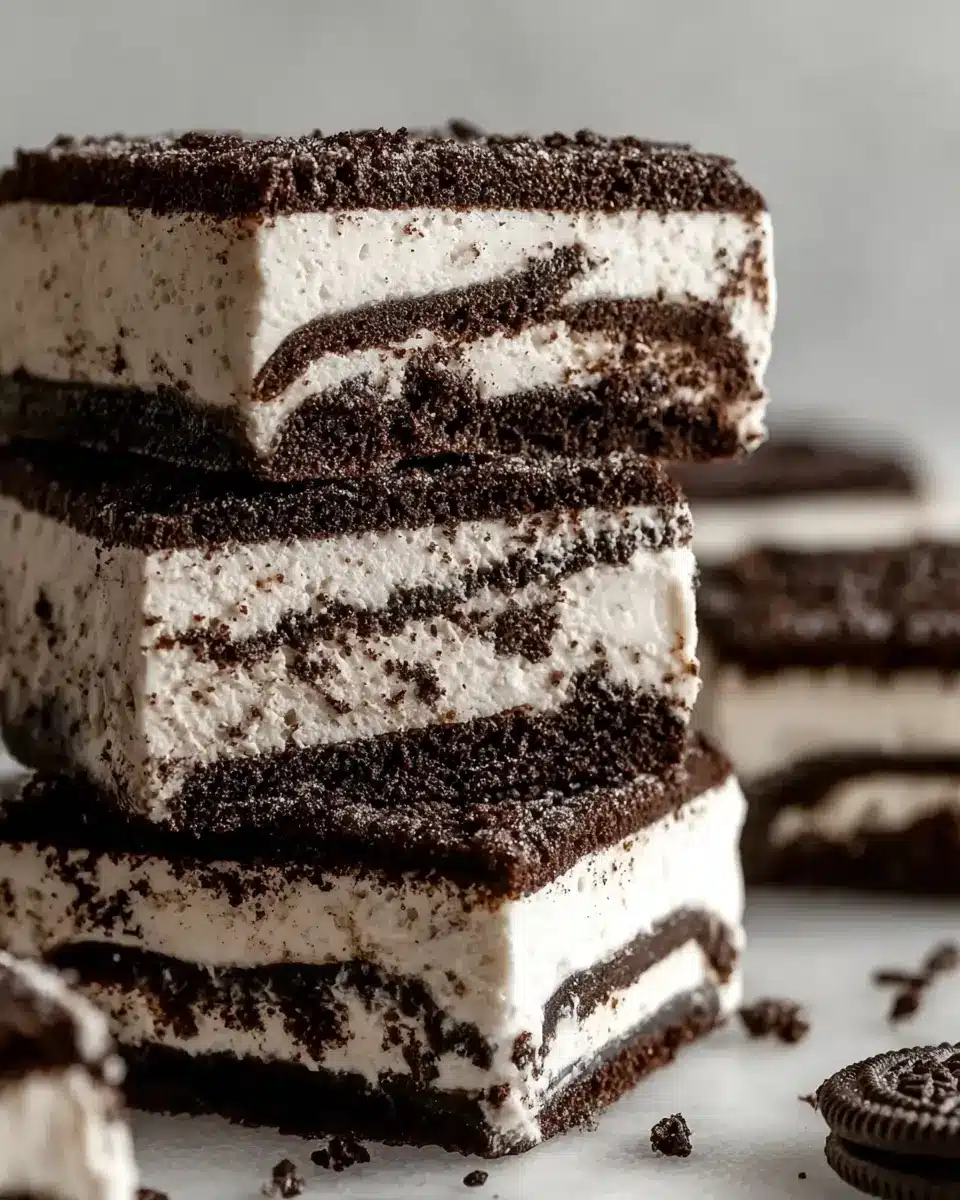
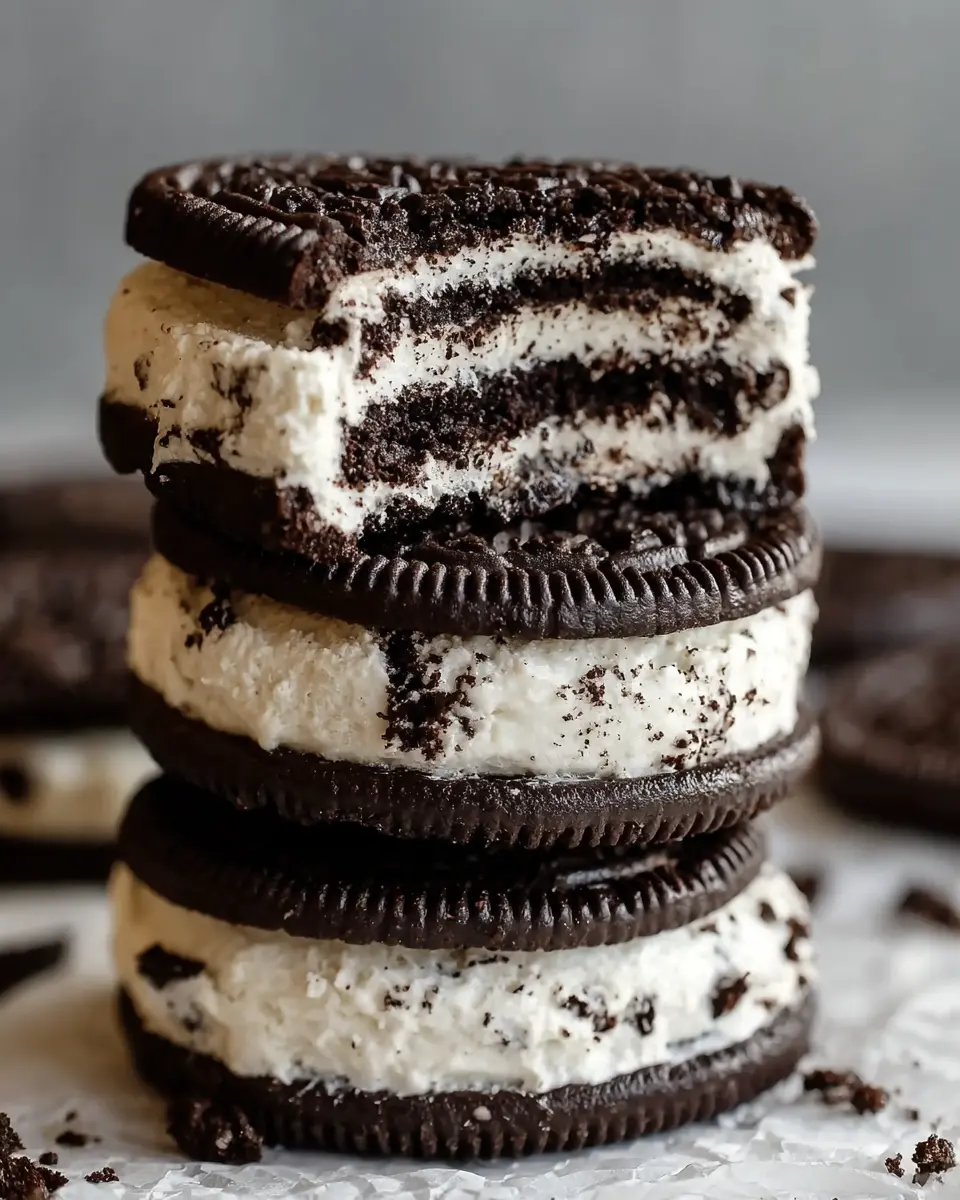
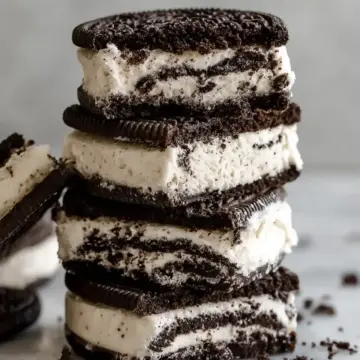
- When you’re ready to serve, lift the block out of the tin using the parchment paper. Cut into bars with a warm knife for clean edges.
Voilà! You’ve created the ultimate no-churn Oreo ice-cream sandwiches that everyone will love. So, why not make another batch?
For more creamy dessert ideas, you can check resources like Delish or Food Network. Enjoy!

Variations on No-Churn Oreo Ice-Cream Sandwiches
Cookie Substitution Options for Allergies
When making your delicious no-churn Oreo ice-cream sandwiches, consider using alternative cookies for those with dietary restrictions. Gluten-free cookies, like Pamela's or Kinnikinnick, are excellent options that don’t skimp on flavor. You can also experiment with homemade cookie recipes using almond flour for a nut-friendly, gluten-free base.
Flavor Variations for the Cream Filling
The cream filling is where you can truly make these sandwiches your own. Try infusing the whipped cream with vanilla extract for a classic touch or add a swirl of peanut butter for a rich, nutty flavor. For a refreshing twist, mix in a bit of mint extract or some crushed fruit like strawberries or raspberries. The variations are endless! Each flavor will create a uniquely delightful treat. What will you create?
For more inspiration on cookie alternatives and flavor combinations, check out Gluten-Free Living and The Kitchn.
Cooking Tips and Notes for No-Churn Oreo Ice-Cream Sandwiches
Tips for Perfect Texture and Flavor
Achieving the ultimate no-churn Oreo ice-cream sandwiches is all about maintaining that ideal texture and flavor balance. Here are some handy tips:
-
Chill Your Tools: Make sure your mixing bowl and beaters are chilled for optimal whipping of the dairy-free cream; this can help achieve those beautiful peaks.
-
Oreo Crumble Consistency: Blend the Oreos to a fine crumb for a smoother mix, but leave some larger pieces if you like added crunch in your filling.
-
Adjust Sweetness: Taste your whipped mixture before folding in the crumbled Oreos. You can enhance sweetness by adding more condensed milk, but remember, the Oreos also bring sweetness.
-
Freezing Time: While six hours is a minimum, letting your sandwiches freeze overnight ensures a firmer, more delightful texture.
For some helpful tricks, check out these creamy dessert tips that can elevate your ice cream-making game!
Serving Suggestions for No-Churn Oreo Ice-Cream Sandwiches
Presentation Ideas for Parties
When it comes to serving no-churn Oreo ice-cream sandwiches at your next gathering, a little creativity goes a long way. Consider stacking them in a tiered dessert display for a stunning effect that draws the eye and tempts the palate. You could also use colorful plates or rustic wooden boards to elevate the presentation. For added flair, garnish each sandwich with a drizzle of chocolate or a sprinkle of crushed Oreos. These simple touches will make your dessert table unforgettable!
Creative Pairings to Enhance Enjoyment
To elevate your no-churn Oreo ice-cream sandwiches, think beyond just ice cream. Pair them with a scoop of fresh fruit sorbet for a refreshing contrast, or serve with a drizzle of caramel sauce for that extra indulgence. A side of creamy coconut whipped topping adds a luscious texture, while a cup of rich coffee or a chilled glass of almond milk can enhance the flavors beautifully. The possibilities are endless—experiment and find what excites your taste buds the most!
Time Breakdown for No-Churn Oreo Ice-Cream Sandwiches
Preparation Time
The prep for these delightful no-churn Oreo ice-cream sandwiches takes about 30 minutes. This includes the time it takes to blend the cookies, mix the whipped cream, and assemble everything in the baking tin.
Freezing Time
Once your sandwiches are ready, they need to chill in the freezer for at least 6 hours, or ideally overnight. This step is crucial for achieving that perfect scoopable texture.
Total Time
In total, you're looking at about 6 hours and 30 minutes from start to finish. The majority of this time is waiting for your heavenly ice-cream sandwiches to freeze, which gives you plenty of opportunities to daydream about your delicious creation!
Nutritional Facts for No-Churn Oreo Ice-Cream Sandwiches
When you dive into the delightful world of no-churn Oreo ice-cream sandwiches, knowing what you're indulging in can enhance your enjoyment. Each serving packs approximately 250 calories, providing a balance of 30g of carbohydrates, 15g of fat, and just 2g of protein. These numbers make it a sweet treat worth savoring!
Key Vitamins and Minerals
These ice-cream sandwiches aren't just about the taste; they also offer some nutritional benefits. With each bar, you'll likely get small amounts of potassium (100mg) and calcium (around 2mg). While they might not replace your daily vitamin intake, they offer a fun way to enjoy your favorite flavors while treating yourself.
For those looking to make healthier choices, consider incorporating some nutrient-rich alternatives. For instance, check out this article on nutritional benefits of dairy alternatives to enhance your recipes!
FAQs about No-Churn Oreo Ice-Cream Sandwiches
Can I make this recipe gluten-free?
Absolutely! To whip up these delightful no-churn Oreo ice-cream sandwiches in a gluten-free version, simply substitute the classic Oreo cookies with gluten-free Oreo cookies or any other gluten-free cookie that you love.
How long can I store leftovers?
If you're lucky enough to have leftovers, you can store your no-churn Oreo ice-cream sandwiches in the freezer for about 2 to 3 weeks. Just make sure they’re tightly wrapped or stored in an airtight container to keep them fresh and prevent freezer burn.
What's the best way to enjoy these sandwiches?
There's no wrong way to enjoy your no-churn Oreo ice-cream sandwiches! For the ultimate experience, let them sit at room temperature for a couple of minutes before indulging. This way, the creamy filling becomes a bit softer, creating a heavenly melt-in-your-mouth moment! Pair them with a hot cup of coffee or a refreshing iced tea for a perfect balance of flavors.
Feel free to reach out if you have more questions or need tips!
Conclusion on No-Churn Oreo Ice-Cream Sandwiches
Creating no-churn Oreo ice-cream sandwiches at home is not only simple, but it’s also a delightful way to indulge in a sweet treat without the fuss. With just a few ingredients and minimal effort, you can enjoy these creamy, crunchy goodies. Perfect for gatherings or solo snacking, they’re bound to impress!
No-Churn Oreo Ice-Cream Sandwiches
Equipment
- 8x8 inch baking tin
- food processor
- mixing bowl
Ingredients
For the Cookie Base
- 600 g Classic Oreo Cookies substitute with gluten-free cookies for a gluten-free version
- 180 g Dairy-Free Butter coconut oil can be used as a substitute
For the Cream Filling
- 400 ml Dairy-Free Whipping Cream make sure it’s chilled for optimal whipping
- 300 g Vegan Condensed Milk use homemade or store-bought as you prefer
Instructions
Method
- Line an 8x8 inch baking tin with greaseproof or parchment paper.
- In a food processor, blend 500g of Oreos until fine crumbs form.
- Melt the dairy-free butter and combine it with the crumbled Oreos until the mixture is sticky.
- Firmly press half of the mixture evenly into the base of the lined tin.
- Whip together the dairy-free whipping cream and vegan condensed milk until thick and peaking.
- Fold in the remaining 100g of crumbled Oreos into the whipped mixture.
- Spread the ice-cream filling over the Oreo base.
- Sprinkle the remaining Oreo crumble on top and gently press it to adhere.
- Cover the tin with cling film and freeze for at least 6 hours or overnight.
- Once set, lift out the block and cut into bars using a warm knife.


Leave a Reply