
Introduction to Monster Cookie No Bake Bars
Why Monster Cookie No Bake Bars are a Game-Changer for Young Professionals
Let’s be real: life as a young professional can be hectic. Between juggling work, social commitments, and maybe even a side hustle, there's little time for complex baking projects. That’s where Monster Cookie No Bake Bars come into play! This delicious treat captures the delightful flavor of classic monster cookies without the need for an oven.
Imagine a sweet, chewy bar infused with creamy peanut butter, hearty oats, and a sprinkle of colorful mini M&Ms—all ready in just 15 minutes of prep time! You can whip up these bars quickly, allowing you to channel your inner pastry chef even on the busiest of days. Plus, with a chill time of just an hour, they're perfect for last-minute gatherings or a sweet personal treat after a long week.
Not only are these bars a hit at parties, but they also fit seamlessly into your weeknight routine. They are rich in fiber and can even serve as a great pick-me-up for those mid-afternoon slumps. Want to learn more about making simple desserts with wholesome ingredients? Check out this guide on quick no-bake recipes for busy lifestyles. With Monster Cookie No Bake Bars, you can treat yourself without all the fuss!
Ingredients for Monster Cookie No Bake Bars
Creating the perfect Monster Cookie No Bake Bars starts with selecting the right ingredients. Here’s a breakdown to help you gather everything you need.
Essential ingredients for the base
For the delicious base of your bars, you’ll need:
- Butter: ½ cup, softened (this adds creaminess)
- Granulated sugar: ½ cup (for sweetness)
- Light brown sugar: ¼ cup (adds a hint of molasses flavor)
- Creamy peanut butter: 1 cup (the heart of the monster flavor!)
- All-purpose flour: ½ cup (make sure to heat it to eliminate any harmful bacteria)
- Vanilla extract: 1 teaspoon (for that warm, inviting aroma)
- Old fashioned oats: 2 cups (provides texture and chewiness)
- Mini M&M's: ¾ cup (colorful pops of joy)
Topping essentials
To crown your monster cookie no bake bars, you’ll need:
- Semi-sweet chocolate chips: 1 ¼ cups (for that rich chocolate layer)
- Heavy cream: 3 tablespoons (to create a silky chocolate topping)
- Mini M&M's: ¼ cup (a festive finishing touch)
With these ingredients, you’re just a few simple steps away from enjoying a delightful dessert! Whether you're preparing for a cozy night in or a casual gathering with friends, don’t forget to check out our tips on how to elevate your bars with fun mix-ins or alternative toppings on popular culinary sites like Food Network or Serious Eats. Enjoy!
Preparing Monster Cookie No Bake Bars
Making Monster Cookie No Bake Bars is an easy and enjoyable process that transforms classic cookie flavors into a simple dessert. Let’s guide you through each step so you can create these rich, delicious bars without even turning on the oven.
Heating the flour safely
First things first, we need to ensure our flour is safe to eat. Flour can sometimes contain bacteria, so it's crucial to heat it to 160º F. You have two options here:
- Microwave Method: Place the flour in a microwave-safe bowl and heat for about 1 minute, stirring every 20 seconds to ensure even heating.
- Oven Method: Spread the flour on a baking sheet and pop it in a preheated oven at 350º F for about 5 minutes.
Once you’ve heated the flour, let it cool before using it in the monster cookie no bake bars. This step is vital for both safety and texture!
Setting up your baking dish
Now that your flour is ready, it’s time to prepare your baking dish. Line a 9-inch square baking dish with either foil or parchment paper. This will make it easier to remove the bars later and help with cleanup. Be sure to leave some overhang so you can easily lift the bars out once they’re set.
Mixing the cookie dough
In a large mixing bowl, cream together:
- ½ cup softened butter
- ½ cup granulated sugar
- ¼ cup light brown sugar
Use a hand mixer on medium speed until well combined. Next, add in 1 cup of creamy peanut butter and 1 teaspoon of vanilla extract. Mix until smooth.
Now, it’s time to add the flour you heated earlier. Fold it in until just incorporated, and gradually mix in 2 cups of old-fashioned oats until the dough starts to take shape. Finally, fold in ¾ cup of mini M&M's for that classic monster cookie flair.
Forming the cookie base
Once your cookie dough is mixed, transfer it to the prepared baking dish. Press the dough evenly into the bottom, making sure to distribute it well in the corners. This ensures your monster cookie no bake bars have a solid structure.
Melting the chocolate topping
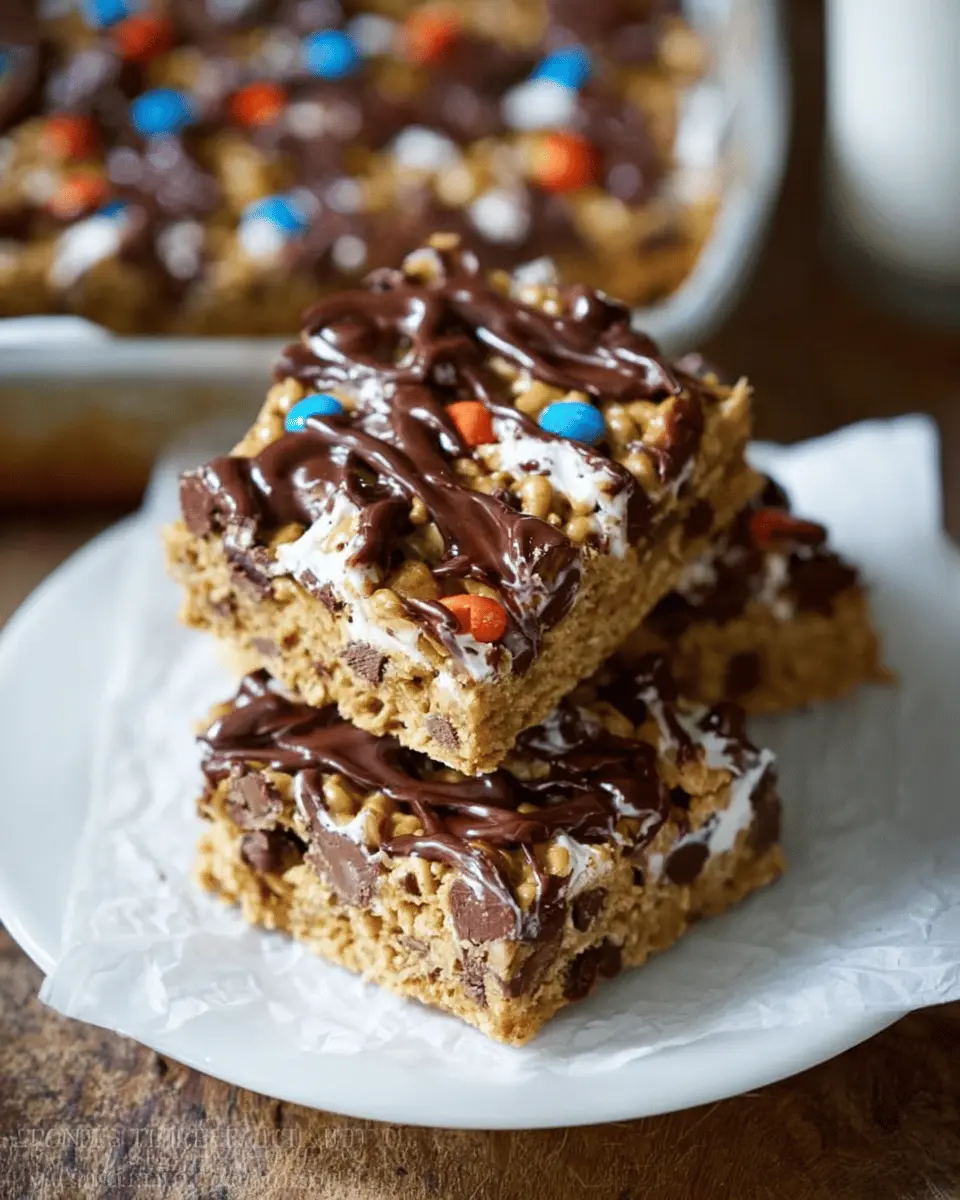
The next step is to melt the chocolate topping. In a microwave-safe bowl, combine 1 ¼ cups of semi-sweet chocolate chips with 3 tablespoons of heavy cream. Heat in 30-second increments, stirring after each interval, until you achieve a smooth consistency.
Assembling the bars
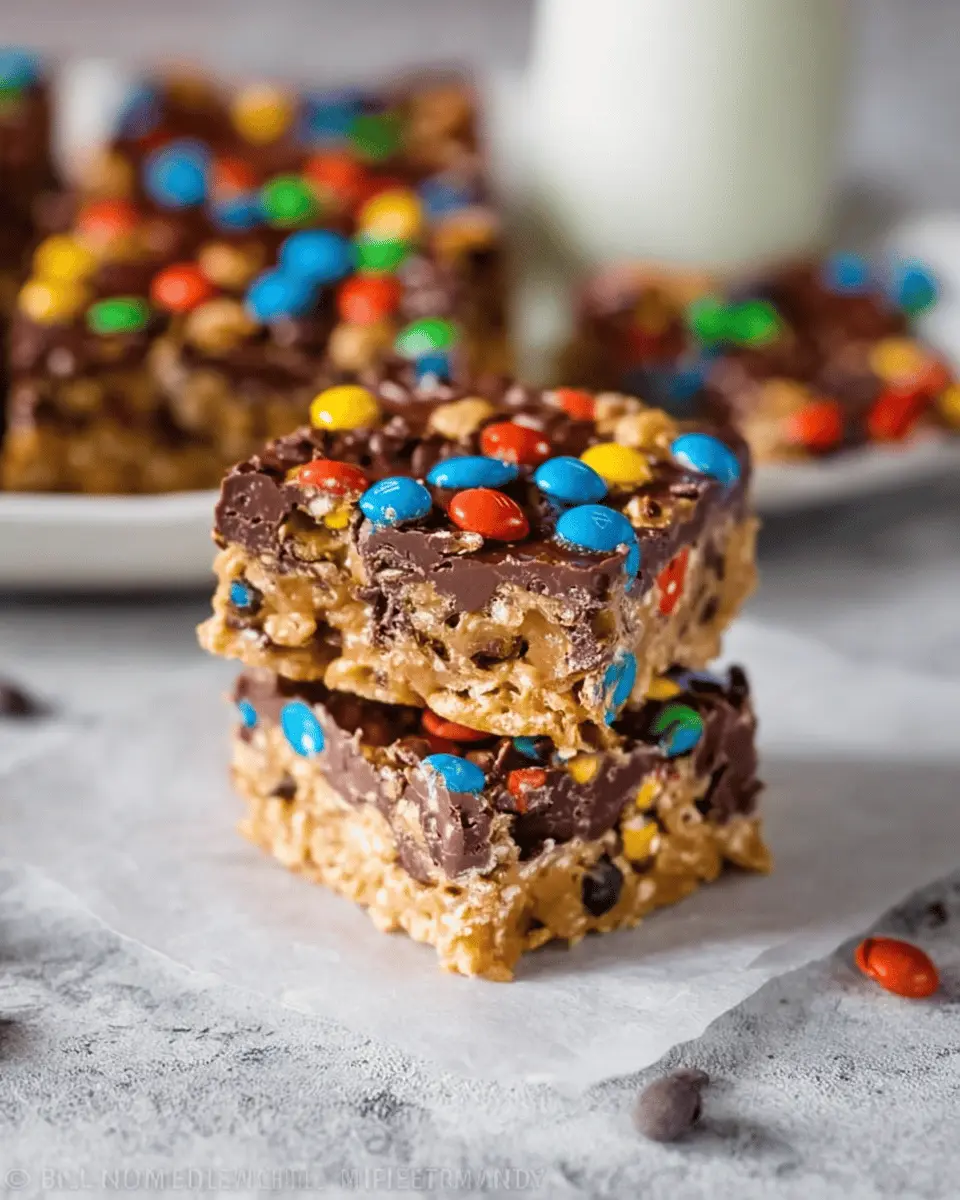
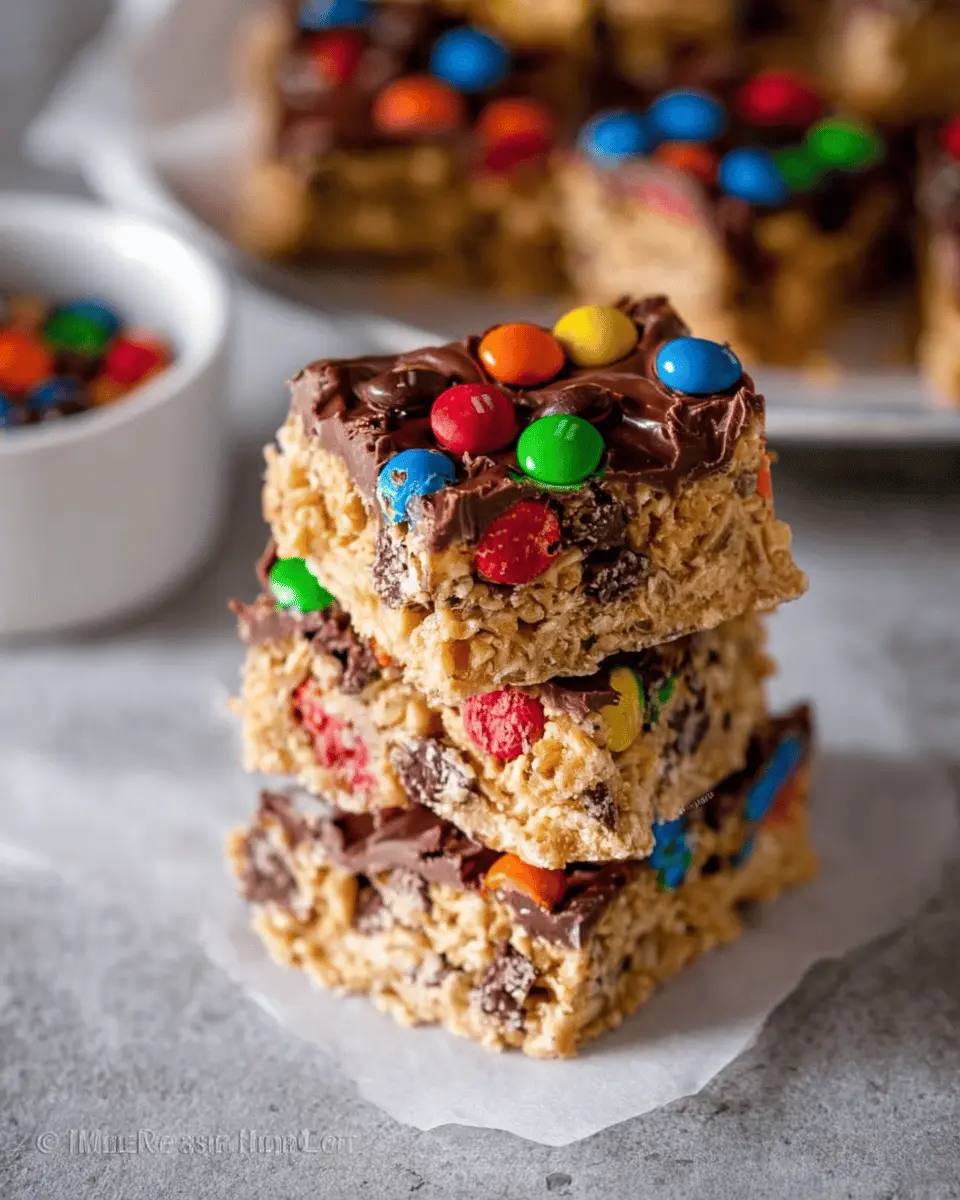
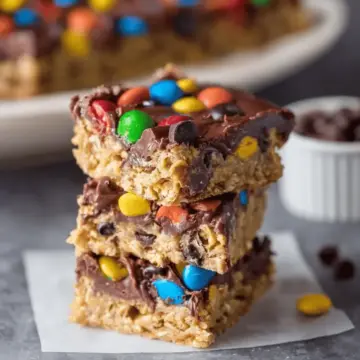
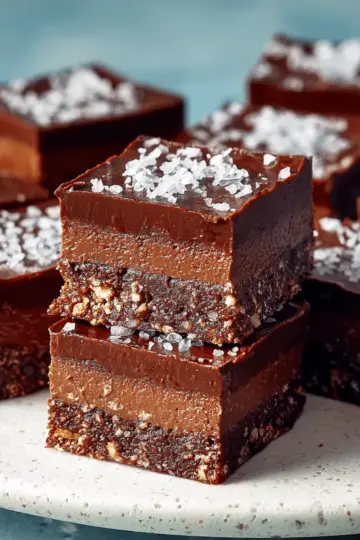
Pour the melted chocolate over the cookie base, using a spatula to spread it evenly. For an extra treat, sprinkle the remaining ¼ cup of mini M&M's over the chocolate layer. This not only enhances the flavor but makes the bars visually appealing too!
Chilling to perfection
Now, place your assembled bars in the refrigerator. Chill for at least 1-2 hours or until the chocolate is fully set. Patience is key here! Once they're cool, lift the bars out using the overhang and cut them into squares.
And there you have it—your delightful Monster Cookie No Bake Bars are ready to be enjoyed! These bars are perfect for a quick dessert or a sweet snack, making them a favorite for any gathering. Enjoy!
Variations on Monster Cookie No Bake Bars
Gluten-free Version
Craving monster cookie no bake bars without gluten? It's simple! Just swap out the all-purpose flour for a gluten-free blend. Look for a certified gluten-free flour to ensure no cross-contamination. Most blends will mimic the texture you love, keeping your bars gooey and delicious!
Vegan Adaptation
Want to make a vegan version of your favorite no bake bars? Replace the butter with coconut oil and use a plant-based peanut butter. For the chocolate topping, try using dairy-free chocolate chips and a splash of almond milk instead of heavy cream. These swaps will let you enjoy these indulgent bars while sticking to your dietary preferences!
For more handy tips on variations, you can check out this gluten-free baking guide and explore vegan dessert ideas. Happy baking!
Cooking Tips and Notes for Monster Cookie No Bake Bars
Importance of Properly Heating Flour
Before diving into your delicious monster cookie no bake bars, remember to properly heat your flour. This step is crucial to eliminate any harmful bacteria that might linger. Microwaving it for about one minute while stirring every 20 seconds or baking it at 350°F for five minutes will get it to the right temperature (160°F). Trust me, it's a small step that can make a big difference in ensuring your treat is safe and scrumptious!
Tips for Achieving the Perfect Consistency
To achieve that ultimate, fudgy texture in your monster cookie no bake bars, make sure to incorporate the oats gradually. Adding them in increments allows for even distribution, avoiding overly sticky or dry sections. If your mixture feels too dry, you can always add a splash of cream or a touch more peanut butter. And remember, patience is key when pressing the mixture into the pan – a firm, even press ensures clean slices later!
Serving suggestions for Monster Cookie No Bake Bars
Pairing with dessert neighbors
These monster cookie no bake bars are delightful standalone treats, but they really shine when paired with dessert companions. Consider serving them alongside a scoop of vanilla ice cream for a classic parlour vibe—or try a rich caramel sauce drizzled on top for an additional touch of decadence. They also complement fresh fruit platters; the fruity acidity counters the sweetness beautifully. You could even create a dessert charcuterie board, featuring your bars, cheese, and chocolate. For more inspiration, check out dessert pairing ideas from The Spruce Eats.
Ideal occasions to showcase these bars
Versatile and festive, monster cookie no bake bars are perfect for a variety of occasions! Whether it's a summer picnic, birthday party, or holiday gathering, these bars spark joy with their colorful M&M’s and delicious flavors. Their no-bake nature makes them an easy, stress-free option for last-minute entertaining or weekday cravings. Imagine sharing them at your next game night or potluck; they’re sure to be a hit! Looking for more ideas? Check out this list of fun dessert ideas for gatherings.
Time Breakdown for Monster Cookie No Bake Bars
Preparation Time
These scrumptious monster cookie no bake bars require just 15 minutes of your time for preparation. That’s right—no oven required! You'll have everything mixed and ready in no time.
Chill Time
Once you've pressed your mixture into the pan, it’s time for a little patience. Pop the bars in the fridge to chill for 1 hour, letting all those delightful flavors meld together while the chocolate sets.
Total Time
All in all, you’re looking at a total of 1 hour and 15 minutes from start to finish. With most of that time being passive, you can kick back and relax while you await your tasty, no-cook treat!
Now that you’ve got the timing down, why not jump right into making these delicious bars? Trust me, the effort is so worth those gooey, chocolatey bites! If you're curious about whipping up more desserts without turning on your oven, check out No Bake Treats for inspiration.
Nutritional Facts for Monster Cookie No Bake Bars
Calories per serving
Each serving of Monster Cookie No Bake Bars comes in at approximately 383 calories. This makes them a hearty option for those mid-afternoon cravings or a satisfying dessert after dinner.
Breakdown of key nutrients
These delicious bars deliver a delightful mix of nutrients:
- Carbohydrates: 41g
- Protein: 7g
- Fat: 23g
- Saturated Fat: 11g
- Fiber: 3g
- Sugar: 26g
Packed with ingredients like oats and peanut butter, these bars offer a delightful balance of energy-boosting carbs and satisfying protein. If you’re looking for a treat that also provides some nutritional benefits, these bars are a great choice. Remember, moderation is key, especially with all that satisfyingly sweet chocolate and M&M's!
For those looking to enhance their nutrient intake, consider pairing these bars with a side of fresh fruit or a glass of milk, allowing you to enjoy the sweetness while still keeping a balanced diet.
Feeling inspired? For more nutritional tips, check out resources like the U.S. Department of Agriculture’s MyPlate for healthy eating guidelines!
FAQs about Monster Cookie No Bake Bars
Can I make these bars in advance?
Absolutely! These monster cookie no bake bars are perfect for making ahead of time. You can store them in the refrigerator for up to one week. Just be sure to keep them wrapped tightly or in an airtight container to maintain their delicious texture and flavor!
How should I store the leftover bars?
To keep your leftover bars fresh, place them in an airtight container and store them in the refrigerator. You can also freeze them for up to three months if you’d like to enjoy them later! Just remember to let them thaw in the fridge for a few hours before indulging.
What can I substitute for peanut butter?
If you're looking for alternatives to peanut butter due to allergies or personal preference, you can use any nut butter, such as almond or cashew butter. For a nut-free option, sunflower seed butter works beautifully, providing a similar creamy texture without the allergens. You can find more tips on substitutes at The Kitchn.
Feel free to get creative and mix it up!
Conclusion on Monster Cookie No Bake Bars
In conclusion, monster cookie no bake bars provide a delightful balance of flavors and textures that make them an irresistible treat. Perfect for busy days or spontaneous gatherings, these bars are quick to prepare and require no baking. Try them out, and indulge in the yummy goodness!
Monster Cookie No Bake Bars
Equipment
- 9-inch baking dish
- microwave
- mixing bowl
Ingredients
Cookie Dough
- ½ cup butter, softened
- ½ cup granulated sugar
- ¼ cup light brown sugar
- 1 cup creamy peanut butter
- ½ cup all-purpose flour
- 1 teaspoon vanilla extract
- 2 cups old fashioned oats
- ¾ cup mini M&M's
Topping
- 1 ¼ cup semi-sweet chocolate chips
- 3 Tablespoons heavy cream
- ¼ cup mini M&M's
Instructions
Preparation
- Start by heating your flour. You can microwave for 1 minute, stirring every 20 seconds, or bake at 350º F for 5 minutes. You want the flour to be 160º F. Let it cool.
- Line a 9-inch baking dish with foil or parchment paper.
- Combine butter, sugar, and brown sugar together in a large bowl. Mix at medium speed until combined.
- Add peanut butter and the vanilla, mix until well blended.
- Stir in the flour mixing until just incorporated.
- Slowly add oats, 1 cup at a time until it forms a dough.
- Fold in M&M's. Press into prepared pan.
- In a microwave safe bowl melt together chocolate and heavy cream, in 30 second increments. Once smooth, pour over cookie dough mixture. Sprinkle with remaining M&M's.
- Refrigerate for 1-2 hours, or until chocolate is completely set up before serving.
Leave a Reply