
Introduction to Deep-Fried Blooming Onion
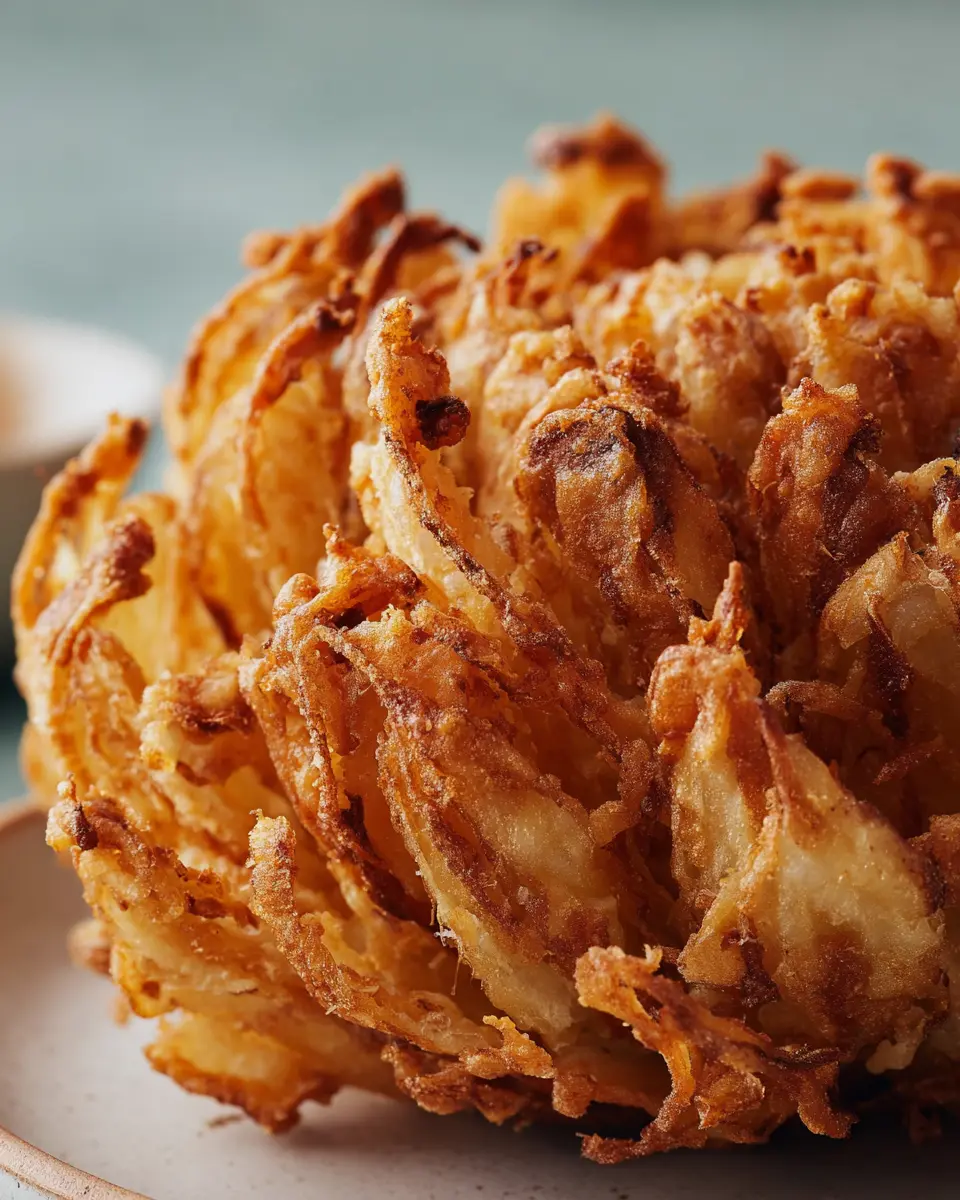
If you're looking to impress your friends or family at your next gathering, a deep-fried blooming onion is an absolute must-try! This iconic appetizer, often found at fairs and restaurants, brings a unique twist to the traditional onion ring, transforming a simple onion into a stunning, flower-like creation that is not only visually appealing but also bursting with flavor.
Why the Blooming Onion is a Must-Try for Home Cooks
The beauty of a blooming onion lies in its simplicity and its versatility. As a home cook, you have the opportunity to tailor this dish to suit your personal taste. Whether you're aiming for a spicy kick or a mild, savory delight, the seasoning options are endless.
Additionally, making a deep-fried blooming onion at home allows you to control the quality of ingredients, ensuring that low-quality oils or additives don’t spoil this delightful experience. The hands-on nature of preparing this dish also adds a fun, interactive element to your cooking that will engage everyone in the kitchen.
Need tips on how to elevate your blooming onion? Check out this guide on perfect frying techniques to ensure your onion turns out crispy and golden every time. So, roll up your sleeves and let's dive into the delicious world of deep-fried blooming onions!
Ingredients for Deep-Fried Blooming Onion
Creating the ultimate deep-fried blooming onion starts with the right ingredients. Let’s break it down:
Essential ingredients for a perfect bloom
To achieve that deliciously crispy texture and flavorful punch, you’ll need:
- Large sweet onion: A Vidalia or similar variety works best, as its sweetness balances the savory batter.
- High-heat oil: Canola, corn, or peanut oil are all excellent choices for deep-frying.
- All-purpose flour: This gives the blooming onion its crunchy coating.
- Spices: Paprika, kosher salt, dried oregano, cayenne pepper, ground cumin, garlic powder, and freshly ground black pepper add depth and complexity.
Mixing these essentials together will give you that iconic bloom you crave!
Optional ingredients for dipping sauce
While the deep-fried blooming onion is tasty on its own, a well-matched dipping sauce can elevate the experience. Consider whipping up a classic sauce using mayonnaise and ketchup or explore tangy options like ranch or spicy aioli. You can find a great dipping sauce recipe here that perfectly complements your creation!
Preparing a Deep-Fried Blooming Onion
Creating a deep-fried blooming onion at home is not just about following a recipe; it’s an experience that brings the joy of cooking straight into your kitchen. Let’s break it down step by step, ensuring you’re prepped and ready for this delicious endeavor!
Gather Your Tools and Ingredients
To get started, it’s essential to have all your tools and ingredients lined up, so you’re not running around the kitchen mid-recipe. Here’s what you’ll need:
- Tools: A large stockpot for frying, a whisk, a sharp chef's knife, a baking sheet, and a wire rack.
- Ingredients:
- 4 quarts high-heat oil (canola, corn, or peanut)
- 1 large sweet onion (like a Vidalia)
- 1 cup all-purpose flour
- A variety of spices including paprika, cayenne, and garlic powder
- 2 large eggs
- ½ cup buttermilk or milk
- Optional: Your favorite dipping sauce
Having everything ready will streamline the process and make it more enjoyable.
Preparing the Oil for Frying
Frying is all about temperature management. Heat up 4 quarts of your chosen oil in a large stockpot over medium-high heat until it reaches 375°F. Keep in mind, hot oil can be dangerous, so ensure there's enough space in the pot to avoid spills. For safety tips and techniques on frying, check out this guide from Serious Eats.
Breading the Onion
While your oil heats up, it’s time to prepare the breading. In a large bowl, combine:
- 1 cup all-purpose flour
- 1 tablespoon paprika
- 3 teaspoons kosher salt (reserve ¼ teaspoon for later)
- 1 teaspoon dried oregano
- ¾ teaspoon cayenne pepper
- ¾ teaspoon ground cumin
- ¾ teaspoon garlic powder
- ½ teaspoon black pepper
Whisk these together until well mixed, then set aside about ¾ cup of this flour mixture for later use.
Cutting and Prepping the Onion
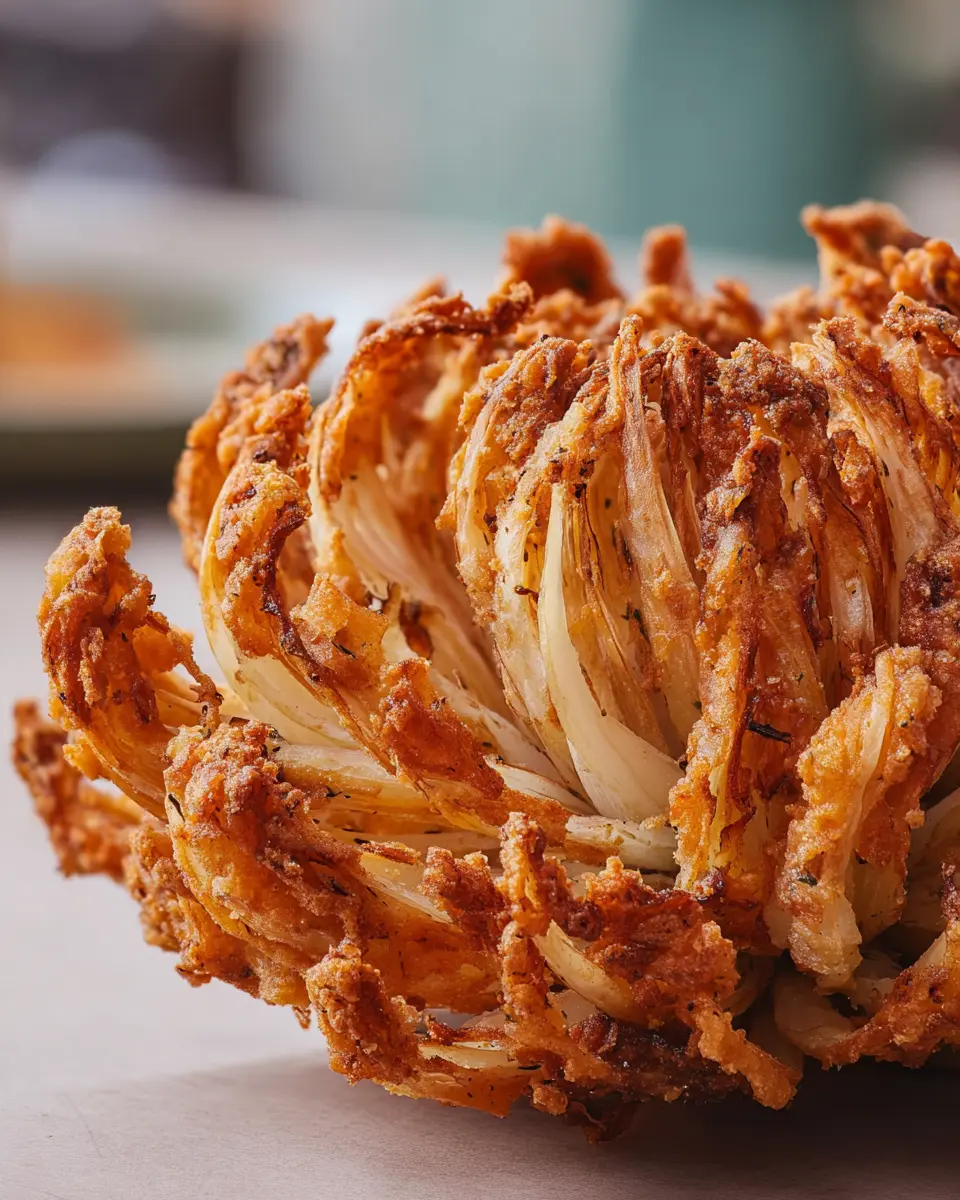
Cutting the onion is where the magic happens—literally. To prepare, trim off the top of the onion and remove the outer skin. Place it root-side up and make strategic cuts into the onion, ensuring the root stays intact. It’s like giving the onion a fascinating haircut! This is essential for creating that blooming effect, allowing it to open beautifully during frying.
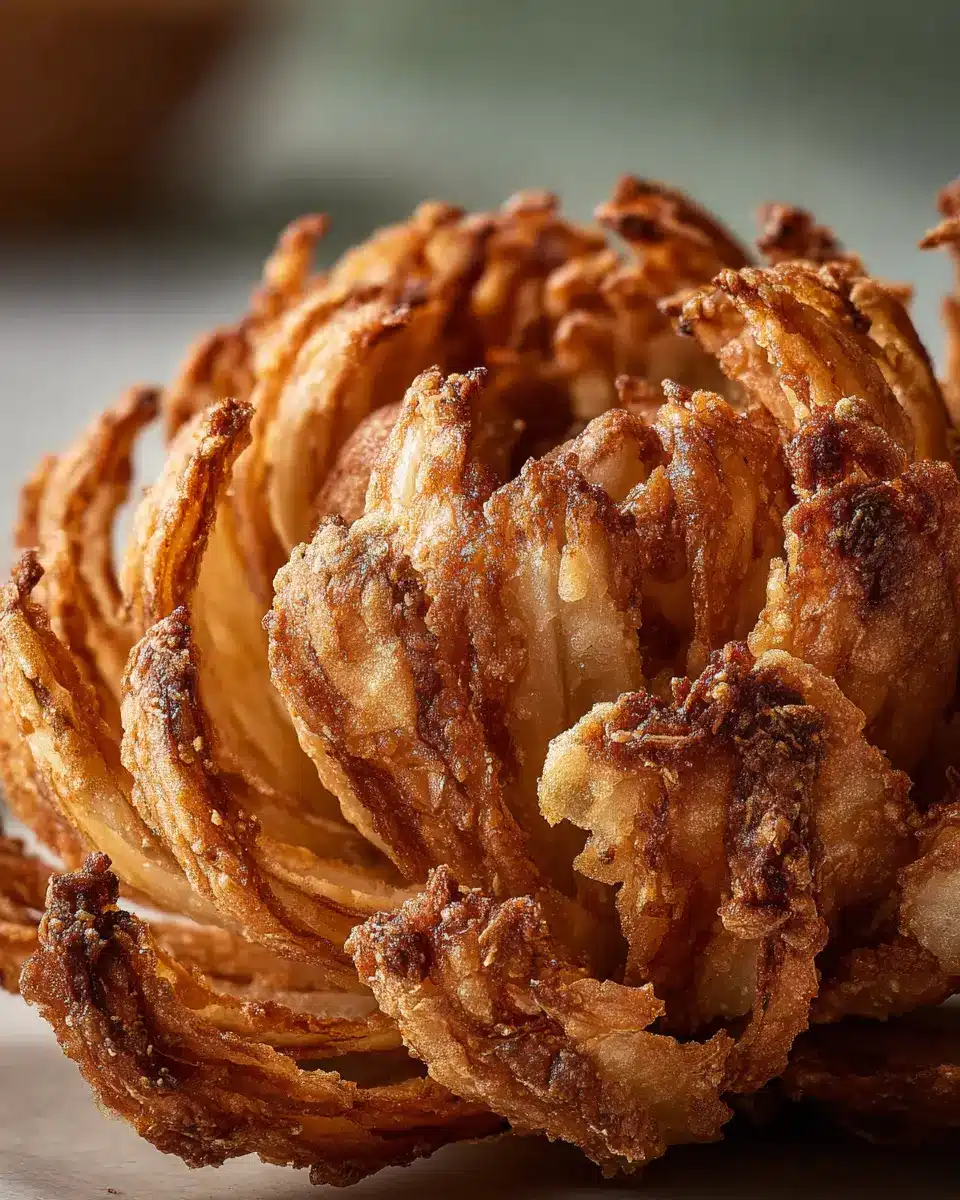
Frying the Onion to Perfection
Once your onion is prepped and your oil is sizzling, it’s showtime!
- Place the breaded onion, cut side up, into the hot oil using a spider or slotted spoon.
- Fry for about 4 minutes until golden brown, then carefully flip and fry for another 3-4 minutes.
- Once cooked, let any excess oil drip off on a wire rack.
Don’t forget to sprinkle the leftover salt over your onion for that final touch!
Whether you're prepping for a gathering or just indulging after a long week, your deep-fried blooming onion will surely delight and impress. Enjoy with a zesty dipping sauce for an unforgettable bite!
Variations of Deep-Fried Blooming Onion
Blooming onion with a spicy twist
If you're looking to amp up the flavor of your deep-fried blooming onion, consider adding a spicy kick! Incorporate some chopped jalapeños into the egg mixture or invite a dash of sriracha into your dipping sauce. This will not only provide a delightful heat but also elevate the overall taste experience. You might even try using a spicy seasoning blend instead of traditional spices—perfect for those who love a fiery bite!
Gluten-free blooming onion options
For those with gluten sensitivities, creating a gluten-free deep-fried blooming onion is easier than you might think! Substitute all-purpose flour with a gluten-free flour blend or almond flour. Additionally, ensure your spices are certified gluten-free. If you're new to gluten-free cooking, check out resources from organizations like The Gluten Intolerance Group for tips and recipes. Your friends will be none the wiser, enjoying this delicious treat without compromising on flavor!
Cooking Tips and Notes for Deep-Fried Blooming Onion
Pro Tips for Achieving the Ideal Crunch
To ensure a perfectly crispy deep-fried blooming onion, frying temperature is key. Aim for that sweet spot of 360-375ºF; this helps achieve a golden brown texture. Don’t rush the frying process; allowing each side to cook for about 4 minutes ensures optimal crispness. Consider using a thermometer to monitor the oil temperature accurately, and remember to maintain it as you fry.
Common Pitfalls to Avoid
Common mistakes can lead to soggy results. Avoid over-breading the onion; the goal is a light coating that allows the flavors to shine through. Additionally, if you're preparing the onion in advance, resist the urge to refrigerate it after breading, as moisture can dampen the crunch. Instead, fry it fresh for the best results. If you're curious about techniques, sites like Serious Eats offer fantastic frying tips that can elevate your cooking game!
Serving Suggestions for Deep-Fried Blooming Onion
Best dips and sauces to pair with your blooming onion
The deep-fried blooming onion is truly a star dish on its own, but pairing it with the right dips can elevate your snacking experience. Classic choices include creamy ranch dressing and zesty buffalo sauce. For a twist, try a tangy garlic aioli or chipotle mayo to add some warmth. Want something more unique? A sweet and spicy mango dipping sauce can contrast beautifully with the savory flavors of the onion.
Creative platter ideas
Make your presentation pop by serving your blooming onion on a colorful platter alongside a variety of snacks. Consider including:
- Crispy sweet potato fries
- Crunchy veggie sticks (carrots, celery, and bell peppers)
- Slices of turkey bacon or chicken ham for some protein
- Mini sliders or chicken wings for fuller bites
This not only looks impressive but also gives your guests a delightful array of tastes and textures to enjoy. Use this chance to experiment with themes, such as a backyard barbecue or a game day feast!
Time Breakdown for Deep-Fried Blooming Onion
Preparation Time
Get your kitchen ready in about 20 minutes. This includes slicing and seasoning the onion to perfection, ensuring it's prepped for that glorious deep-fry.
Cooking Time
Expect to spend around 8 minutes frying your blooming onion. You’ll want it to reach that enticing golden brown while maintaining a tender inside.
Total Time
In total, you’re looking at about 28 minutes to create this mouthwatering deep-fried blooming onion. Perfect for a snack, appetizer, or even a side dish for game day!
Ready to take the plunge into the world of tantalizing flavors? For more detailed cooking advice, check out our guide on perfecting frying techniques. It’s all about making those onions bloom beautifully!
Nutritional Facts for Deep-Fried Blooming Onion
Calories per serving
A single serving of deep-fried blooming onion typically contains around 1,200 calories. While it's certainly a delightful treat, it's essential to enjoy it in moderation as part of a balanced diet.
Healthier swaps
Looking to lighten up your deep-fried blooming onion? Here are a few healthier alternatives:
- Use whole wheat flour instead of all-purpose flour for added fiber.
- Opt for a lighter cooking method like baking or air-frying to significantly reduce calories and fat.
- Experiment with Greek yogurt instead of buttermilk for a protein boost with fewer calories.
For more on modifying fried recipes, check out Food Network’s tips on healthy cooking swaps. This way, you can indulge guilt-free while maintaining delicious flavor!
FAQs about Deep-Fried Blooming Onion
Can I make a blooming onion without deep-frying?
Absolutely! If you're looking to enjoy a blooming onion without the extra calories from frying, consider baking or air-frying instead. Both methods will give you that satisfying crunch with less oil. Just coat your onion as instructed and bake it on a wire rack in the oven at around 400°F for 25-30 minutes, or until golden brown. For air-frying, a similar time at 375°F should work nicely.
What’s the best onion to use?
For the perfect deep-fried blooming onion, a large sweet onion, like Vidalia or Walla Walla, is your best bet. These varieties are not only milder in flavor but also hold their shape well when fried, allowing those beautiful petals to shine.
How do I store leftovers?
If you happen to have any of your delicious deep-fried blooming onion left over, store it in an airtight container in the fridge for up to 2 days. Reheat it in the oven or an air fryer to restore its original crunch. While not as good as fresh, it’s a tasty snack nonetheless!
For more tips on onion storage, you can check out the National Onion Association.
Conclusion on Deep-Fried Blooming Onion
Indulging in a deep-fried blooming onion is a delightful experience, perfect for parties or a fun night in. It's crispy, savory, and sure to impress your guests. Remember to serve it with your favorite dipping sauce for an extra kick. Enjoy creating memories around this delicious treat!
Discover more about entertaining with snacks at Epicurious, where you can find new inspiration for your next gathering.
Deep-Fried Blooming Onion
Equipment
- Large Stockpot
- whisk
- spider
- Baking Sheet
- Wire rack
Ingredients
Oil
- 4 quarts high-heat oil, such as canola, corn, or peanut for deep-frying
Onion
- 1 large sweet onion (13 to 14 ounces), such as Vidalia
Breading
- 1 cup all-purpose flour
- 1 tablespoon paprika
- 3 teaspoons kosher salt, divided
- 1 teaspoon dried oregano
- ¾ teaspoon cayenne pepper
- ¾ teaspoon ground cumin
- ¾ teaspoon garlic powder
- ½ teaspoon freshly ground black pepper
Wet Mix
- 2 large eggs
- ½ cup buttermilk, whole, or 2% milk
Dipping Sauce
- Dipping sauce optional
Instructions
Preparation
- Heat 4 quarts high-heat oil in a large stockpot (make sure there is plenty of room between the oil and the top of the pot, as it will bubble up when you add the onion) over medium-high heat until 375ºF. Meanwhile, prepare the breading and cut the onion.
- Place 1 cup all-purpose flour, 1 tablespoon paprika, 2 ½ teaspoons of the kosher salt, ¾ teaspoon cayenne pepper, 1 teaspoon dried oregano, ¾ teaspoon ground cumin, ¾ teaspoon garlic powder, and ½ teaspoon black pepper in a large bowl and whisk to combine. Remove and set aside about ¾ cup (does not need to be exact) of the flour mixture; keep the remaining in the bowl.
- Place 2 large eggs, ½ cup buttermilk or milk, and the remaining ¼ teaspoon kosher salt in a medium bowl and whisk to combine.
- Using a sharp chef’s knife, trim ½ to ¾ inch of the stem end (opposite of root end) from 1 large sweet onion and peel away the outer skin. Place the onion root-side up on the cutting board.
- Insert the tip of the knife about ½ inch below the root and cut down towards the cutting board. Do not make back-and-forth slicing motions; this will rip the petals. Spin the onion clockwise a quarter turn and repeat the cut. Repeat turning and cutting twice more.
- Avoiding the root again, make 4 more cuts between the first 4 cuts so that there are now 8 sections but the root is still intact. Make 8 more cuts between the first two rounds of cuts so that you now have 16 sections but the root is still intact.
- Flip the onion over to reveal the cuts and spread them to open like a flower. If there are any stuck pieces in the center, use the tip of your knife to slice to release (if you don’t do this, you may have raw onion in the center).
- Place the onion cut side up into the flour mixture. Sprinkle the reserved flour over the onion, making sure to spread the petals so the flour gets in all the nooks. Dust off any excess flour.
- Gently transfer the onion into the egg mixture, cut side down. In a scooping motion, lift up and spread the petals to coat completely in the egg. Scoop out some of the flour mixture into the measuring cup again, leaving some still in the bowl. Transfer the dipped onion, letting the excess liquid mixture drip back into the bowl, into the flour mixture cut side up. Spread the petals and sprinkle with the reserved flour mixture section by section so all the petals are well coated on all sides.
- Line a baking sheet with a wire rack and top with a paper towel.
- When the oil is ready, place the breaded onion in a spider cut-side up. Carefully lower into the oil (be careful, it will bubble up). The oil temperature will drop, so adjust the heat as needed to keep it between 360 to 365ºF. Fry until deep golden brown on the bottom, about 4 minutes. Flip the onion and fry until deep golden brown and knife tender, 3 to 4 minutes more.
- Using the spider, pick up the onion out of the oil cut side down and let the excess oil drip back into the pot. Place cut-side up on the paper towels. Sprinkle with the remaining ¼ teaspoon kosher salt. Let cool about 5 minutes before serving with dipping sauce if desired.

Leave a Reply