
Introduction to Mini Cheesecakes
Mini cheesecakes are far more than just cute little desserts; they embody the ideal treat for busy young professionals looking to indulge without the commitment of a full-sized cake. With their delightful bite-sized portions, these mini delights allow you to enjoy a moment of sweetness without derailing your day.
Why are mini cheesecakes the perfect treat for young professionals? For one, they strike an ideal balance between rich flavors and convenience. Whether you’re hosting a dinner party or packing lunch for a busy day at work, these mini morsels are easily transportable and can be prepped in advance, saving you precious time. Plus, they lend themselves to endless customization, so you can experiment with different toppings, flavors, and crusts to match your mood or the season.
As a young professional myself, I appreciate how a simple indulgence can turn a hectic day around. Imagine coming home after a long day and treating yourself to a beautifully piped mini cheesecake topped with fresh berries or luscious caramel. What’s not to love? Explore the delicious world of mini cheesecakes and discover the joy they can bring to your everyday life. For more inspiration, check out this baking guide.
Ingredients for Mini Cheesecakes
When crafting the perfect mini cheesecakes, it's essential to gather the right ingredients. This delectable dessert consists of two main components: the crust and the filling. Let's break down what you'll need for each.
Crust Ingredients
The crust provides a delightful crunch that complements the creamy filling. For this, you'll need:
- 1 cup (120g) graham cracker crumbs (about 8 full sheets)
- 2 tablespoons (25g) granulated sugar
- 3 tablespoons (43g) unsalted butter, melted
This combination will create a slightly sweet, buttery base for your mini cheesecakes. If you’re feeling adventurous, you can explore variations using other types of cookies for the crust, like digestive biscuits, which give a different flavor profile.
Filling Ingredients
Now, onto the oh-so-indulgent filling! Gather these ingredients:
- 16 ounces (452g) full-fat cream cheese, softened to room temperature
- ½ cup (100g) granulated sugar
- ¼ cup (60g) full-fat sour cream, also at room temperature
- 1 teaspoon pure vanilla extract
- 1 teaspoon freshly squeezed lemon juice
- 2 large eggs, at room temperature
These elements come together to create a rich and creamy filling that’s sure to impress. The sour cream adds a tangy depth, while the lemon juice brightens the flavors beautifully.
Having everything prepped and ready not only simplifies the baking process but also makes it a fun activity to share with friends or family. Happy baking!
Preparing Mini Cheesecakes
Making mini cheesecakes is a delightful venture that can seem daunting at first but is truly rewarding and offers a delicious dessert. Let’s walk through the essential steps to create these creamy bites of bliss!
Preheat the oven and line the muffin pan
First things first: preheat your oven to 350°F (177°C). While it's heating up, line a standard 12-count muffin pan with cupcake liners. This little step ensures easy removal later, letting your beautiful mini cheesecakes shine as they should!
Mix and press the crust ingredients
Grab a medium bowl and combine 1 cup of graham cracker crumbs, 2 tablespoons of granulated sugar, and 3 tablespoons of melted unsalted butter. Your mixture should have a sandy texture. Use about a heaping tablespoon of this crust mixture for each muffin liner and firmly press it down. We want that crust to be sturdy enough to hold up the cheesecake filling as they bake. Pop these crusts into the oven for about 6 minutes to give them a head start.
Blend the filling ingredients for creaminess
While the crust is setting, let’s prepare the filling! In a large bowl, beat together 16 ounces of softened cream cheese and ½ cup of granulated sugar until smooth. You’ll want that luscious creaminess, so consider using a stand mixer for the best results. Add in ¼ cup of sour cream, 1 teaspoon of vanilla extract, and 1 teaspoon of lemon juice. Mix until thoroughly combined. Beat in 2 large eggs, one at a time, being careful not to over-mix. The goal is a velvety texture that promises deliciousness in every bite.
Fill the liners with cheesecake batter
Once your crusts are done baking, it's time to fill those liners! Divide your creamy filling evenly among them, filling each to the top—yes, we want generous portions here!
Bake using the water bath method
For truly heavenly mini cheesecakes, consider using the water bath method. This prevents cracking and ensures even baking. Place a large metal baking pan on the bottom rack of the oven and fill it with boiling water—about 1 inch deep. Then, place the muffin pan on the center rack. Bake until the edges are set and the centers jiggle slightly, around 20 minutes.
Cool and chill the mini cheesecakes
Once baked, remove the pan from the oven and let it cool at room temperature for about 45 minutes before placing it in the fridge. Chill for at least 2 hours—though all of that time is worth the wait when you taste the final product!
Prepare and add toppings
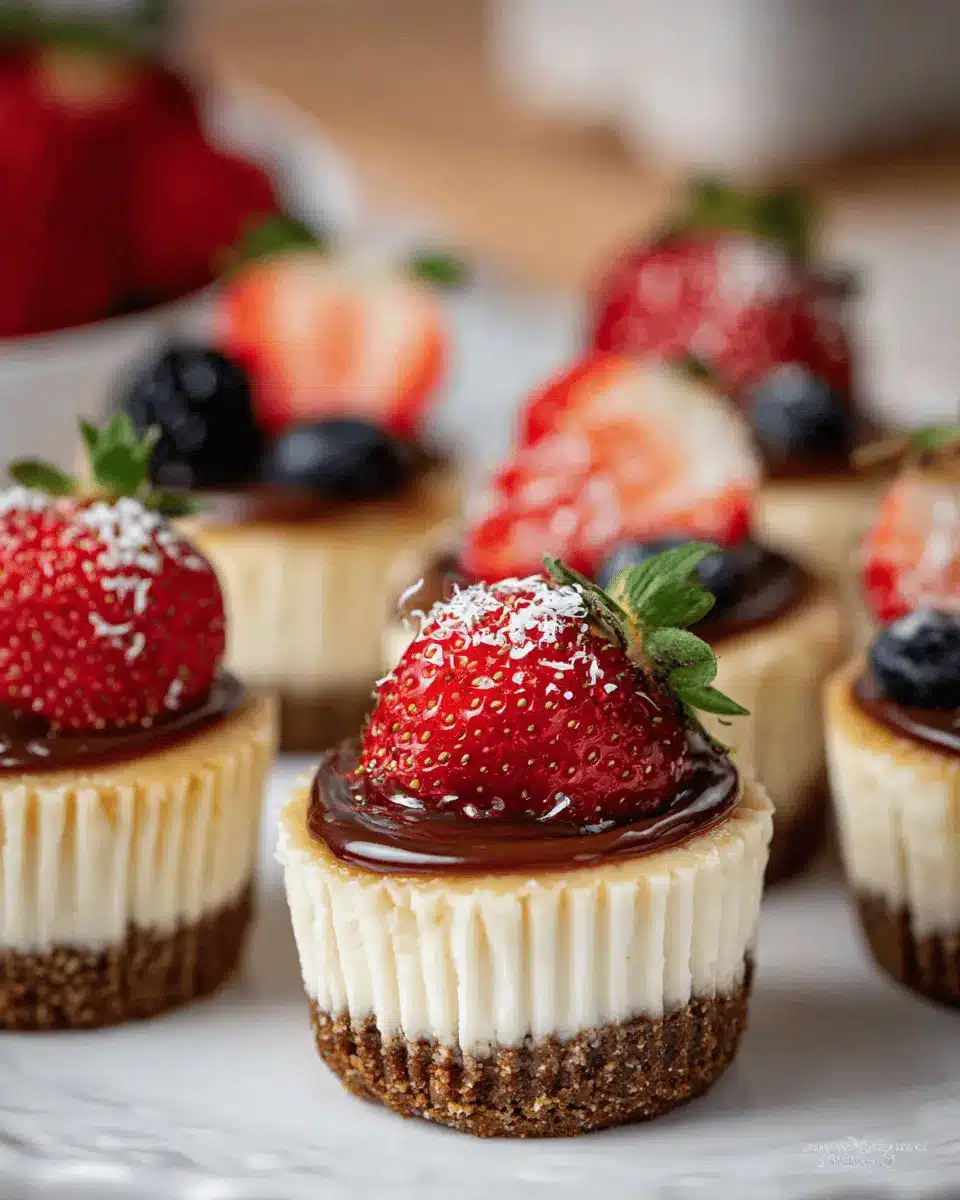
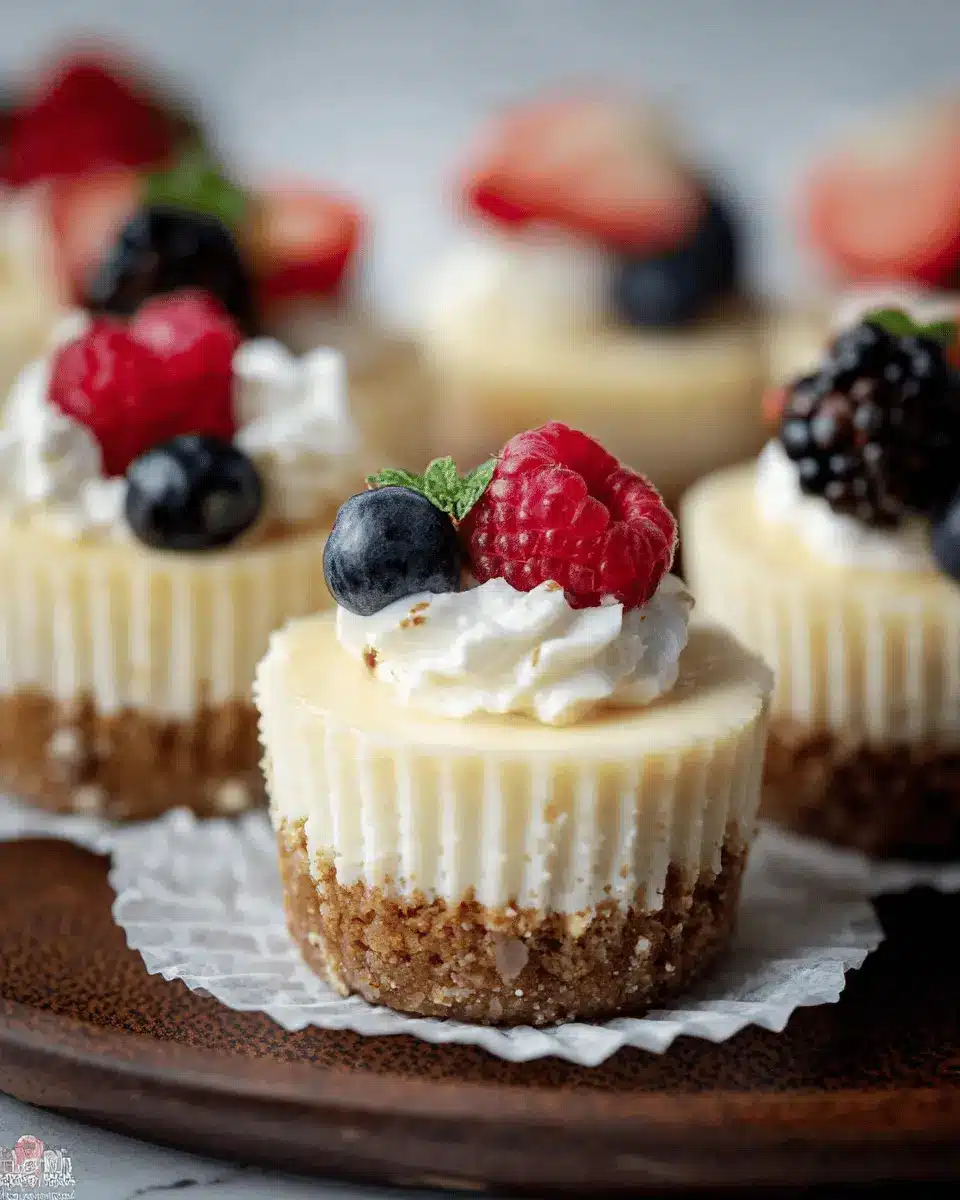
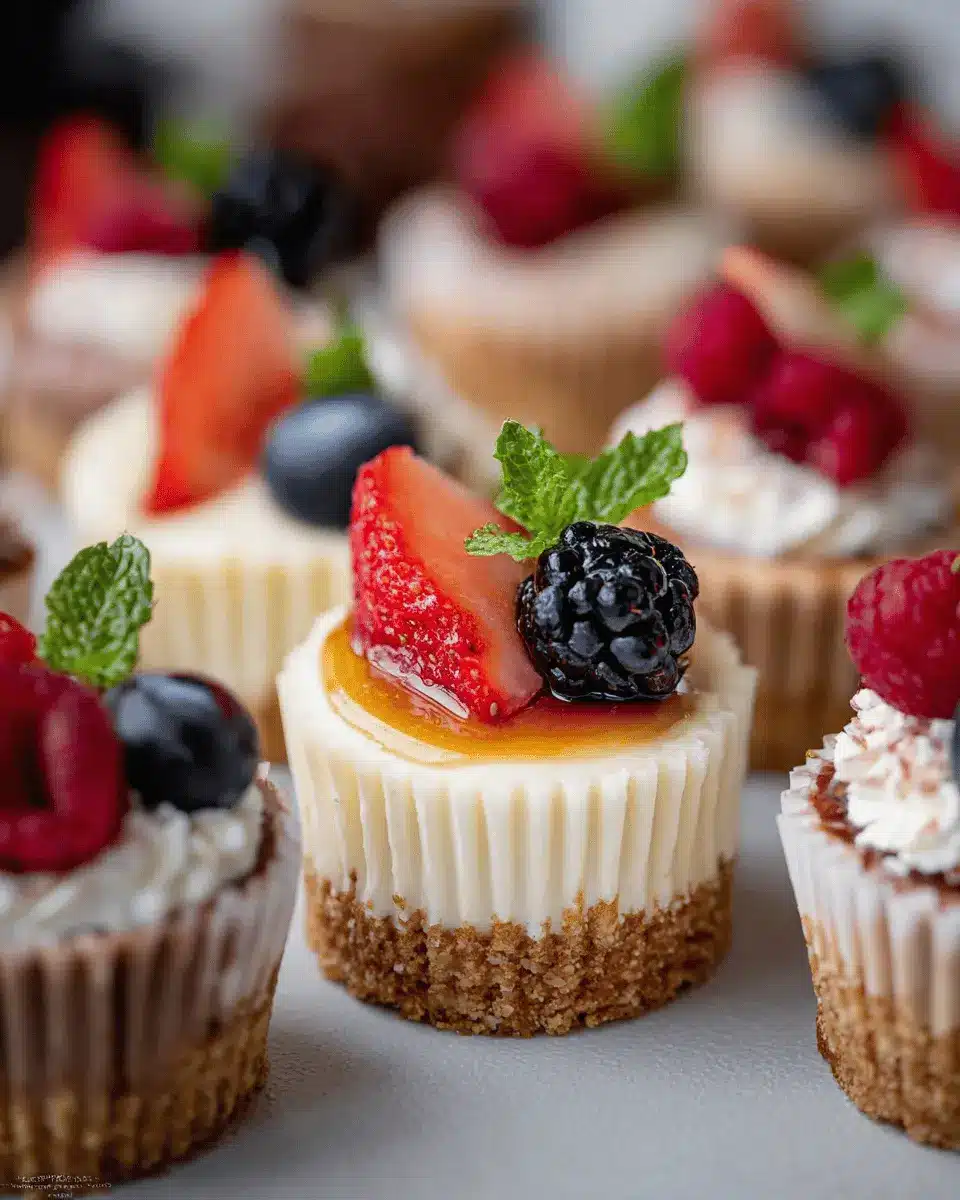
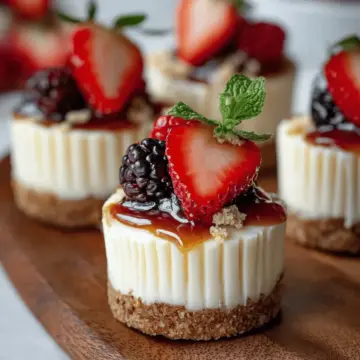
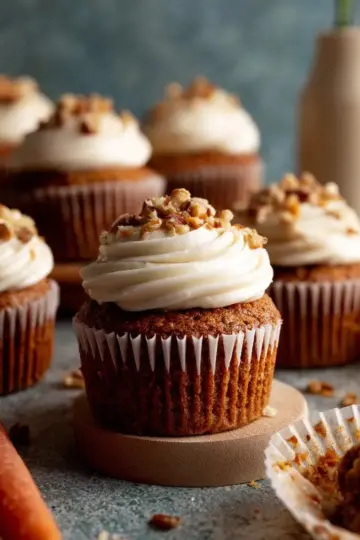
Now comes the fun part: toppings! Whipped cream, fresh berries, or perhaps a drizzle of homemade caramel. Use a piping bag fitted with a star tip for a beautification touch. The options are endless, so feel free to get creative!
With these straightforward steps, you're well on your way to serving up some fabulous mini cheesecakes that are sure to impress your friends and family. Happy baking!
Variations on Mini Cheesecakes
Different Crust Options
While the classic graham cracker crust is a fan favorite, don’t hesitate to experiment! Consider using:
- Chocolate cookie crumbs for a delectable twist.
- Shortbread cookies for a buttery base.
- Oreo crumbs, if you’re craving that rich flavor.
Switching up the crust can change the entire vibe of your mini cheesecakes, making them extra special for any occasion.
Flavor Variations for the Filling
The filling for your mini cheesecakes is a blank canvas waiting for your creativity. Beyond the traditional flavor, try adding:
- Fruit purees like raspberry or mango for brightness. Learn how to make fruit purees for a fresh touch.
- Nut butters such as peanut or almond for an irresistible richness.
- Chocolate for those days when only a rich, smooth filling will do. Add cocoa powder or melted chocolate directly into the cheesecake mixture.
With these variations, you’re set to delight everyone’s taste buds!
Baking Tips for Mini Cheesecakes
Preventing Cracks and Sinking
To achieve perfect mini cheesecakes, avoid overmixing your batter, as this can incorporate too much air and lead to cracks. Incorporating your eggs gradually and mixing just until combined is key. If you want a foolproof method, consider a water bath. This adds gentle moisture and helps prevent sinking while baking.
Proper Cooling Techniques
Cooling your mini cheesecakes properly is crucial. After baking, let them cool at room temperature for about 45 minutes. This gradual cooling process helps them maintain their shape. After that, transfer the pan to the refrigerator for at least two hours. Cover them loosely to prevent any excess moisture from forming on the surface. This simple step will help your cheesecakes remain smooth and delectable!
Consider checking out The Cheesecake Factory for more delightful inspiration!
Serving suggestions for Mini Cheesecakes
Creative plating ideas
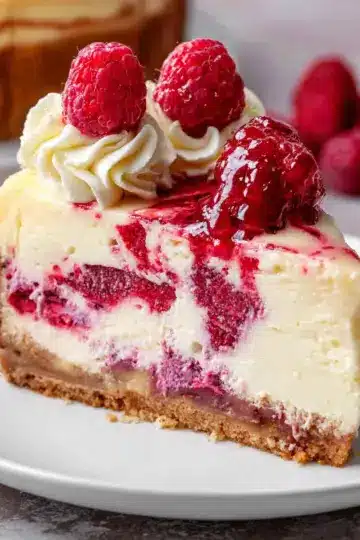
When it comes to serving your mini cheesecakes, presentation is everything! Consider using individual dessert plates for each guest, adding a dollop of whipped cream on top for that elegant finish. A fresh berry or mint leave can elevate the look even more. Arrange the cheesecakes on a rustic wooden platter, surrounded by seasonal fruits to create a vibrant centerpiece. For a playful touch, drizzle chocolate or fruit sauce artfully on the plate before placing the cheesecake.
Perfect pairings with beverages
Pair your mini cheesecakes with a delightful drink to enhance the experience. A rich espresso or cappuccino complements the creamy sweetness beautifully. If you prefer something fruitier, opt for a refreshing lemonade or sparkling water infused with mint. Both options refresh the palate and balance the richness of the cheesecake nicely. Consider if you want a cozy or vibrant vibe when choosing your beverage, it can take your dessert experience from good to unforgettable!
Time Details for Mini Cheesecakes
Preparation Time
Getting started with your mini cheesecakes is a breeze! You’ll need approximately 15 minutes to gather your ingredients, prepare the crust, and mix the filling. It's a quick process that sets the stage for deliciousness.
Baking Time
The baking takes around 20 minutes. This step is crucial as the cheesecakes need just the right amount of time to achieve that perfect, creamy texture. Plus, you’ll have the delightful aroma wafting throughout your kitchen to keep you motivated!
Total Time
From prep to chill time, you’re looking at about 3 to 3.5 hours in total. This includes cooling and chilling, ensuring your mini cheesecakes develop that rich, decadent flavor we all love. While it may take a bit of patience, the results are absolutely worth it!
Helpful Tips for Perfect Mini Cheesecakes
- Prepare ahead: If you’re short on time, consider making the cheesecakes a day or two in advance. They'll taste even better after chilling overnight.
- Stay organized: Measuring out your ingredients before starting can speed up the process and make everything run smoothly.
For those keen on diving deeper into cheesecake-related tips and techniques, check out this Cheesecake Basics guide.
Now that you have a clear timeline, let’s get baking!
Nutritional Information for Mini Cheesecakes
Calories per Cheesecake
Each delightful mini cheesecake contains approximately 180 calories. This makes them an enjoyable yet moderate indulgence for a sweet treat. Enjoying them in moderation can fit nicely into a balanced diet, right?
Key Nutrients
These mini cheesecakes pack a punch beyond just sweetness! Each cheesecake offers:
- Protein: A good source, thanks to the cream cheese and eggs, aiding muscle repair.
- Calcium: The dairy ingredients contribute to bone health.
- Vitamin B12: Essential for energy and nerve function, primarily from cream cheese.
- Saturated Fat: While they do provide fat, it's primarily from sources like butter and cream cheese. It's essential to balance these treats with a diet rich in fruits, vegetables, and whole grains.
Whether you're celebrating a special occasion or just treating yourself midweek, these mini cheesecakes stand out as a delicious choice that doesn’t compromise your nutritional goals. For a deeper dive into the benefits of cream cheese in moderation, check out Healthline's insights on dairy products!
FAQs about Mini Cheesecakes
How do I ensure my mini cheesecakes are not dry?
To keep your mini cheesecakes rich and moist, make sure to use full-fat cream cheese and sour cream. These ingredients add creaminess and flavor. Also, avoid overmixing the batter, as this can introduce excess air and lead to dryness. If you opt for the optional water bath method, it helps maintain moisture during baking.
Can I make mini cheesecakes ahead of time?
Absolutely! You can prepare the cheesecakes in advance and store them in the refrigerator for up to 2-3 days before baking. Alternatively, baked mini cheesecakes can be frozen for up to three months. Just thaw them overnight in the fridge before serving for a quick and delightful treat.
What are some alternatives for common ingredients?
If you’re out of graham crackers, you can substitute with crushed digestive biscuits or Oreos for a unique twist. For a dairy-free version, use plant-based cream cheese and yogurt. This way, everyone can enjoy the deliciousness of mini cheesecakes! For more ingredient swaps, check this guide.
Conclusion on Mini Cheesecakes
Why these mini cheesecakes are a fantastic choice for your next homemade dessert
Mini cheesecakes are not just adorable; they’re a versatile treat that’s perfect for any occasion. Their bite-sized nature allows for easy serving at gatherings, and you can customize flavors and toppings to suit every palate. Plus, they’re simple to make, ensuring you’ll impress your friends without spending all day in the kitchen. Give them a try—they might just become your go-to dessert!
For more delightful ideas, check out Sally’s Baking Addiction for tips and variations.
Mini Cheesecakes
Equipment
- 12-count muffin pan
- Cupcake liners
- mixing bowl
- handheld mixer
- Cooling rack
Ingredients
Crust
- 1 cup graham cracker crumbs (about 8 full sheet graham crackers)
- 2 Tablespoons granulated sugar
- 3 Tablespoons unsalted butter melted
Filling
- 16 ounces full-fat cream cheese softened to room temperature
- ½ cup granulated sugar
- ¼ cup full-fat sour cream at room temperature
- 1 teaspoon pure vanilla extract
- 1 teaspoon freshly squeezed lemon juice
- 2 large eggs at room temperature
Instructions
Preparation
- Preheat oven to 350°F (177°C). Line a standard muffin pan with cupcake liners.
- Combine all of the crust ingredients in a medium bowl. Firmly press a heaping Tablespoon of crust mixture into each liner. Bake the crusts for 6 minutes.
- Using a handheld or stand mixer, beat the cream cheese and granulated sugar together until smooth. Add sour cream, lemon juice, and vanilla extract, then beat until fully combined. Add the eggs one at a time, beating just until combined before adding the next.
- Divide the batter among the liners, filling each to the top. Bake until the edges are set and the centers slightly jiggle, about 20 minutes.
- Set the pan on a cooling rack and cool at room temperature for 45 minutes. Transfer to the refrigerator and chill for at least 2 hours before serving.
- Top the cheesecakes with whipped cream and garnish with berries or mint as desired.
- Store leftovers in the refrigerator for up to 5 days.
Leave a Reply