
Introduction to Artisan Pizza Dough
Homemade pizza lovers, rejoice! Artisan pizza dough is here to elevate your cooking game. By blending simplicity with technique, this dough creates a crispy, chewy, and bubbly crust that’s hard to match. Whether you’re a seasoned chef or a weekend home cook, mastering this dough transforms your pizza nights into gourmet experiences.
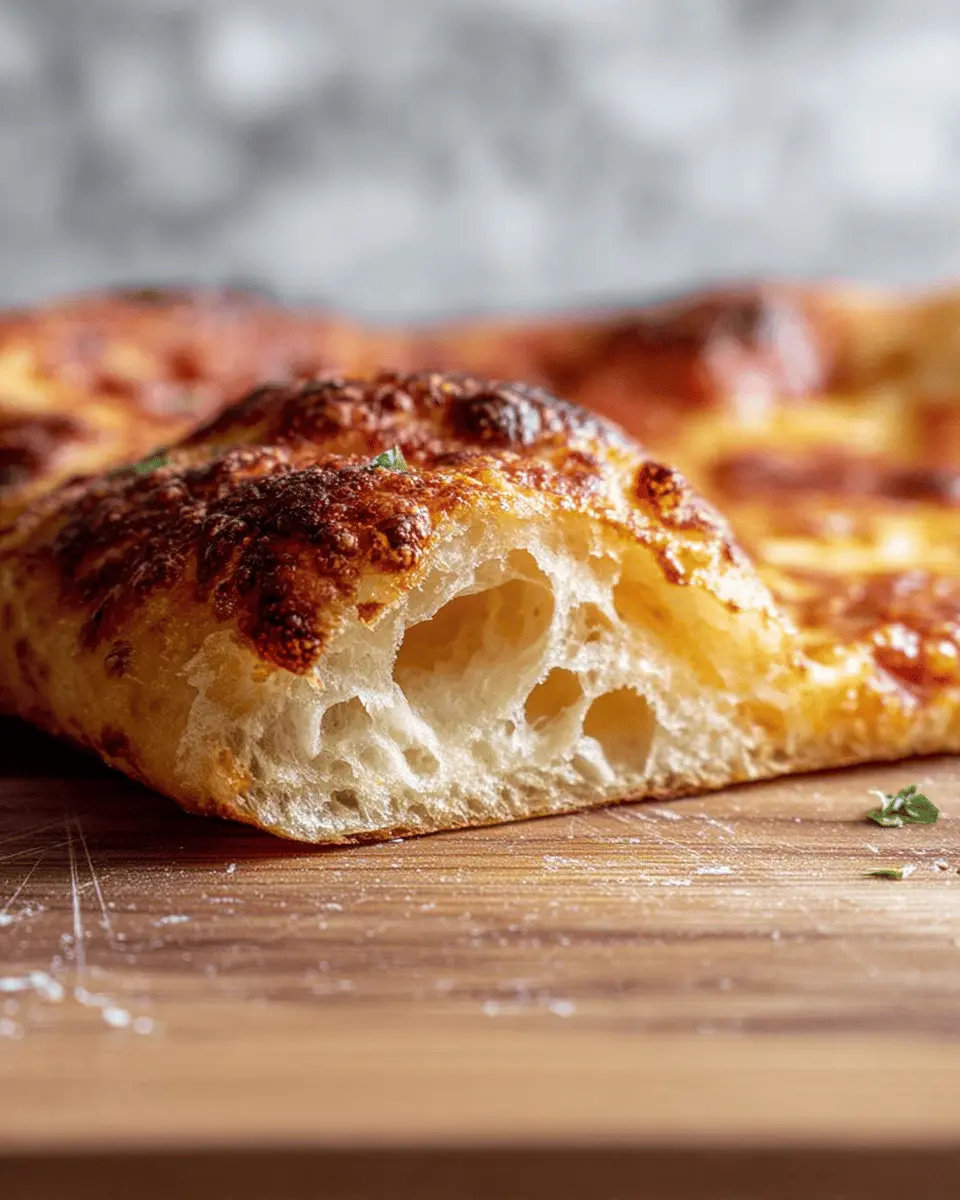
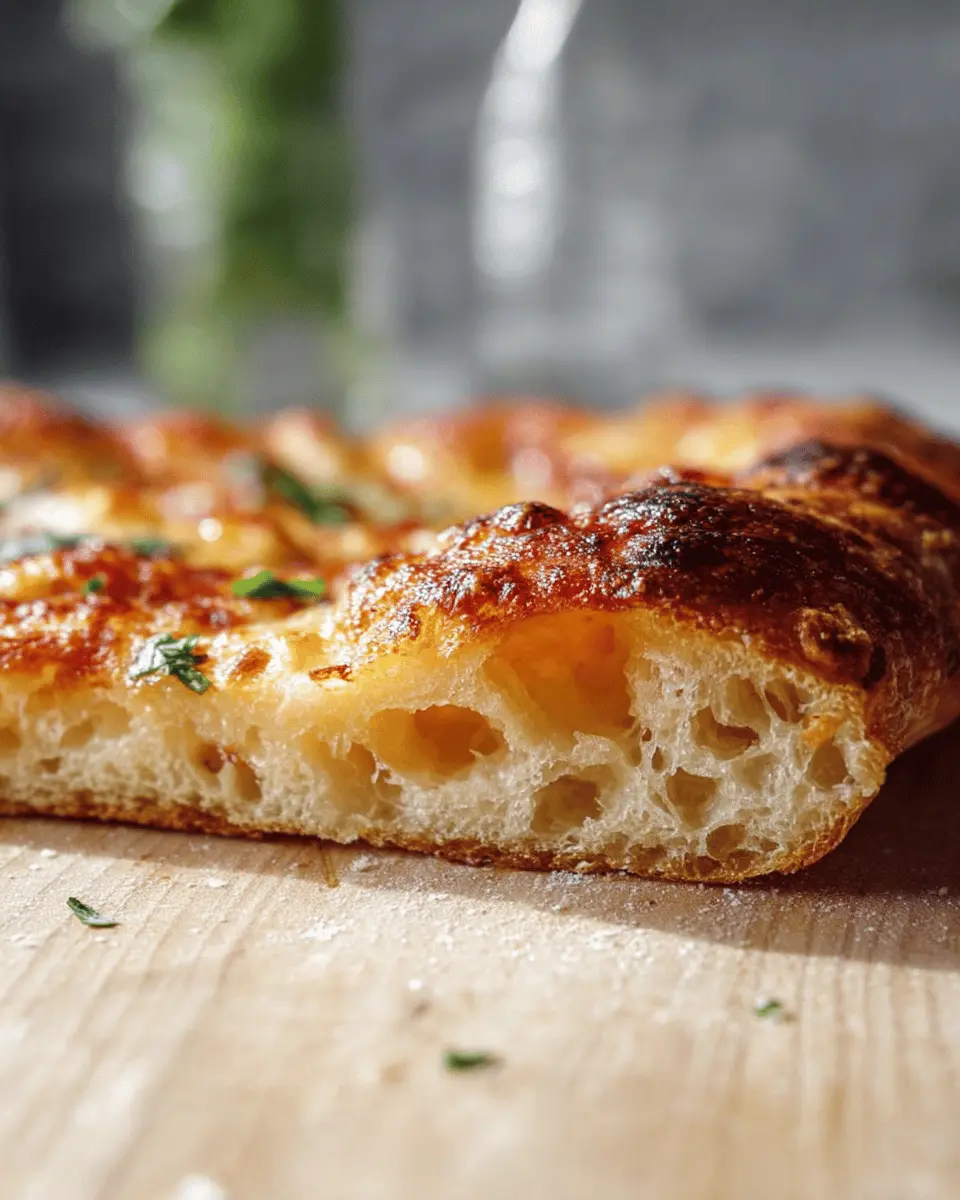
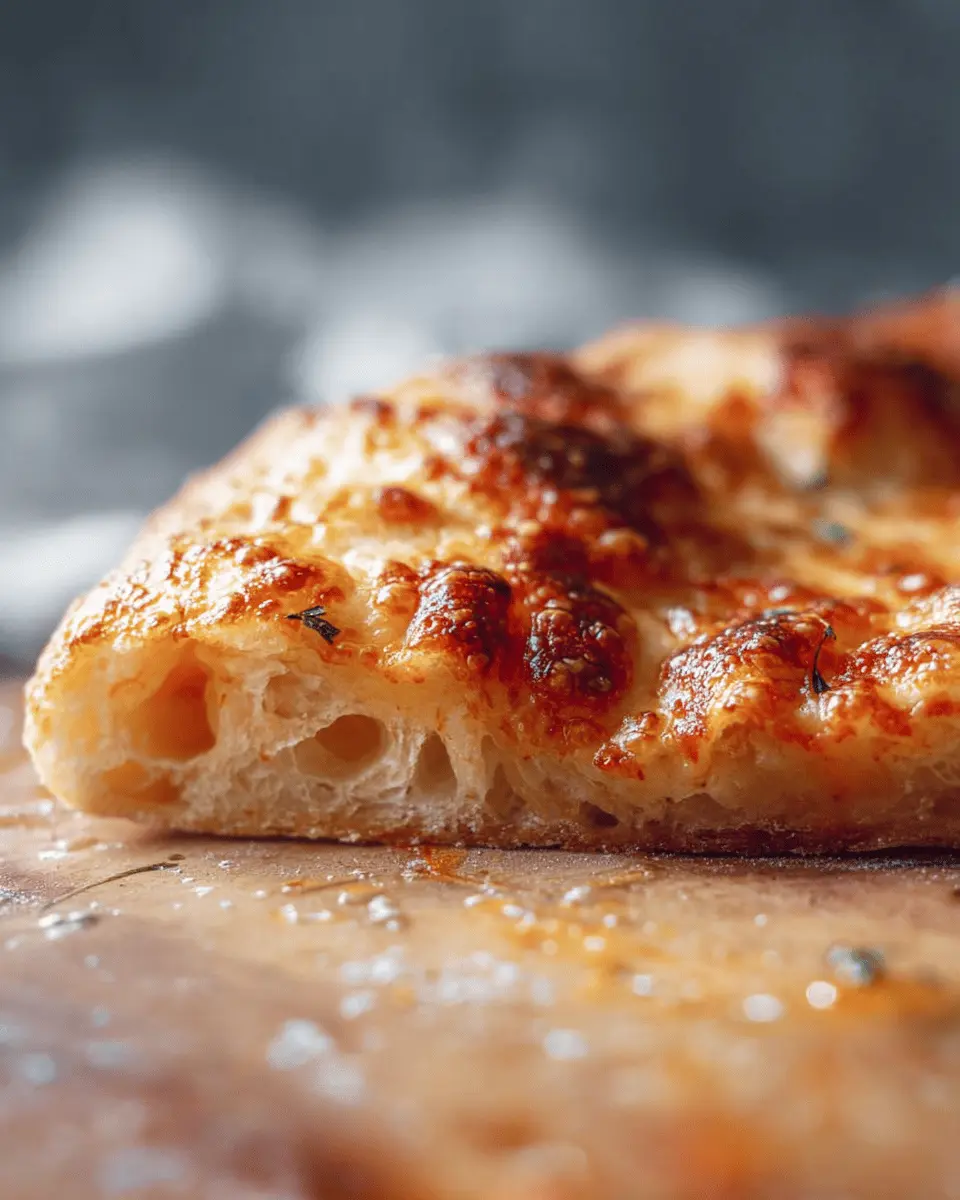
So, what makes artisan pizza dough the real game changer? First, its unique fermentation process allows the flavors to develop more deeply than traditional recipes. This means you’ll enjoy a richer taste that can't be replicated with store-bought options. The high hydration level in the dough creates an airy interior, contributing to that satisfying chewiness. According to food scientists, higher hydration doughs can yield a superior crust texture due to steam escaping during baking, which contributes to a light and crispy exterior.
Additionally, the versatile nature of artisan pizza dough means you can tailor it to your liking—add herbs, spices, or even incorporate whole grain flour for added nutrition. There are numerous resources available, including King Arthur Baking and Serious Eats that offer tips and variation ideas. Get ready to impress your friends and family with pizza that tastes like it came straight from a wood-fired oven!
Ingredients for Artisan Pizza Dough
Crafting the perfect artisan pizza dough requires a few essential ingredients that work together to create that crispy, chewy, bubbly crust we all crave.
Essential Ingredients for a Perfect Crust
- All-Purpose Flour (500g): This is the foundation of your dough. For best results, opt for high-quality flour that provides the necessary gluten structure.
- Warm Water (375g): The water temperature is crucial—it should feel warm to the touch. This activates the yeast, helping your dough to rise beautifully.
- Active Dry Yeast (1g): A little goes a long way! This ingredient helps in the fermentation process, contributing to that wonderful airy texture.
- Fine Salt (10g): Salt is essential not only for flavor but also plays a role in regulating yeast activity.
With just a handful of ingredients, you can create a dough that pizzeria professionals would envy. For an in-depth guide on bread-making techniques, check out sources from King Arthur Baking. Enjoy the process, and you'll soon be on your way to pizza perfection!
Step-by-Step Preparation of Artisan Pizza Dough
Creating the perfect artisan pizza dough is an art that starts with a few simple steps. Let’s dive in and discover how to make a crispy, chewy, and bubbly crust that'll impress your friends at your next pizza night!
Mixing the Dry Ingredients
To kick things off, start by gathering your ingredients:
- 500g (3 ¾ cups plus 2 tbsp) all-purpose flour
- 1g (¼ tsp) active dry yeast
- 10g (1 ½ tsp) fine salt
In a large mixing bowl, combine the flour and the yeast. It’s essential to keep the salt separate for now since it can inhibit yeast activity if mixed. Add all but 1 tablespoon of your warm water to the flour until the mix looks shaggy. Cover the bowl with a kitchen towel and let it rest for 20 minutes. This initial rest, known as autolyse, hydrates the flour and starts developing flavor.
Allowing the Dough to Rest
After the dough has rested, it’s time to introduce the salt. Sprinkle it over the dough's surface, then stir the remaining warm water with the dissolved yeast. Pour this mixture over the dough, utilizing your hands to mix and fold everything together until you have a shaggy texture. This process helps to activate the yeast. Cover the bowl again and allow the dough to rest for about an hour.
Developing the Gluten
Next, we’ll work on developing the gluten. After the hour, it’s time to fold the dough. Lightly wet your hand and gently lift the dough from underneath, stretching a section over itself. Rotate the bowl and repeat this process four to five times. The dough will begin to feel tighter and elastic. Once you've folded it enough, flip the dough seam-side down into a lightly greased bowl and cover it. Let it rise until it doubles in size, which usually takes about 5-6 hours.
Shaping the Dough Balls
Once your dough has risen beautifully, it's time for shaping. Turn the dough onto a floured surface and cut it in half. For each piece, stretch it gently from the sides towards the center and fold to create a ball. Rotate and tuck the dough under itself, warming it with your hands to create surface tension. This step is vital for achieving that perfect artisan pizza dough crust!
Preparing for Baking
Finally, transfer the shaped dough balls to a greased plate, lightly oiling the tops. Cover them and let them rest for about an hour at room temperature. If you’re not using the dough right away, feel free to wrap it tightly and refrigerate it for up to two days. Preheating your oven now is a good idea if you plan to use that dough soon. Aim for a blistering 500°F for the ultimate crust.
And there you have it! With these steps, you're on your way to crafting the artisan pizza dough of your dreams. For more tips and techniques on pizza-making, consider visiting sources like Serious Eats for insights from culinary experts. Happy pizza-making!
Variations on Artisan Pizza Dough
Creating the perfect artisan pizza dough is all about personalization. Here are a couple of delightful variations you might want to try.
Whole Wheat Artisan Pizza Dough
For a nuttier flavor and added nutrition, consider swapping half or all of your all-purpose flour with whole wheat flour. This variation brings a hearty texture and earthy taste to your pizza base. Just be sure to adjust your hydration slightly, as whole wheat flour absorbs more water. A fun tip? Pair it with fresh vegetables or a light olive oil drizzle for a wholesome gourmet experience.
Gluten-Free Artisan Pizza Dough
Craving pizza but need a gluten-free option? No problem! You can create a tasty artisan pizza dough using a gluten-free all-purpose flour blend. Make sure to include xanthan gum if your blend doesn't already contain it, as this will help with elasticity and texture. For extra flavor, add in some herbs or spices to the mix. After baking, enjoy your pizza with a zesty tomato sauce and your favorite toppings!
Exploring variations is the perfect way to make your pizza nights exciting every time! For more inspiration, check out resources like King Arthur Baking or America’s Test Kitchen for expert tips and recipes!
Cooking Tips and Notes for Artisan Pizza Dough
Ensuring the Right Water Temperature
When making artisan pizza dough, water temperature matters! Aim for water that's warm but not scalding—about 110°F (43°C) works wonders. This temperature helps activate the yeast without killing it, ensuring a perfect rise. For a handy reference, you can use a kitchen thermometer or test the water with your wrist; it should feel warm but comfortable.
Tips for Achieving the Perfect Crust Texture
Achieving that enviable crispy, chewy texture in your artisan pizza dough starts with your kneading technique. Fold and stretch the dough as you work, allowing gluten to develop. A hot oven is your friend too—preheat it to about 500°F (260°C) for best results. Consider using a pizza stone or steel for that desired crusty finish. Want more tips? Check out this guide on perfecting pizza dough for expert advice!
Serving Suggestions for Artisan Pizza
Pairing Your Pizza with Homemade Dips
Elevate your pizza experience by pairing your artisan pizza dough creations with homemade dips. A creamy garlic aioli or zesty marinara can complement the crispiness of your pizza crust perfectly. Consider mixing some fresh herbs into your dips, such as basil or oregano, for a flavor boost. Need more ideas? This easy marinara recipe is a great starting point!
Complementary Side Dishes for a Pizza Night
No pizza night is complete without delightful side dishes! Fresh garden salads, loaded with seasonal veggies, can bring a refreshing balance to your meal. Think about adding roasted garlic knots or a charcuterie board featuring turkey bacon and chicken ham for a savory treat. A sprinkle of feta cheese or olives can add a Mediterranean twist to your sides. Keep it simple yet delicious; you and your friends will thank you!
Time Breakdown for Artisan Pizza Dough
Preparation Time
Begin your pizza journey with about 20 minutes for the initial mixing and resting of your artisan pizza dough. This is a critical step, as the rest allows the flour to hydrate and develop flavor.
Rising Time
Next, set aside approximately 5 to 6 hours for the dough to rise and double in size. This long, slow rise is essential for creating that crispy, chewy, bubbly crust that you’re aiming for.
Baking Time
Finally, when your delicious pizza is ready to hit the oven, you’ll need around 10 minutes of baking time. This includes 5 minutes at a high temperature followed by 2 to 4 minutes under the broiler for that perfect finish.
Armed with this timing, you're all set to create artisan pizza dough that wows your friends and family! For more tips on mastering your pizza game, check out resources from King Arthur Baking or Serious Eats.
Nutritional Facts for Artisan Pizza
When indulging in delicious artisan pizza, it helps to know what you're enjoying. Here’s a quick look at its nutritional profile:
Approximate calories per slice
Typically, each slice of artisan pizza contains around 200-300 calories, depending on toppings and portion sizes.
Protein content
Artisan pizza dough usually includes about 7-10 grams of protein per slice, courtesy of the flour and any added toppings.
Sodium levels
Each slice may also contain approximately 400-600 milligrams of sodium, influencing flavor but warranting moderation—especially for those watching their sodium intake.
For a deeper dive into the health aspects of pizza, check out NutritionData for a personalized analysis!
If you're looking to balance flavors with your desire for a healthy meal, consider topping your artisan pizza with fresh veggies and lean proteins. After all, delicious doesn't have to mean indulgent!
FAQs about Artisan Pizza Dough
How long can I store my pizza dough?
You can store your artisan pizza dough in the refrigerator for up to two days. Just wrap it tightly in plastic wrap to prevent it from drying out. If you're looking to keep it longer, consider freezing it—just make sure to portion it into individual balls first. When ready to use, simply let it thaw in the fridge overnight and bring it to room temperature before shaping.
What can I do if my dough is too sticky?
If you're finding that your artisan pizza dough is too sticky to handle, don't panic! A light dusting of flour on your work surface and your hands can help. Start with a small amount to avoid over-flouring, which can change the texture. Alternatively, allow the dough to rest for a bit; sometimes, just giving it a little time can make it easier to manage.
How do I get that bubbly crust?
Achieving that perfect, bubbly crust is all about proper fermentation and high heat. Make sure to let your dough rise adequately; a longer fermentation creates those lovely air pockets. When cooking, preheating your oven to around 500°F (or its highest setting) will help develop that desired texture. Adding a pizza stone or a steel ensures even heat distribution, promoting a crust that’s crispy and chewy!
Conclusion on Artisan Pizza Dough
Once you savor the delightful texture and flavor of artisan pizza dough, you'll understand why homemade reigns supreme. The crispy, chewy, and bubbly crust brings pizzazz to your pizza nights, making store-bought varieties feel bland in comparison. Embrace the art of pizza making and transform your meals into unforgettable experiences!
Why You Won't Want Store-Bought Again
Store-bought pizza dough might save time, but it often lacks the authentic flavor and texture you can create at home. With your own artisan pizza dough, you’re in control of the ingredients, ensuring freshness and a personal touch. Plus, the satisfaction of crafting your own crust is unbeatable.
Want to explore more about pizza-making techniques and ingredients? Check out The Perfect Pizza for tips and resources that can elevate your pizza game!
Ultimately, investing a little time in making your own dough reaps rewards that are worth every minute. You’ll impress friends and family alike while creating pizzas that are not just meals, but delicious works of art!

artisan pizza dough- crispy, chewy, bubbly crust
Equipment
- large bowl
- Pizza Peel
- oven
- cast iron pan
Ingredients
Dough Ingredients
- 500 g all-purpose flour
- 375 g warm water divided
- 1 g active dry yeast
- 10 g fine salt
Instructions
Dough Preparation
- Mix flour and all but 1 tablespoon of the water in a large bowl until just combined, then cover and set aside for 20 minutes to rest. Sprinkle yeast over remaining warm water and set aside to dissolve.
- Sprinkle salt over the surface of the dough. Stir yeast mixture and pour over dough. Fold the dough until the yeast and salt are fully mixed and a shaggy dough is formed. Cover the bowl and let rest about an hour.
- Fold the dough one time to develop the gluten. Invert the ball of dough into a clean, lightly greased bowl, seam down, cover and let rise until doubled in volume, 5-6 hours.
- Turn the dough out onto a floured surface and cut in half. Shape into a ball and let rest at room temperature for about an hour. Preheat oven.
Pizza Making
- Place pizza steel, stone, or inverted baking sheet on the middle rack of the oven and preheat to 500°F (or as high as it will go) for at least 45 minutes.
- Place one dough ball on a floured surface and flatten into a 12-inch circle. Use a pizza peel to transfer to a floured surface.
- Add sauce and toppings, then slide pizza onto the hot steel and bake for 5 minutes. Turn on the broiler for an additional 2-4 minutes until the cheese is melted and crust is golden.


Leave a Reply