
Introduction to Classic Peanut Butter Blossoms
The Nostalgic Charm of Peanut Butter Blossoms
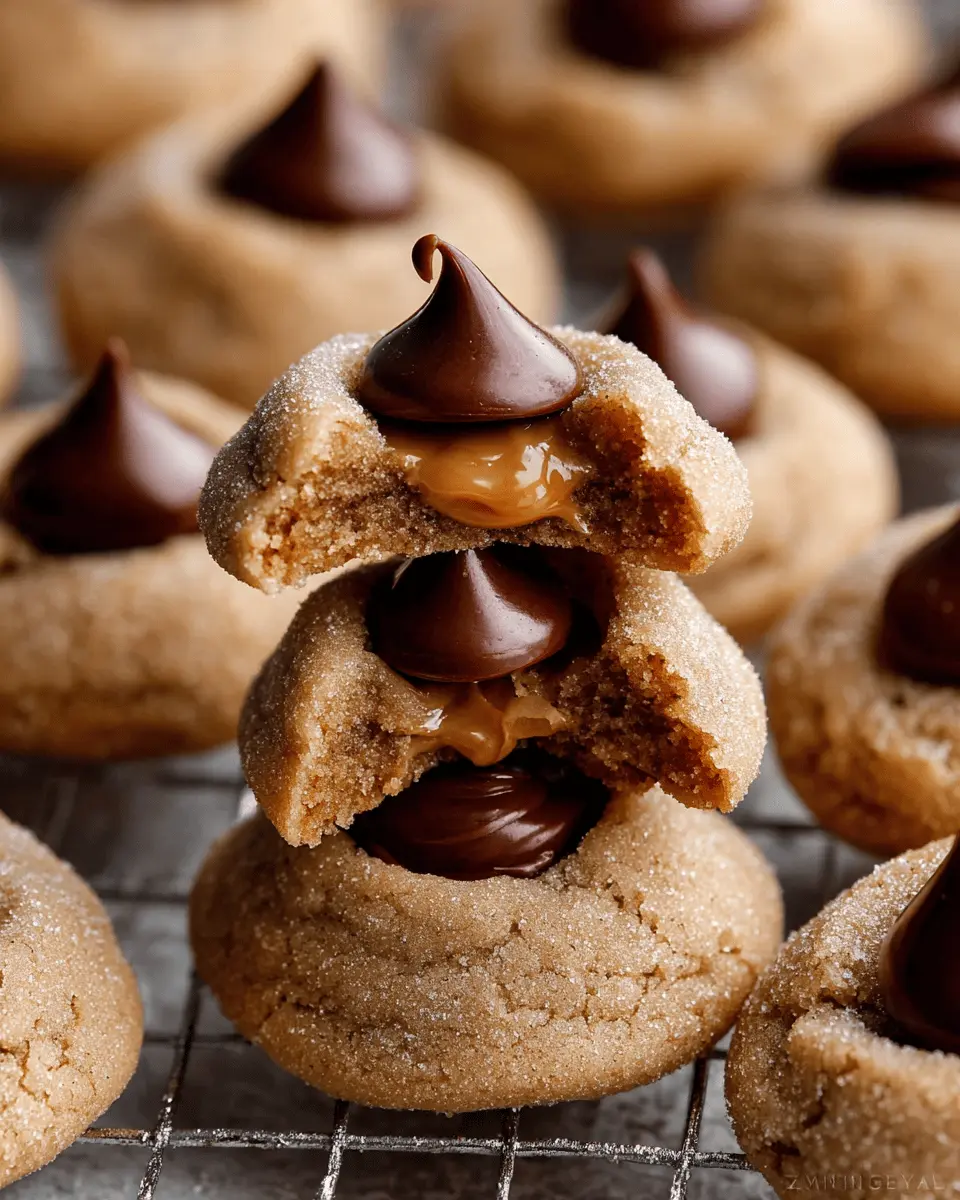
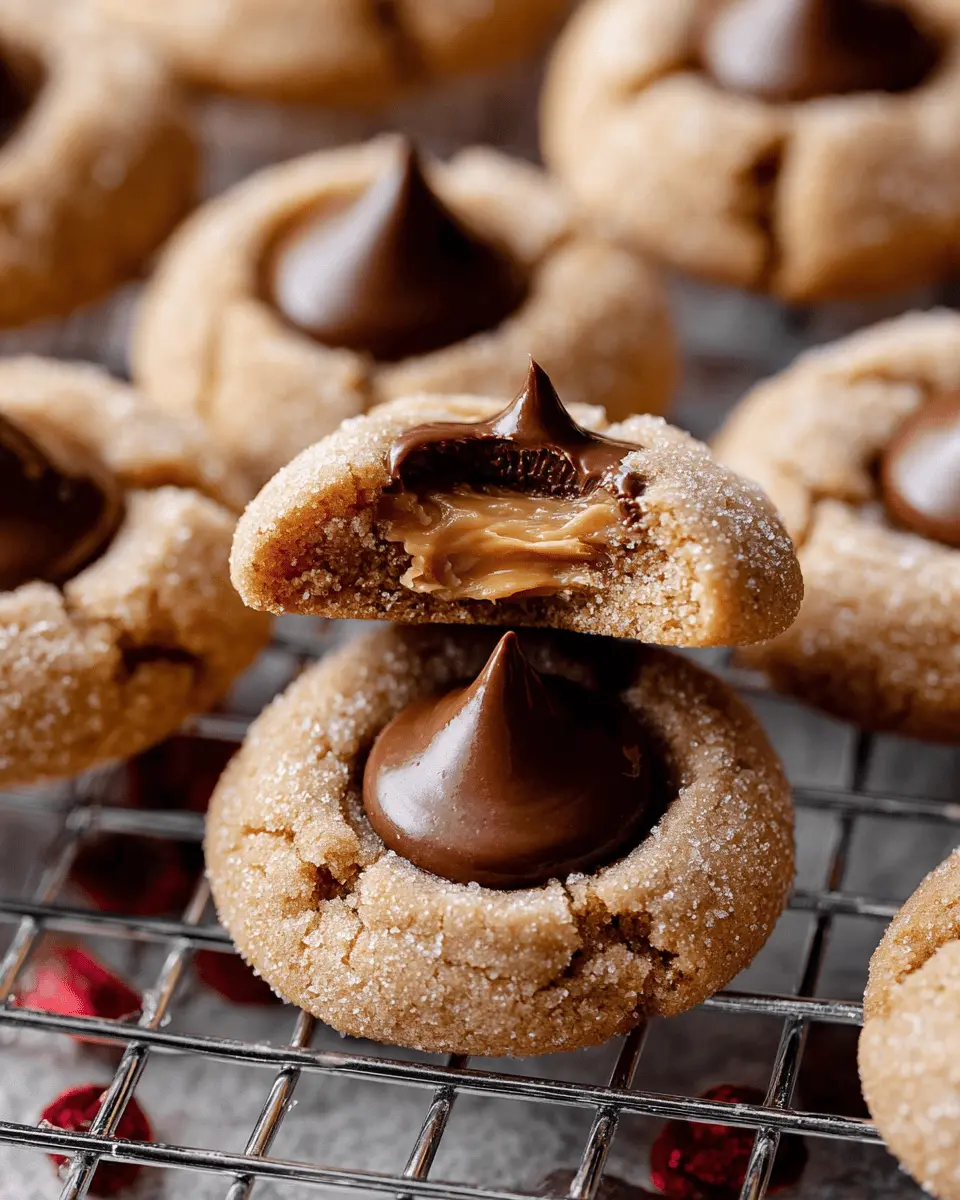
Classic peanut butter blossoms bring back fond memories for many of us. Picture this: the aroma of warm, freshly baked cookies wafting through the house, signaling that something special is about to happen. These delightful treats, with their soft peanut butter base and signature chocolate kiss on top, have a unique way of making any day feel festive.
Why do they hold such a special place in our hearts? Perhaps it's the perfect combination of flavors—creamy, nutty peanut butter and sweet chocolate. For many, it's the joyous act of rolling cookie dough and watching it transform into something extraordinary that stirs a sense of nostalgia. These cookies are also versatile: enjoyed during holiday gatherings, birthday parties, or simply as an afternoon snack with a glass of milk.
If you're intrigued and want to try your hand at baking some, you're in the right place! You might find yourself reminiscing about your childhood or sharing these treats with loved ones, creating new memories in the process. Ready to dive in? Let’s whip up some classic peanut butter blossoms that will surely charm your taste buds and warm your heart. For a great start, check out more about the cultural significance of peanut butter cookies here.

Ingredients for Classic Peanut Butter Blossoms
Essential Pantry Staples
To whip up a batch of classic peanut butter blossoms, you'll need some basic pantry staples. Grab:
- All-purpose flour
- Baking soda
- Salt
- Unsalted butter, softened
- Granulated sugar and brown sugar
These ingredients are likely already in your kitchen, making this cookie recipe easy to pull together on a whim!
Sweeteners and Flavorings
Sweetening your cookies adds a delightful depth of flavor. We recommend using:
- Brown sugar for that rich caramel-like taste
- Granulated sugar for sweetness
- A splash of pure vanilla extract amplifies the overall flavor profile perfectly!
This combination creates a beautifully balanced cookie that’s sweet but not overly so.
Chocolate Kisses and Coating Options
No classic peanut butter blossoms would be complete without their signature chocolate kiss! You’ll need:
- About 24 unwrapped chocolate kiss candies to top each cookie.
For an extra touch of festivity, consider coating your cookie dough balls in:
- Granulated sugar or
- A mix of green and red sanding sugar for a holiday vibe.
Ready to get baking? These ingredients set the stage for mouthwatering cookies that are sure to impress your friends and family. For tips on measuring ingredients accurately, check out this helpful guide on how to measure baking ingredients. Happy baking!
Step-by-step Preparation for Classic Peanut Butter Blossoms
Creating the perfect batch of classic peanut butter blossoms is a delightful journey that involves simple steps and readily available ingredients. Let’s break it down step by step!
Gather and measure your ingredients
Before diving into the mixing, take a moment to gather your ingredients. Here’s what you need:
- 1 and ¼ cups all-purpose flour
- ½ teaspoon baking soda
- ¼ teaspoon salt
- ½ cup unsalted butter, softened to room temperature
- ½ cup packed light or dark brown sugar
- ¼ cup granulated sugar
- 1 large egg, at room temperature
- ¾ cup creamy peanut butter
- 1 teaspoon pure vanilla extract
- 24 unwrapped chocolate kiss candies
Also, don't forget the coating sugars if you're opting for some extra festive flair!
Mix the dry ingredients
In a medium bowl, whisk together the flour, baking soda, and salt. This step helps ensure an even distribution of the leavening agent across the flour, crucial for achieving that perfect cookie texture. Set this mixture aside while you move on to the wet ingredients.
Cream the butter and sugars
In a large bowl, use a hand mixer or stand mixer to beat the softened butter at high speed for about one minute until creamy. Then, add the brown sugar and granulated sugar, mixing until everything is smooth and well combined—this should take about two minutes. Don’t hesitate to scrape down the sides of the bowl to keep things even.
Incorporate the peanut butter and egg
Next, add the egg, peanut butter, and vanilla extract to the butter-sugar mixture. Mix again until fully incorporated. The aroma of peanut butter fills the kitchen at this point, and it's delightful!
Combine the wet and dry ingredients
Now, it’s time to fold in the fluffy and creamy wet ingredients into the dry flour mixture. Beat everything on low speed until combined. You’ll notice the dough is soft and a bit sticky—this is totally normal!
Chill the dough
For the best results, cover the dough and place it in the refrigerator. Let it chill for at least one hour, or up to three days. This step solidifies the fats in the cookies, which helps maintain their shape during baking.
Shape and coat the dough balls
After the dough has chilled, preheat your oven to 350°F (177°C) and line your baking sheets with parchment paper. Scoop about a heaping tablespoon of dough and roll it into a ball. Now, roll each dough ball in granulated sugar (or sanding sugar) to give it a sweet crust and extra shimmer.
Bake the cookies
Arrange the dough balls on your prepared baking sheets about three inches apart and bake for 11–13 minutes. Keep an eye on them; the tops should start to crack when they’re ready. Allow the cookies to cool for a few moments on the baking sheet before transferring them to a wire rack.
Set the chocolate kisses
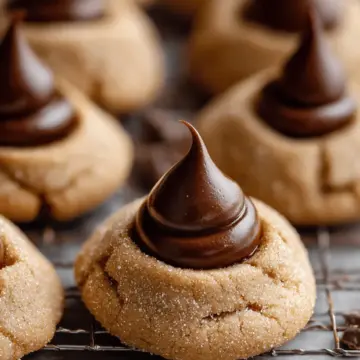
As a final touch, gently press a chocolate kiss into the center of each cookie. For extra precision, you might want to pop the cookies in the freezer for about ten minutes to ensure the chocolate sets perfectly without melting into the dough.
And voilà! Enjoy your classic peanut butter blossoms fresh out of the oven, or store them in an airtight container for later. Your kitchen is bound to smell incredible, and you'll definitely be the star among your friends with these treats!
Variations on Classic Peanut Butter Blossoms
Chocolate Peanut Butter Blossoms
For a delightful twist on classic peanut butter blossoms, consider adding a rich chocolate flavor. Use chocolate peanut butter instead of regular peanut butter for a silky, decadent touch. Not only will you enhance the chocolate kiss topping, but you'll also achieve a luscious, fudgy texture that pairs beautifully with the cookie base. For an extra layer of chocolate indulgence, experiment with mini chocolate chips mixed into the dough. This variation makes for a fantastic dessert that chocolate lovers won't be able to resist!
Nut Butter Alternatives for a Twist
If you're looking to switch things up, why not try different nut butter alternatives? Almond butter or cashew butter can create a unique flavor profile, offering a lighter and slightly sweeter cookie. Just keep in mind that these nut butters may yield a crumblier texture than the original recipe, so adjust your expectations accordingly. For a nut-free option, sunflower seed butter works beautifully and brings its own delightful nuttiness to the table. No matter which option you choose, these variations ensure your peanut butter blossoms stay exciting and delicious!
For more creative ideas, check out resources like Food Network or Baking Mischief.
Cooking Tips and Notes for Classic Peanut Butter Blossoms
Tips for the perfect cookie texture
To achieve perfectly chewy classic peanut butter blossoms, ensure your butter is softened, not melted. This creates a creamy mixture that helps the cookies rise nicely and maintain their shape. Chill the dough for at least an hour; this prevents spreading during baking. Don’t skip the pressing in of the chocolate kisses right after baking—the cookies will still be soft, which aids in securing that chocolate goodness right in the center!
How to store and freeze cookies
For optimal storage, keep your classic peanut butter blossoms in an airtight container at room temperature, where they'll stay fresh for up to a week. Want to save some for later? Baked cookies can be frozen for up to three months. Just layer them in an airtight container with parchment paper between layers. Unbaked cookie dough balls freeze well too—just add an extra minute to the baking time when you're ready to bake!
For additional insights on freezing cookies, you might find this cookie dough freezing guide helpful. Enjoy your baking!
Serving Suggestions for Classic Peanut Butter Blossoms
Pairing with Milk or Coffee
What better way to elevate your classic peanut butter blossoms than with a warm glass of milk or a rich cup of coffee? The creamy texture of peanut butter harmonizes beautifully with the velvety richness of milk, making those Kisses melt even more in your mouth. If you love coffee, a slightly sweetened brew enhances the flavors, giving a delightful twist to each bite.
Plating for Holiday Gatherings
When it comes to entertaining, presentation is key. Arrange your classic peanut butter blossoms on a tiered cake stand or a festive platter. For a touch of elegance, sprinkle some cocoa powder or decorate with holiday-themed sprinkles around them. This not only makes your dessert the centerpiece but also invites guests to enjoy the delightful flavors together—perfect for celebrations!
For more creative ideas on food presentations, check out this handy guide that offers tips on plating like a pro!
Time Breakdown for Classic Peanut Butter Blossoms
Preparation Time
Getting started on your classic peanut butter blossoms takes about 15 minutes. This includes gathering ingredients, mixing, and getting that cookie dough ready to chill.
Chilling Time
For optimal texture, allow the cookie dough to chill in the refrigerator for at least 1 hour. This crucial step ensures the cookies bake evenly and have that perfect chewy texture.
Baking Time
Baking these delightful treats will take about 11–13 minutes. Keep an eye on them — you want those tops to crack just slightly while keeping the centers soft.
Total Time
From start to finish, including prep, chilling, and baking, expect to spend around 1 hour and 30 minutes to 1 hour and 45 minutes on these classic peanut butter blossoms. But trust me, the delicious aroma and taste will be well worth the wait!
Nutritional Facts for Classic Peanut Butter Blossoms
When baking classic peanut butter blossoms, you might be curious about their nutritional profile. Here's a quick breakdown to keep you informed:
Calories
Each cookie contains approximately 120 calories, making them a delightful treat without overindulging.
Sugar Content
With about 10 grams of sugar per cookie, these blossoms offer a sweet satisfaction to your cravings while still being manageable in your diet.
Protein
Thanks to the peanut butter, each cookie packs in about 3 grams of protein, which can help curb those midday munchies!
For more specifics on the ingredients used, feel free to check resources like the USDA Food Data Central here. Once you have these delightful cookies, they’re sure to become a favorite in your dessert rotation!
FAQs about Classic Peanut Butter Blossoms
Can I use natural peanut butter?
Sure, you can use natural peanut butter, but it does come with a few considerations. Ensure it's at room temperature and thoroughly stirred; otherwise, your cookies may turn out a bit crumbly. Processed options like Jif or Skippy will give you a creamier, more consistent texture. Want a classic taste? Stick with the spread that’s already a household favorite.
How long do these cookies stay fresh?
These delightful classic peanut butter blossoms can stay fresh for up to a week when stored in an airtight container at room temperature. For long-term storage, consider freezing them! Baked cookies freeze well for up to three months, retaining their scrumptious flavor.
What other chocolates can I use for toppings?
While traditional kisses are a hit, feel free to get creative! Chocolate chips, caramel-filled chocolates, or even pieces of milk chocolate or dark chocolate can elevate your blossoms. Imagine the flavor combinations you can discover!
Conclusion on Classic Peanut Butter Blossoms
In conclusion, classic peanut butter blossoms are the perfect blend of nostalgia and flavor. These delightful cookies burst with creamy peanut butter goodness topped with a warm chocolate kiss, making them an irresistible treat for any occasion. Bake a batch today, and watch them disappear!
Classic Peanut Butter Blossoms
Equipment
- mixing bowl
- Electric mixer
- Silicone Spatula
- baking sheets
- Parchment paper
- Cooling rack
Ingredients
- 1.25 cups all-purpose flour spooned & leveled
- 0.5 teaspoon baking soda
- 0.25 teaspoon salt
- 0.5 cups unsalted butter softened to room temperature
- 0.5 cups brown sugar packed light or dark
- 0.25 cups granulated sugar
- 1 large egg at room temperature
- 0.75 cups creamy peanut butter
- 1 teaspoon pure vanilla extract
- 24 pieces chocolate kiss candies unwrapped
Coating
- 0.5 cups granulated sugar
- 0.25 cups green sanding sugar optional
- 0.25 cups red sanding sugar optional
Instructions
Preparation
- Whisk the flour, baking soda, and salt together in a medium bowl. Set aside.
- In a large bowl using a hand mixer or a stand mixer fitted with paddle attachment, beat the butter for 1 minute on high speed until creamy. Switch to medium-high speed and beat in the brown sugar and ¼ cup granulated sugar until completely creamed and smooth, about 2 minutes. Add the egg and beat until combined, about 1 minute. Scrape down the sides and bottom of the bowl with a silicone spatula as needed. Add the peanut butter and vanilla extract and beat until combined.
- Add the flour mixture to the wet ingredients and beat on low speed until combined. The dough will be very creamy and soft. Cover and chill the cookie dough in the refrigerator for at least 1 hour, and up to 3 days.
- Preheat oven to 350°F (177°C). Line two large baking sheets with parchment paper or silicone baking mats. Set aside.
- Scoop and roll cookie dough, about 1 heaping Tablespoon of dough each. Roll each ball in the ½ cup of sugar (or sanding sugar) and arrange on the baking sheet about 3 inches apart. Bake for 11–13 minutes or until the tops begin to slightly crack. Remove cookies from the oven and allow to cool on the baking sheets for 5 minutes.
- Press a chocolate kiss candy into the center of each, then, using a thin spatula, immediately transfer the cookies to a large plate or a few smaller plates. Place the plate(s) of cookies in the freezer for 10 minutes to quickly set the chocolate in the cookie.
- Remove from the freezer and serve.
- Cookies stay fresh covered at room temperature for up to 1 week.
Leave a Reply