
Introduction to Homemade Snickerdoodle Pumpkin Bread
Baking your own bread might sound like a chore, but for young professionals juggling busy schedules, it can be a true game changer. Imagine returning home after a long day, only to be greeted by the enticing aroma of homemade snickerdoodle pumpkin bread wafting through your kitchen. Not only is this a delightful treat, but it’s also a fantastic way to unwind and infuse some warmth into your week.
Creating your own bread allows you to take control of the ingredients, ensuring it's as healthy—or indulgent—as you want it to be. Plus, baking can be a therapeutic experience, providing a delicious reward at the end. With this homemade snickerdoodle pumpkin bread, you’ll enjoy the perfect blend of spicy pumpkin and sweet cinnamon topping, making it an ideal snack or breakfast option.
If you’re curious about the mechanics of baking, there’s a wealth of knowledge out there to help you perfect your skills, from YouTube tutorials to baking blogs. So, grab your apron and get ready to impress your friends and family with a scrumptious loaf that’s not just easy to make, but also a feast for the senses!
Ingredients for Homemade Snickerdoodle Pumpkin Bread
When you’re ready to whip up a warm, homemade snickerdoodle pumpkin bread, having the right ingredients on hand is key. Here’s a friendly breakdown to guide you through the essentials.
Essential Ingredients for the Pumpkin Loaf
To create a moist and flavorful pumpkin loaf, gather these core ingredients:
- All-purpose flour: 1¾ cups (219 g)
- Baking soda: 1 teaspoon
- Salt: ¾ teaspoon
- Ground spices: These include 1 teaspoon of ground cinnamon, ½ teaspoon each of ground nutmeg and ground ginger, and ¼ teaspoon each of ground cardamom and ground cloves.
- Eggs: 2 large, at room temperature
- Pumpkin puree: 1½ cups (340 g)
- Canola or vegetable oil: ½ cup (118.29 ml)
- Granulated sugar: ¾ cup (150 g)
- Light brown sugar: ½ cup (100 g), packed
- Vanilla extract: 1½ teaspoons
These ingredients work harmoniously to create that delicious pumpkin flavor you love!
Ingredients for the Snickerdoodle Layer
What sets this recipe apart is the delightful snickerdoodle layer. Here’s what you need:
- Granulated sugar: ⅓ cup (67 g)
- Ground cinnamon: 1½ teaspoons
- Ground cardamom: 1¼ teaspoons
This layer adds a sweet and spicy touch that perfectly complements the pumpkin loaf. As you can see, making a snickerdoodle pumpkin bread doesn’t need to be complicated—just gather these ingredients, and you’re on your way to baking a cozy treat! If you're looking for more baking inspiration, check out King Arthur Baking for tips and tricks.
Step-by-step Preparation of Homemade Snickerdoodle Pumpkin Bread
Creating your own homemade snickerdoodle pumpkin bread is not only a delightful way to embrace the fall flavors, but it also fills your kitchen with the aroma of cinnamon and pumpkin. Let’s dive into this fun and easy step-by-step process!
Gather and Prep Your Ingredients
Before we get our hands messy, let’s ensure everything is ready to go. Gather the following ingredients for both the pumpkin loaf and the snickerdoodle layer:
For the Pumpkin Loaf:
- 1¾ cups all-purpose flour
- 1 teaspoon baking soda
- ¾ teaspoon salt
- 1 teaspoon ground cinnamon
- ½ teaspoon ground nutmeg
- ½ teaspoon ground ginger
- ¼ teaspoon ground cardamom
- ¼ teaspoon ground cloves
- 2 large eggs (room temperature)
- 1½ cups pumpkin puree
- ½ cup canola or vegetable oil
- ¾ cup granulated sugar
- ½ cup light brown sugar (packed)
- 1½ teaspoons vanilla extract
For the Snickerdoodle Layer:
- ⅓ cup granulated sugar
- 1½ teaspoons ground cinnamon
- 1¼ teaspoons ground cardamom
Make sure your oven is preheated to 350°F and grease a 9x5-inch bread pan—this step is crucial!
Create the Pumpkin Loaf Batter
In a large mixing bowl, it’s time to whisk together our dry ingredients: flour, baking soda, salt, and spices. This mixture forms the foundation of our loaf. Set this bowl aside.
Next, in another bowl, grab your eggs and whisk them up. Add the pumpkin puree, canola oil, both sugars, and vanilla extract into the mix, combining until everything is nicely integrated. Don’t be afraid to get a bit vigorous here—this is where the magic begins!
Gradually fold the dry ingredients into your wet mixture. Remember, patience is key; stop folding once you can’t see any flour streaks.
Prepare the Snickerdoodle Layer
In a small bowl, mix together the sugar, cinnamon, and cardamom for that delightful snickerdoodle layer. This is what will create the sweet, spicy contrast to your pumpkin base.
Assemble the Layers in the Pan
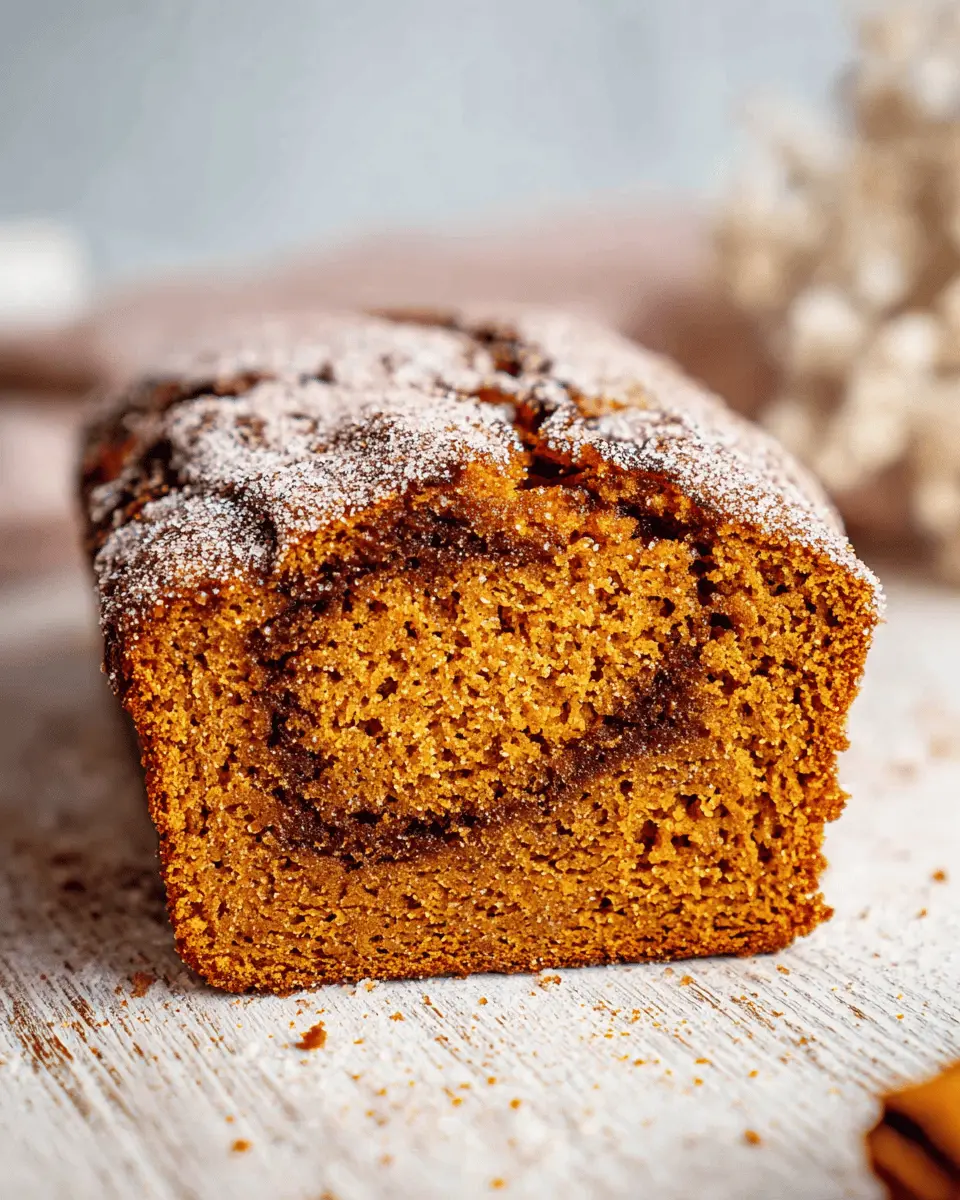
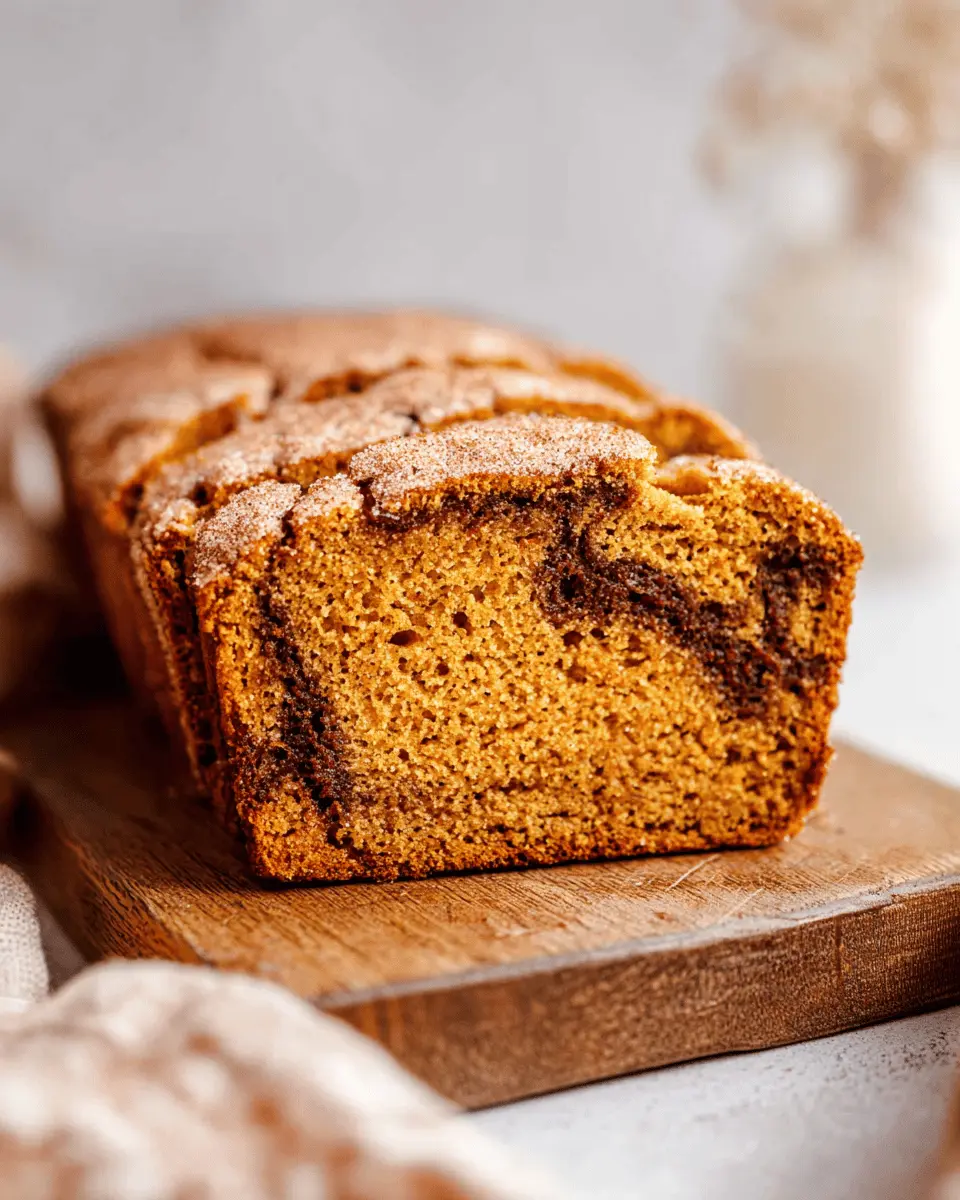
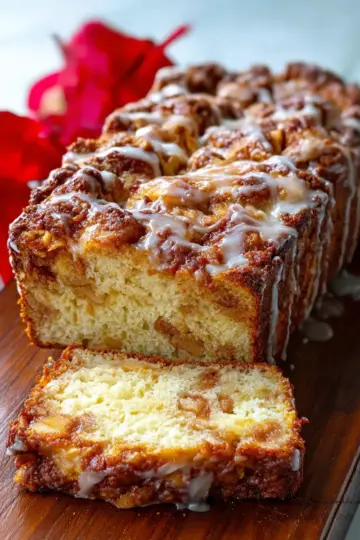
Now comes the fun part! Start by pouring half of your pumpkin batter into the greased loaf pan. Evenly spread the snickerdoodle mixture on top of this layer. Use a spatula to cover it with the remaining pumpkin batter, smoothing the top for a good appearance. Your homemade artistry is taking shape!
Bake Your Delicious Creation
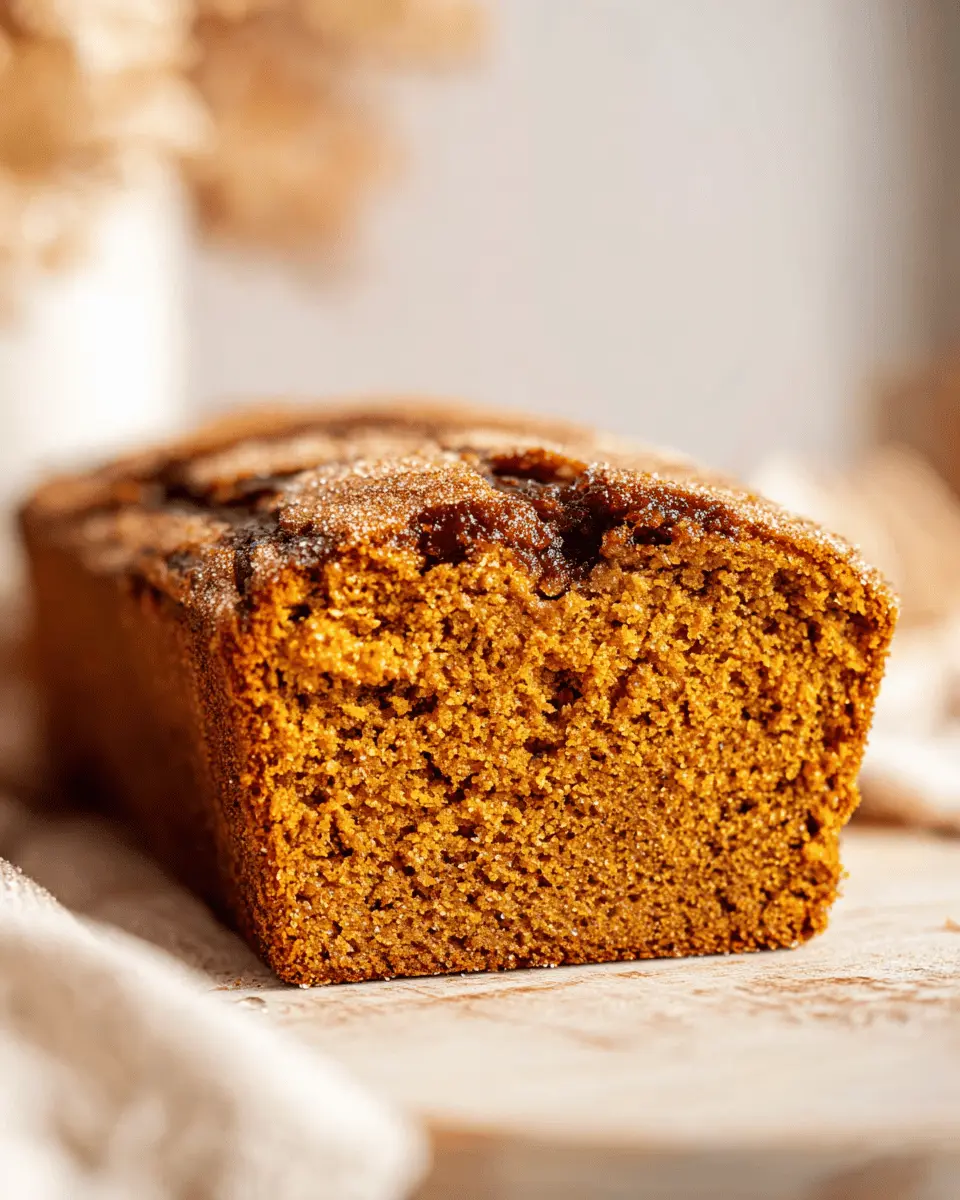
Slide your pan into the oven and let the magic happen! Bake for about 60 to 70 minutes, or until the top is firm and a toothpick inserted in the center comes out clean. Patience is a virtue at this stage—smell those incredible scents?
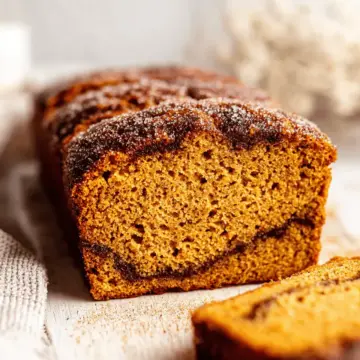
Once it's done, allow your loaf to cool completely in the pan on a wire rack. When cool, carefully run a butter knife around the edges and remove your beautiful loaf. Slice it up and enjoy the warm, comforting flavors of fall!
Now you’re armed with the steps to create this delightful homemade snickerdoodle pumpkin bread. It’s perfect for a cozy night in or as a sweet treat to share at a gathering. Happy baking!
Variations on Homemade Snickerdoodle Pumpkin Bread
Gluten-free Snickerdoodle Pumpkin Bread
If you're following a gluten-free diet, you can still enjoy the cozy warmth of homemade snickerdoodle pumpkin bread. Simply swap the all-purpose flour for a high-quality gluten-free flour blend, such as one that includes xanthan gum to ensure that your bread maintains its texture. Additionally, be sure to check ingredients in your baking soda and spices to ensure they’re gluten-free.
Vegan Snickerdoodle Pumpkin Bread Options
Craving a vegan twist? Replacing the eggs in the recipe is easier than you might think! Use ¼ cup of unsweetened applesauce or a flaxseed meal mixed with water (1 tablespoon ground flaxseed + 2.5 tablespoons water) as a substitute. Instead of using canola oil, you can try melted coconut oil or a light olive oil for a healthful choice. For a richer flavor, consider adding a splash of plant-based milk to the batter. Your vegan friends will surely appreciate this delightful treat!
Discover more on gluten-free and vegan baking techniques through sites like Minimalist Baker and Oh She Glows for inspiring ideas!
Cooking Tips and Notes for Homemade Snickerdoodle Pumpkin Bread
Best practices for baking success
For the perfect homemade snickerdoodle pumpkin bread, a few tips can make all the difference:
- Room temperature ingredients: Ensure your eggs and pumpkin puree are at room temperature for optimal blending. This helps create a smoother batter.
- Don’t overmix: Gently fold the dry ingredients into the wet until just combined. Overmixing can lead to a dense loaf instead of that lovely fluffy texture.
- Use an oven thermometer: Oven temperatures can vary, and a thermometer can help ensure your pumpkin bread bakes evenly.
How to store your bread for freshness
To keep your delicious creation fresh:
- Wrap it well: Once completely cooled, wrap the loaf tightly in plastic wrap or aluminum foil.
- Store at room temperature: If consuming within a few days, keep it at room temperature. For longer storage, consider freezing it.
- Freezing tip: Slice the loaf before freezing for easy individual servings. Thaw slices as needed for a quick treat!
Check out King Arthur Baking for more tips on keeping baked goods fresh!
Serving Suggestions for Homemade Snickerdoodle Pumpkin Bread
Pairing Suggestions for a Cozy Breakfast
Start your day on a warm note by enjoying your homemade snickerdoodle pumpkin bread with a side of creamy Greek yogurt topped with seasonal fruits. A warm cup of spiced chai or a rich coffee complements the bread beautifully, enhancing its cinnamon and pumpkin flavors. For a heartier option, consider adding slices of turkey bacon or chicken ham for a satisfying breakfast.
Perfect Snacks or Dessert Options
This delightful bread makes an ideal snack or dessert! Serve it with a dollop of whipped cream cheese or even a scoop of vanilla ice cream for an indulgent treat. Pair it with a glass of hot apple cider or a refreshing herbal tea for a cozy afternoon snack. Did you know that pumpkin offers numerous health benefits, including a boost in immunity? Enjoy guilt-free snacking with homemade snickerdoodle pumpkin bread!
For more delicious ideas, check out this article on food pairings to inspire your next meal!
Time Breakdown for Homemade Snickerdoodle Pumpkin Bread
Preparation time
Get ready to entice your senses! The preparation of your homemade snickerdoodle pumpkin bread will take approximately 15-20 minutes. It’s a quick process that builds excitement for the delicious aroma that’s about to fill your kitchen.
Baking time
Now, let’s talk about the magic of baking. You’ll want to set aside around 60-70 minutes for baking. Patience is key here as you anticipate that perfect, golden-brown loaf.
Total time
Finally, if you add both preparation and baking times, you’re looking at about 75-90 minutes for the entire process. That’s hardly a long wait for such a delightful treat, right? Enjoy the journey to creating this snickerdoodle pumpkin masterpiece!
For more inspiring recipes, you might want to check out AllRecipes and Food Network for ideas on what to pair with your delicious bread.
Nutritional Facts for Homemade Snickerdoodle Pumpkin Bread
Calories per slice
Each slice of homemade snickerdoodle pumpkin bread contains approximately 210 calories. You'll enjoy a satisfying treat without blowing your daily calorie goals!
Protein content
You can expect around 3 grams of protein per slice, thanks to the eggs and pumpkin puree — a nutritious boost to fueling your day.
Other nutritional highlights
This delightful bread includes beneficial spices like cinnamon and nutmeg, known for their antioxidant properties. Plus, pumpkin puree adds a generous dose of vitamins A and C, making each slice not just tasty, but also packed with health benefits! For more insight into the health perks of pumpkin, check out Healthline’s guide on pumpkin benefits.
FAQs about Homemade Snickerdoodle Pumpkin Bread
Can I make this bread ahead of time?
Absolutely! You can prepare your homemade snickerdoodle pumpkin bread in advance. Simply bake it, let it cool completely, and then wrap it tightly in plastic wrap or foil. Store it in the refrigerator for up to a week or freeze it for up to three months. When you're ready to enjoy it, just thaw it in the fridge overnight, and it's good to go!
How do I prevent my bread from being dry?
To keep your snickerdoodle pumpkin bread moist, ensure you use fresh pumpkin puree as older versions can degrade in moisture. Also, avoid over-baking; check your loaf at the lower end of the baking time range. A toothpick should come out with a few moist crumbs, not completely clean!
What’s the best way to enjoy this bread fresh?
Fresh is always best! Enjoy your homemade snickerdoodle pumpkin bread warm, straight out of the oven or toasted with a pat of butter. Pair it with a cozy cup of coffee or tea for the ultimate treat. Need more ideas? Try adding a sprinkle of cinnamon sugar on top!
For more baking tips, check out King Arthur Baking’s baking guide for expert advice!
Conclusion on Homemade Snickerdoodle Pumpkin Bread
Making homemade snickerdoodle pumpkin bread is a delightful experience that brings the cozy flavors of fall right into your kitchen. You'll love how easy it is to prepare and how the combination of spices and sweetness fills your home with warmth. Share it with friends and family for a perfect treat!
Why You’ll Love Making This Recipe at Home
Cooking at home allows you to control the ingredients while customizing flavors to suit your taste. Not only does this recipe combine rich pumpkin goodness with a snickerdoodle twist, but it also offers the opportunity for creativity.
- Freshness: Enjoy the rich aroma of spices wafting through your home while baking.
- Healthier Options: You can opt for healthier substitutions like using whole wheat flour or reducing sugar.
- Memorable Moments: Baking bread brings people together, whether for a cozy breakfast or a festive gathering.
So, why not whip up a loaf today? Check out additional tips for enjoying your pumpkin bread, such as pairing it with a warm cup of tea or coffee for the perfect autumn afternoon!
What are your favorite recipes that combine unexpected flavors? Let us know in the comments below!
Homemade Snickerdoodle Pumpkin Bread
Equipment
- 9x5 inch bread pan
- Mixing bowls
- whisk
- spatula
- Cooling rack
Ingredients
Pumpkin Loaf
- 1.75 cups all-purpose flour
- 1 teaspoon baking soda
- 0.75 teaspoon salt
- 1 teaspoon ground cinnamon
- 0.5 teaspoon ground nutmeg
- 0.5 teaspoon ground ginger
- 0.25 teaspoon ground cardamom
- 0.25 teaspoon ground cloves
- 2 large eggs room temperature
- 1.5 cups pumpkin puree
- 0.5 cup canola or vegetable oil
- 0.75 cup granulated sugar
- 0.5 cup light brown sugar packed
- 1.5 teaspoons vanilla extract
Snickerdoodle Layer
- 0.33 cup granulated sugar
- 1.5 teaspoons ground cinnamon
- 1.25 teaspoons ground cardamom
Instructions
Preparation
- Preheat oven to 350°F. Grease a 9x5" bread pan.
- Whisk together the flour, baking soda, salt, and spices. Set aside.
- In a large bowl, whisk the eggs. Mix in the pumpkin puree. Add the oil, sugars, and vanilla extract and whisk together thoroughly.
- Gradually fold the dry ingredients into the wet ingredients until no flour streaks are visible.
Snickerdoodle Layer
- In a small bowl, mix together the sugar, cinnamon and cardamom.
Assembly and Baking
- Pour ½ of the pumpkin loaf batter into the greased pan. Evenly sprinkle the snickerdoodle layer on top, then cover with the remaining batter. Smooth the top with a spatula.
- Bake the loaf for 60-70 minutes, or until the top is firm and a toothpick comes out clean.
- Allow the loaf to cool completely in the pan, on a cooling rack. When it's ready, carefully run a butter knife around the edges and remove it from the pan. Enjoy!
Leave a Reply